Content
- March 2, 2023 – It Starts Here
- March 3, 2023 – The Talash (Pt. 1)
- March 4, 2023 – The Talash (Pt. 2)
- March 5, 2023 – The Talash (Pt. 3)
- March 6, 2023 – Stripping and Cleaning
- March 7, 2023 – Mysterious History
- March 8, 2023 – Accessing the Inside of the Sitar
- March 9, 2023 – Mama and Keela
- March 10, 2023 – Surface Preparation, But a Problem
- March 11, 2023 – The Transducers
- March 12, 2023 – Closing Up the Kaddu
- March 13, 2023 – Psychedelia
- March 14, 2023 – Masking and Priming
- March 15, 2023 – Source Impedance
- March 16, 2023 – Painting
- March 17, 2023 – More Masking
- March 18, 2023 – Stochasticity and Determinism in Psychedelia
- March 19, 2023 – Still More Masking and Painting
- March 20, 2023 – Krylon
- March 21, 2023 – Removed Masking
- March 22, 2023 – Touching Up / Texas A&M
- March 23, 2023 – Shellac
- March 24, 2023 – Testing the Impedance
- March 25, 2023 – The First Two Strings
- March 26, 2023 – Last Round of Tests
- March 27, 2023 – Frets
- March 28, 2023 – Tied the Frets
- March 29, 2023 – Tuning Knob
- March 30, 2023 – Tuning Knob (#2)
- March 31, 2023 – Tuning Knob (#3)
- April 1, 2023 – Stringing
- April 2, 2023 – Misc- Matters
- April 3, 2023 – Cremation-Ground
- April 4, 2023 – “Standard” Tuning (Pt. 1)
- April 5, 2023 – “Standard” Tuning (Pt. 2)
- April 6, 2023 – “Standard” Tuning (Pt. 3)
- April 7, 2023 – Frets
- April 8, 2023 – More Frets, But a Problem
- April 9, 2023 – More Frets
- April 10, 2023 – Two More Frets
- April 11, 2023 – Eighteen Down – Two to Go
- April 12, 2023 – One More To Go
- April 13, 2023 – An Uneasy Finish
March 2, 2023 – It Starts Here
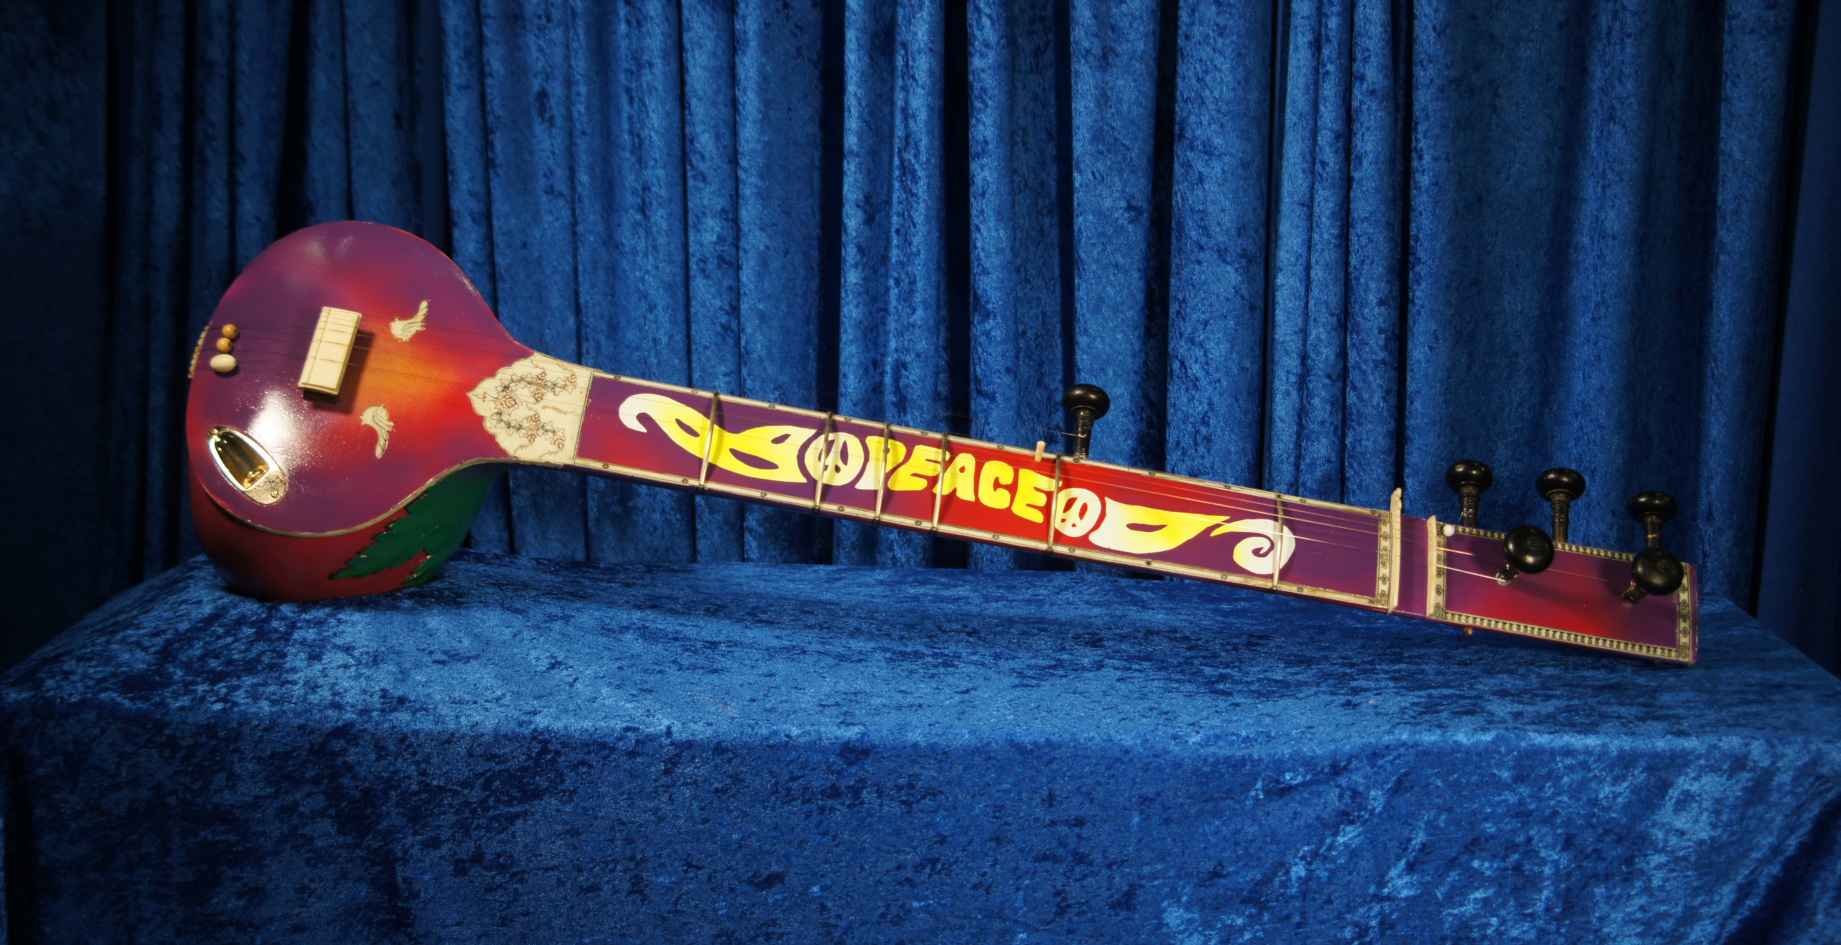
I am starting a project on electrifying a sitar. This is not in itself remarkable, except for one thing. Presently, the people who are active on the internet do not electrify sitars. Conversely, the people who electrify sitars do not discuss the process on the internet.
I intend to rectify this situation.
Why do I want to electrify my sitar? This is an easy question to answer. My sitar has a broken tabali (face-plate), that was at some time clumsily glued together. This is a problem; indeed, this is a BIG problem. For a sitar to sound good, the requirement is that wood for the tabali be heavy and free from any flaw. Any discontinuity means that the sitar will never sound good. Therefore, short of fabricating a new faceplate, (which is usually impractical) a broken faceplate generally means that the instrument is reduced to little more than firewood.
But why should this be the case? If the instrument is acoustically compromised, then one can remove, or at least downgrade, the importance of its acoustics. The electrification of the sitar essentially does just this.
Will an electric sitar sound the same as a fully acoustic one? The answer to this is a definite “NO!” Is this a bad thing? Well that is not an easy question to answer. There are many situations where we might find the sound of the electric sitar more desirable. Just as it is very normal for guitarists to have both electric as well as acoustic guitars; in a similar fashion, it is good for sitarists to have both electric as well as acoustic sitars. I presently own one surbahar, two acoustic sitars, and one electric sitar.
Over the next few months, I will be documenting the process of restoring and converting an acoustic instrument to become my second electric sitar.
March 3, 2023 – The Talash (Pt. 1)
The word “talash” is a very powerful word. It literally means a “quest”. What does this have to do with the restoration of a sitar? Read on, and it will all fall into place.
The restoration project’s story began on the evening of Wednesday March 1, 2023. A very good friend of mine, Srinivas Koumounduri, sent me a link. Generally I do not open links that are sent to me because this is often a way in which malware travels. However, in this case I clicked on it.
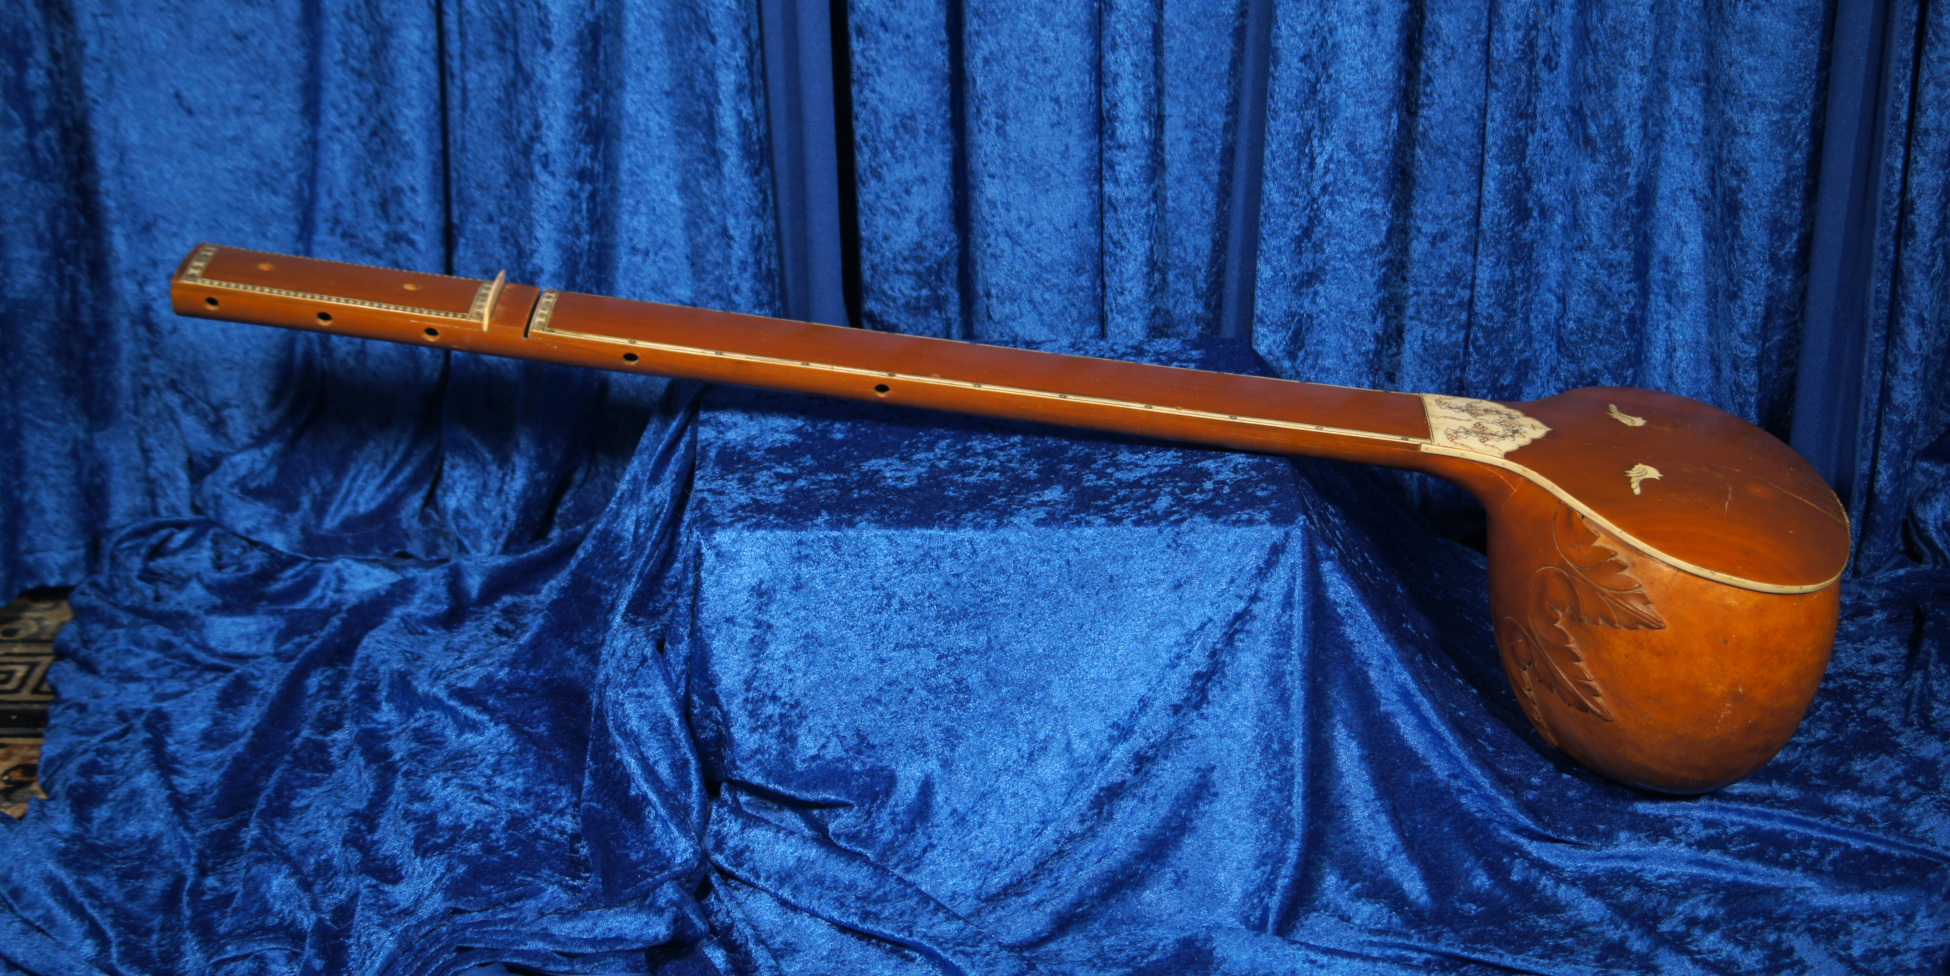
This link took me to FB Marketplace. FB Marketplace is a generally worthless piece of internet real estate that is good to avoid. But this particular link had a picture of a sitar that was for sale for only $25.
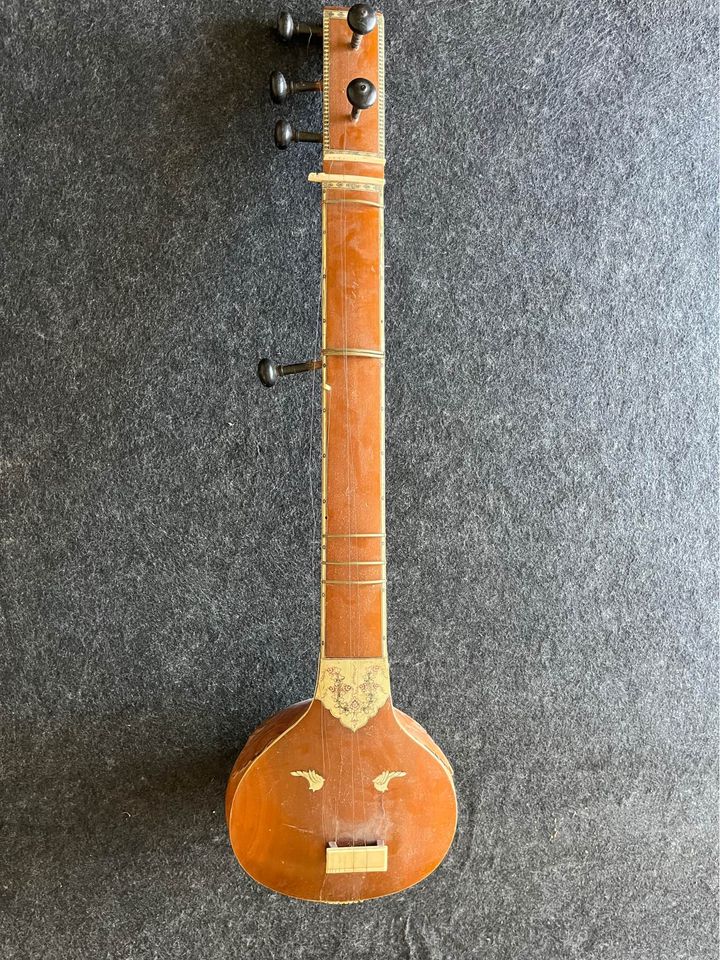
It was clear that the instrument was in terrible shape. It was missing at least half of the frets. It only had one mogara for the chikari. It was missing one of the tuning pegs; and it was missing all of the taraf tuning pegs.
Wait a second – was it really missing all of the taraf strings and pegs? No – IT NEVER HAD ANY.
I immediately became excited. I had been searching for this style of sitar for about the last eight years! It was my personal talash.
Now anyone who is familiar with sitars will immediately think that I am crazy. Sitars without taraf strings (sympathetic strings) were relatively common at the turn of the 20th century. But they were relegated to low quality economy models, while the better instruments had tarafdars (sympathetics). By the middle of the 20th century, such sitars were still only to be found in lowest quality student models. They appear to have disappeared from the market sometime in the 1970s or 1980s.
Now this brings up the obvious question as to why I, a proud possessor of one surbahar and three other fine instruments, would be interested in a damaged low quality student sitar from the 3rd quarter of the 20th century.
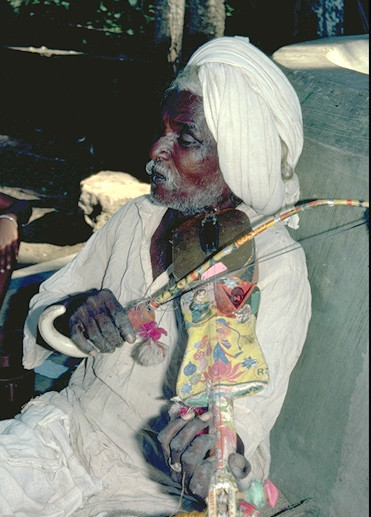
For the answer to this, we have to go back more than half a century to 1971. I would have been about 17 at the time. Being 17 is a very stressful time in anyone’s life. But for me it was particularly stressful. It seemed that the only escape I could find was in my interest in Indian classical music.
Unfortunately my opportunities to learn music or obtain any kind of instrument were essentially zero. However on one instance I was in an import store here in Houston, and they had a sitar for sale. It too, was a student quality instrument of this very style. It cost about $85.
The problem was that I was 17 years old and had virtually no money. Never-the-less, I went into the store almost every week just to look at it. Each time I would wish that I could get it.
I never did get it.
The decades passed, and my financial position improved. I got my first sitar when I married. It came with my wife (how’s that for dowry). Over the years, I ended up with several extremely good quality ones. But still, something in the back of my mind yearned for the simple version that so fascinated me in my youth.
About 2015, I started to look in earnest. At least once every six months, I would get on EBay to see if I could find one for sale. In each case none were to be found. There was a single occasion where I found one, but it was located in Europe.
Now, one has appeared.
The talash of the last several years was almost over.
| This book is available around the world |
|---|
Check your local Amazon. More Info.
|
March 4, 2023 – The Talash (Pt. 2)
There was once an old farmer. He was getting on in years, and the existential insecurities that come with advancing age were upon him. He decided that he need to get some religion.
Therefore, one day he approached a Catholic priest in his nearby town. The farmer enquired as to what would be required for him to become a Catholic.
“There is a process, my son,” said the priest, “but before I go into it, I have one question for you. Where was Jesus Christ born?”
The farmer was stumped. After a while he said “Nacogdoches.”
The Catholic priest was taken aback. He really did not know how to respond to this ridiculous answer to such a simple question. Hesitatingly he said, “Uh… uh… I’m sorry, but I really don’t think that you would make a good Catholic.”
The old farmer dejectedly returned home. He was stung by such a sharp rejection.
After a few days, the old farmer approached the local Methodist minister with the same query.
The Methodist minister said, “Becoming a Methodist is not difficult, but before we go into it, I have one question. Where was Jesus born?”
The old farmer thought for a second, then replied, “Lufkin.”
The Methodist minister instantly knew from such a clueless answer that this farmer would not be a good addition to his congregation. He therefore told the farmer, “I’m sorry, but I just feel that you would not be a good Methodist”.
Again the farmer dejectedly returned home.
After a few days, he approached the preacher in one of his local Evangelical churches with the same query.
“Hallelujah, brother,” said the preacher, “we meet every Sunday. We would be pleased to have you”.
“You ain’t gonna quiz me or nothin’?” asked the farmer.
“No,” replied the preacher.
“Great,” said the farmer, “but there is one thing I have been curious about. Where was Jesus born?”
“In Bethlehem,” said the Preacher.
“Bethlehem, where the heck is that?” asked the farmer.
“It is in Palestine,” said the preacher.
“Darn it, I knew it was in East Texas somewhere,” said the farmer.
– – – – – –
Palestine – The preceding story was the first thing that came to my mind when I read the advertisement for the sitar. The seller was in Palestine, Texas. This would be a full day’s trip.
But there was no question in my mind. I was going to go to Palestine to buy the sitar.
March 5, 2023 – The Talash (Pt. 3)
It was late morning Thursday, March 2nd , when Chandra and myself got in our car and headed off toward Palestine, Texas. We were both looking forward to this little excursion. Since the COVID pandemic, we have not had many opportunities to get out of Houston.
Google Maps said that it would be a three hour journey; yet experience had taught me that when one considers various breaks, that it would be four hours.
About two hours into the trip we stopped for lunch. The first place that we stopped had all of the indications that they would have very good BBQ. But Chandra always shows hesitance about such places. She eats chicken, but she is concerned that such places are careless and cook their chicken on the same grill with the same utensils that they use for beef and pork. After 44 years of marriage, I am used to such concerns.
But this time, even I was hesitant to go in. The Harley Davidson motorcycles, pickup trucks, and their rough looking owners, made me think twice before going in.
I was hesitant to go in for concerns about our safety. For readers who are not from Texas, especially those who are not in the US, some explanation is in order.
The US is highly polarised and tensions run very high. These tensions become especially dangerous considering the extreme prevalence of firearms.
It is factiously said that an armed society is a polite society. But the fact that this is not necessarily true, is readily seen in Houston. There are so many people who get mad at each other while driving. The guns come out, and before long someone is dead. These road-rage shootings are almost a daily occurrence in Houston.
The situation in East Texas is even more extreme. One finds a mixture of racism, xenophobia, and right-wing conspiracy mindsets, coupled with some of the highest number of firearms in the US. This makes it a potentially dangerous place. I am a long-haired, neo-Marxist, fag-stag, city-liberal, in the company of a woman-of-colour. What chance would I have in a bible thumping, MAGAstan like this?
We decided that we needed to find a safer place to eat lunch.
We did, and after lunch we continued on to Palestine.
We arrived at our location. The owner of the sitar was cordial; but it was clear that we lived in two totally different worlds. The transaction could not have taken more than five or ten minutes. We completed the transaction, and returned to Houston with the sitar.
March 6, 2023 – Stripping and Cleaning
The instrument needed to be readied for work.
I removed all of the strings, tuning pegs, frets, and anything that could come off. Each peg was numbered so that it would go back into the same hole from whence it came. In a similar manner, the few remaining frets were marked as per their position on the neck and their orientation. The orientation is important because the top side of the fret does not have the same curve as the bottom side. They were all packed away carefully.
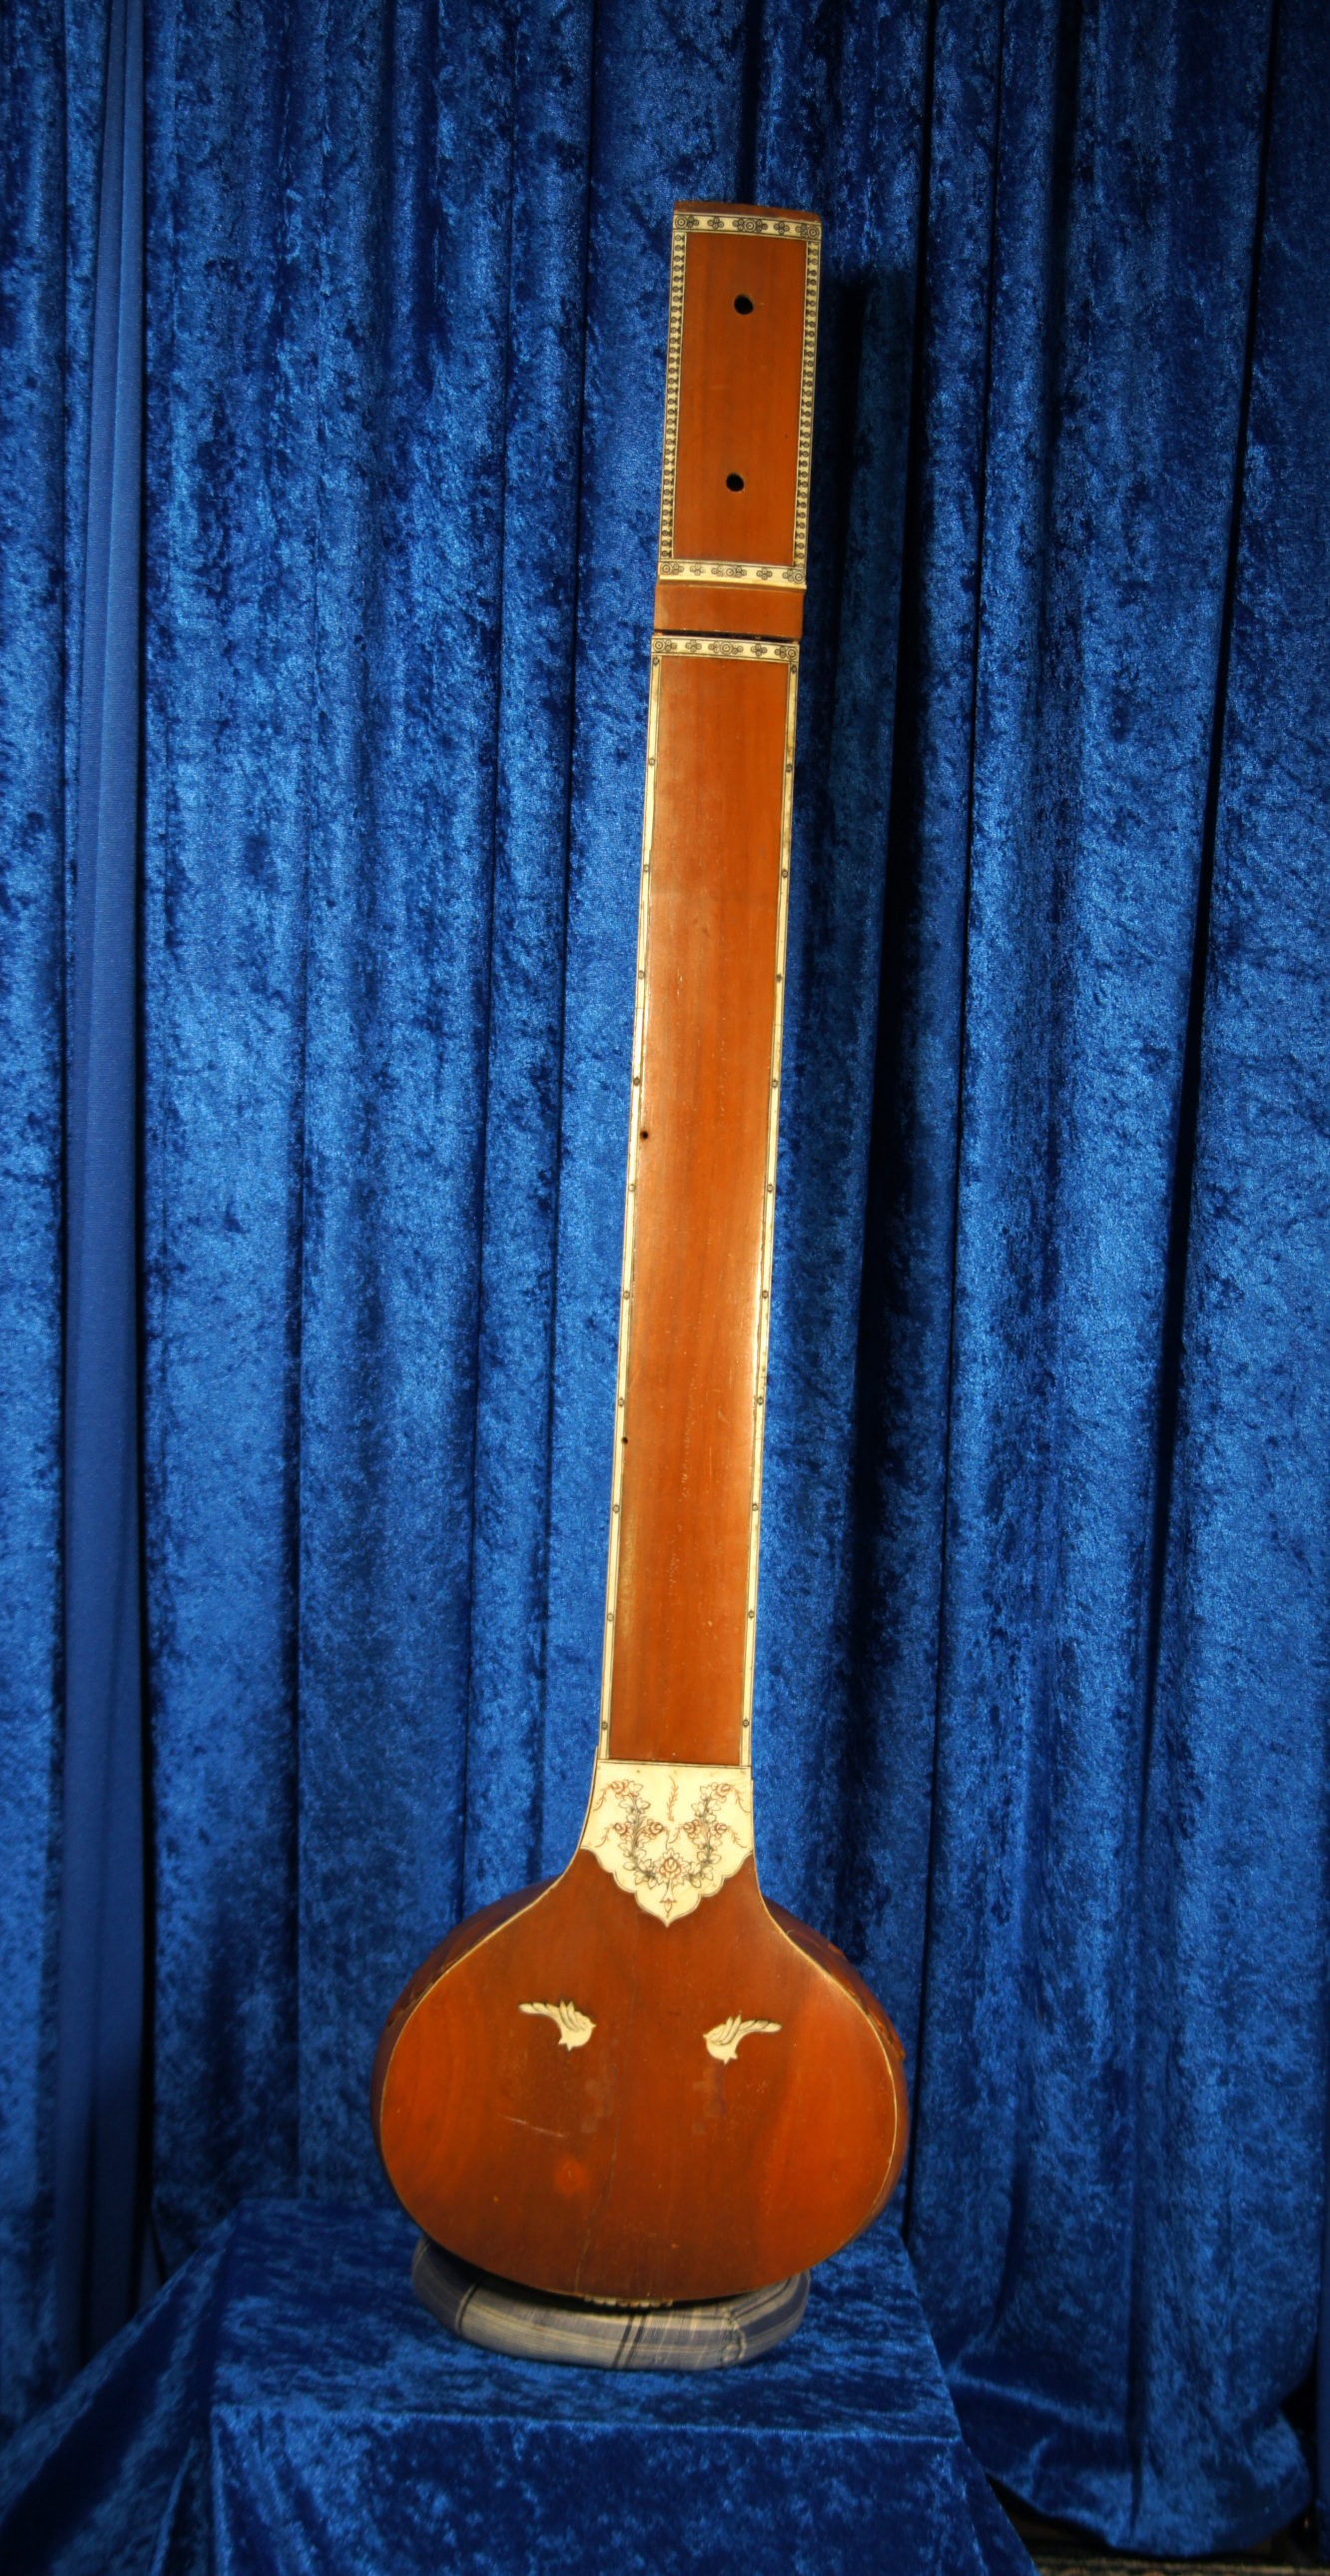
I next cleaned the entire instrument with alcohol. This removes 50 years of dirt and grime, but it also removes shellac.
March 7, 2023 – Mysterious History
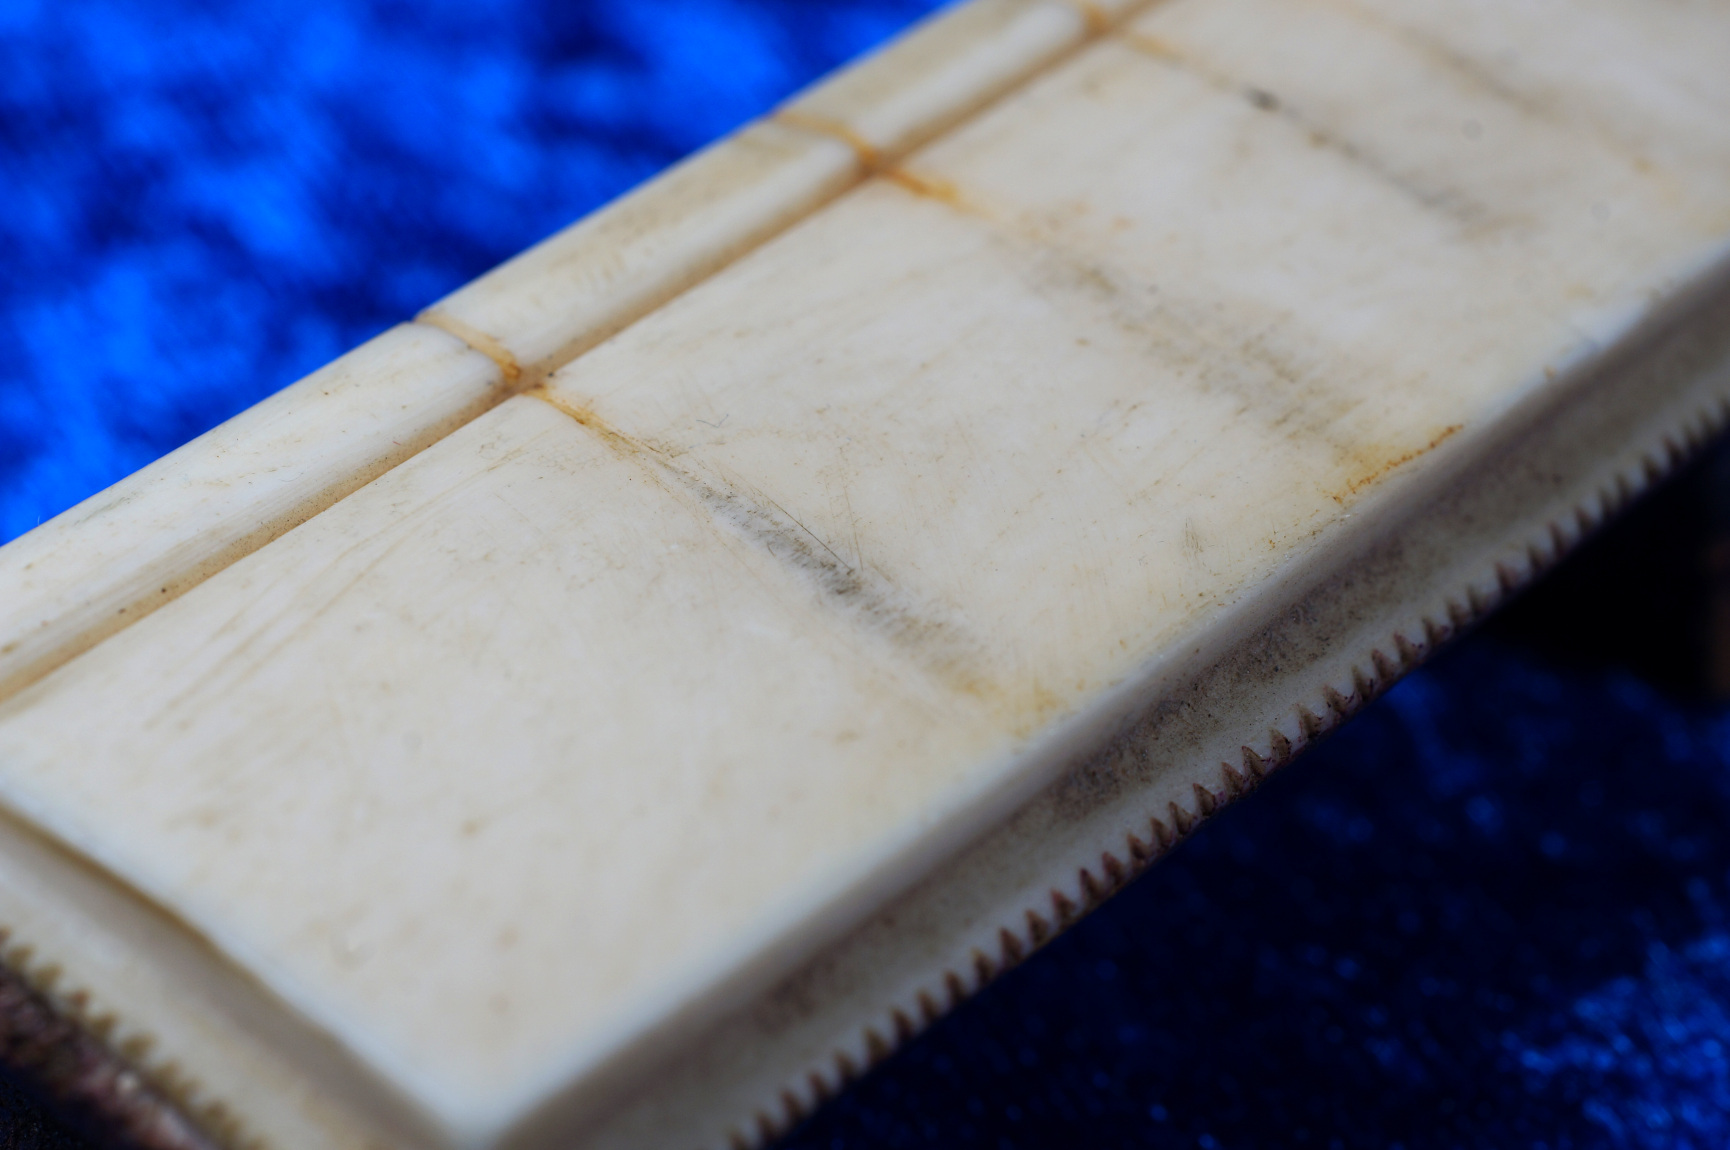
The process of stripping the instrument of assorted bits-and-bobs revealed some interesting things. 50 years of its history started to unfold. One thing that was clear was this instrument was not just a show-piece that someone had; it had been used by someone who knew the sitar well. The tuning pegs still showed the presence of chalk; only a working musician would know to do that. Furthermore, the bridge was deeply grooved from years of heavy use.
This itself brought up some interesting questions. Who would use a student sitar to such an extent? A serious musician would almost certainly have invested in a more expensive instrument. Had this been used in a music school back in India? A music school would indeed have invested in a number of student quality sitars and use them heavily.
How did the instrument wind up in Palestine Texas? The person from whom I bought it was a businessman who owned storage units. My presumption is that someone abandoned a storage unit, and after a period of time, the businessman simply seized the unit and all of its contents for non-payment of rent.
But that still did not explain how this instrument managed to show up in East Texas.
Then there were the repairs. It was obvious that the broken tabali was repaired in the US. I know how Indian repairmen work; and it did not have the telltale signs of a deshi craftsman.
I did modify my impression of the previous repair job. Previously I thought that it was clumsily patched. However on close examination, I came to the conclusion that the person who repaired it may not have known much about sitars, but they were very experienced working with wood. It showed signs of actually being very well attended to.
If this instrument could talk, it might have told its whole story.
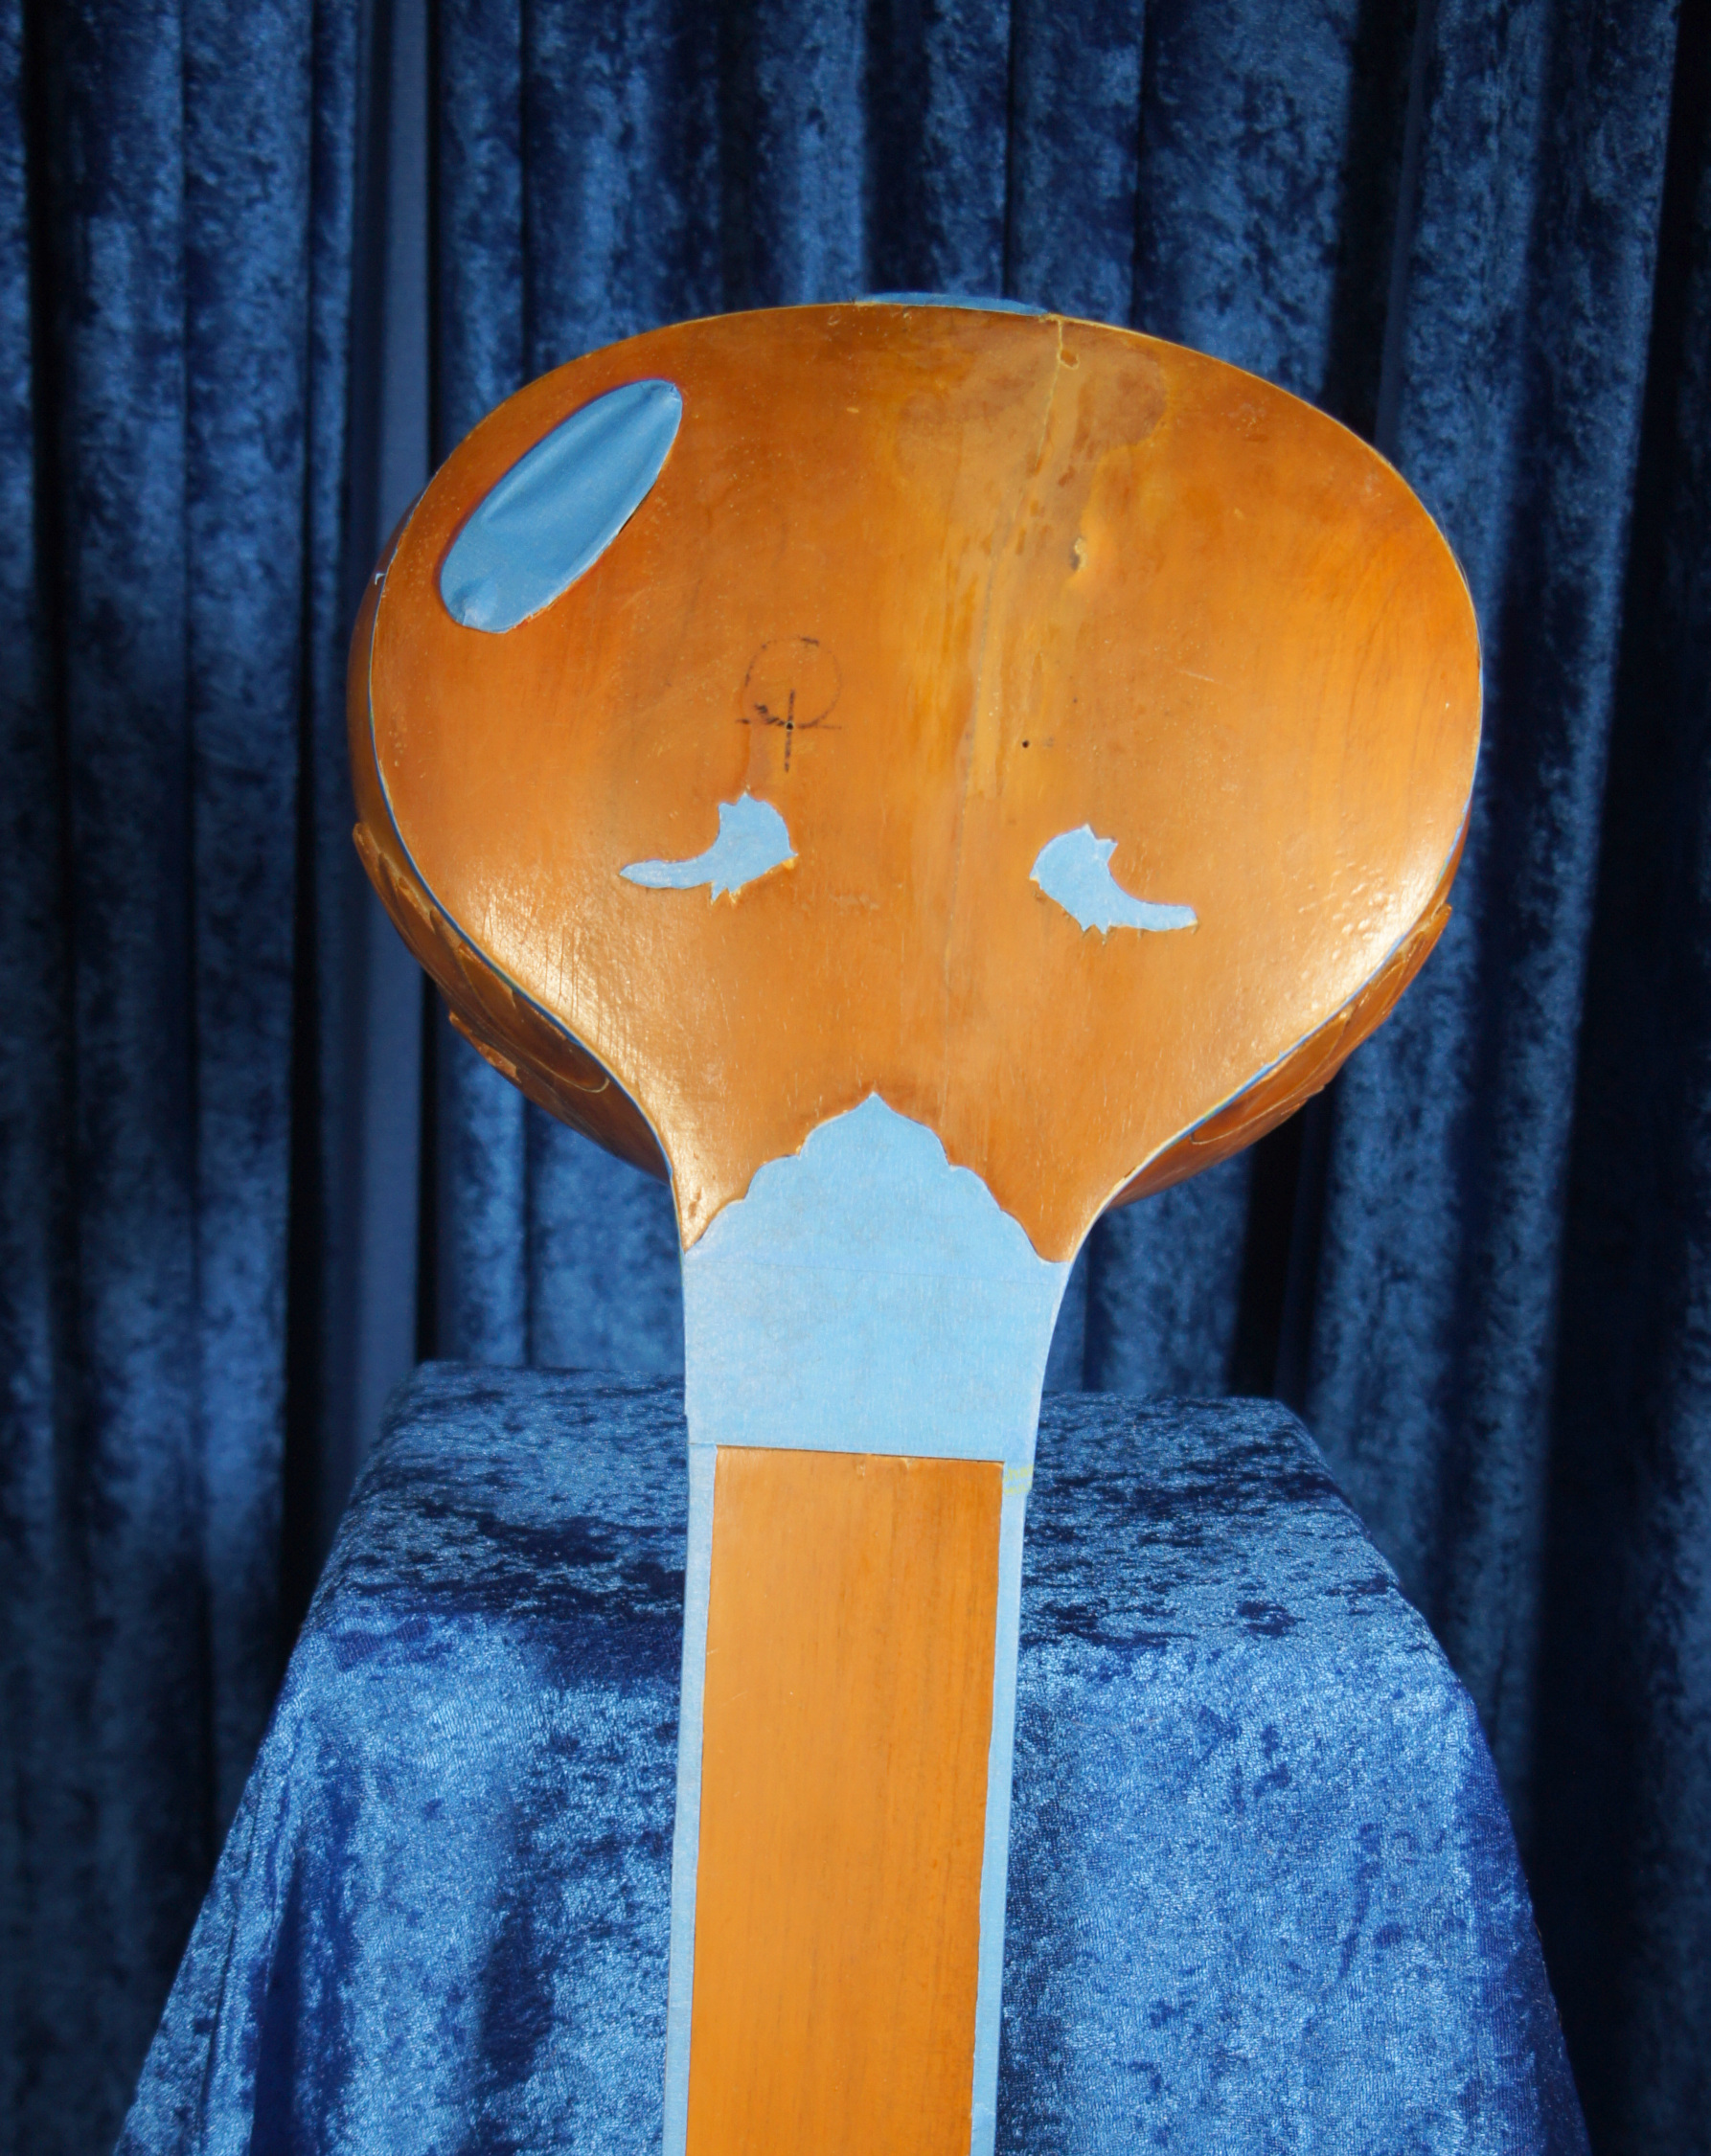
March 8, 2023 – Accessing the Inside of the Sitar
It was now time to access the inside of the sitar. This part of the job is not for the faint of heart. But I have done this many times, so I am confident that I can bring it all back together.
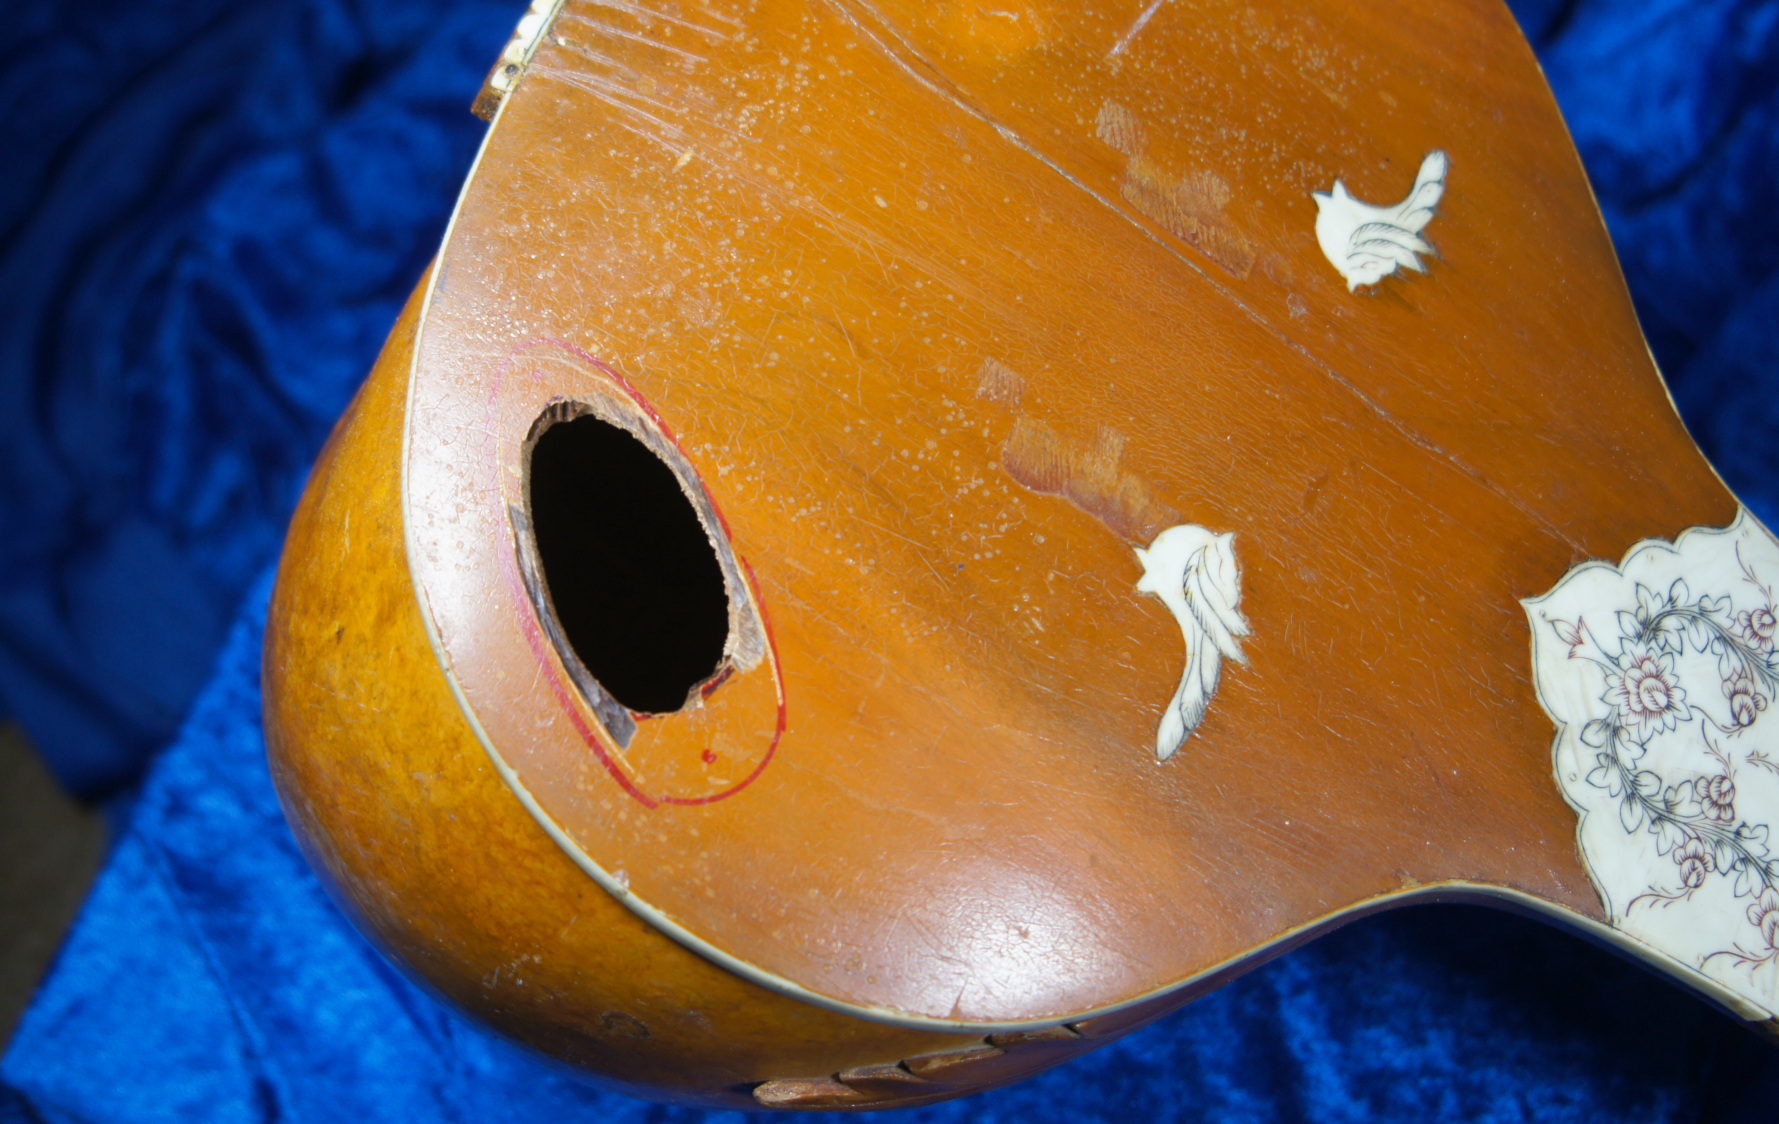
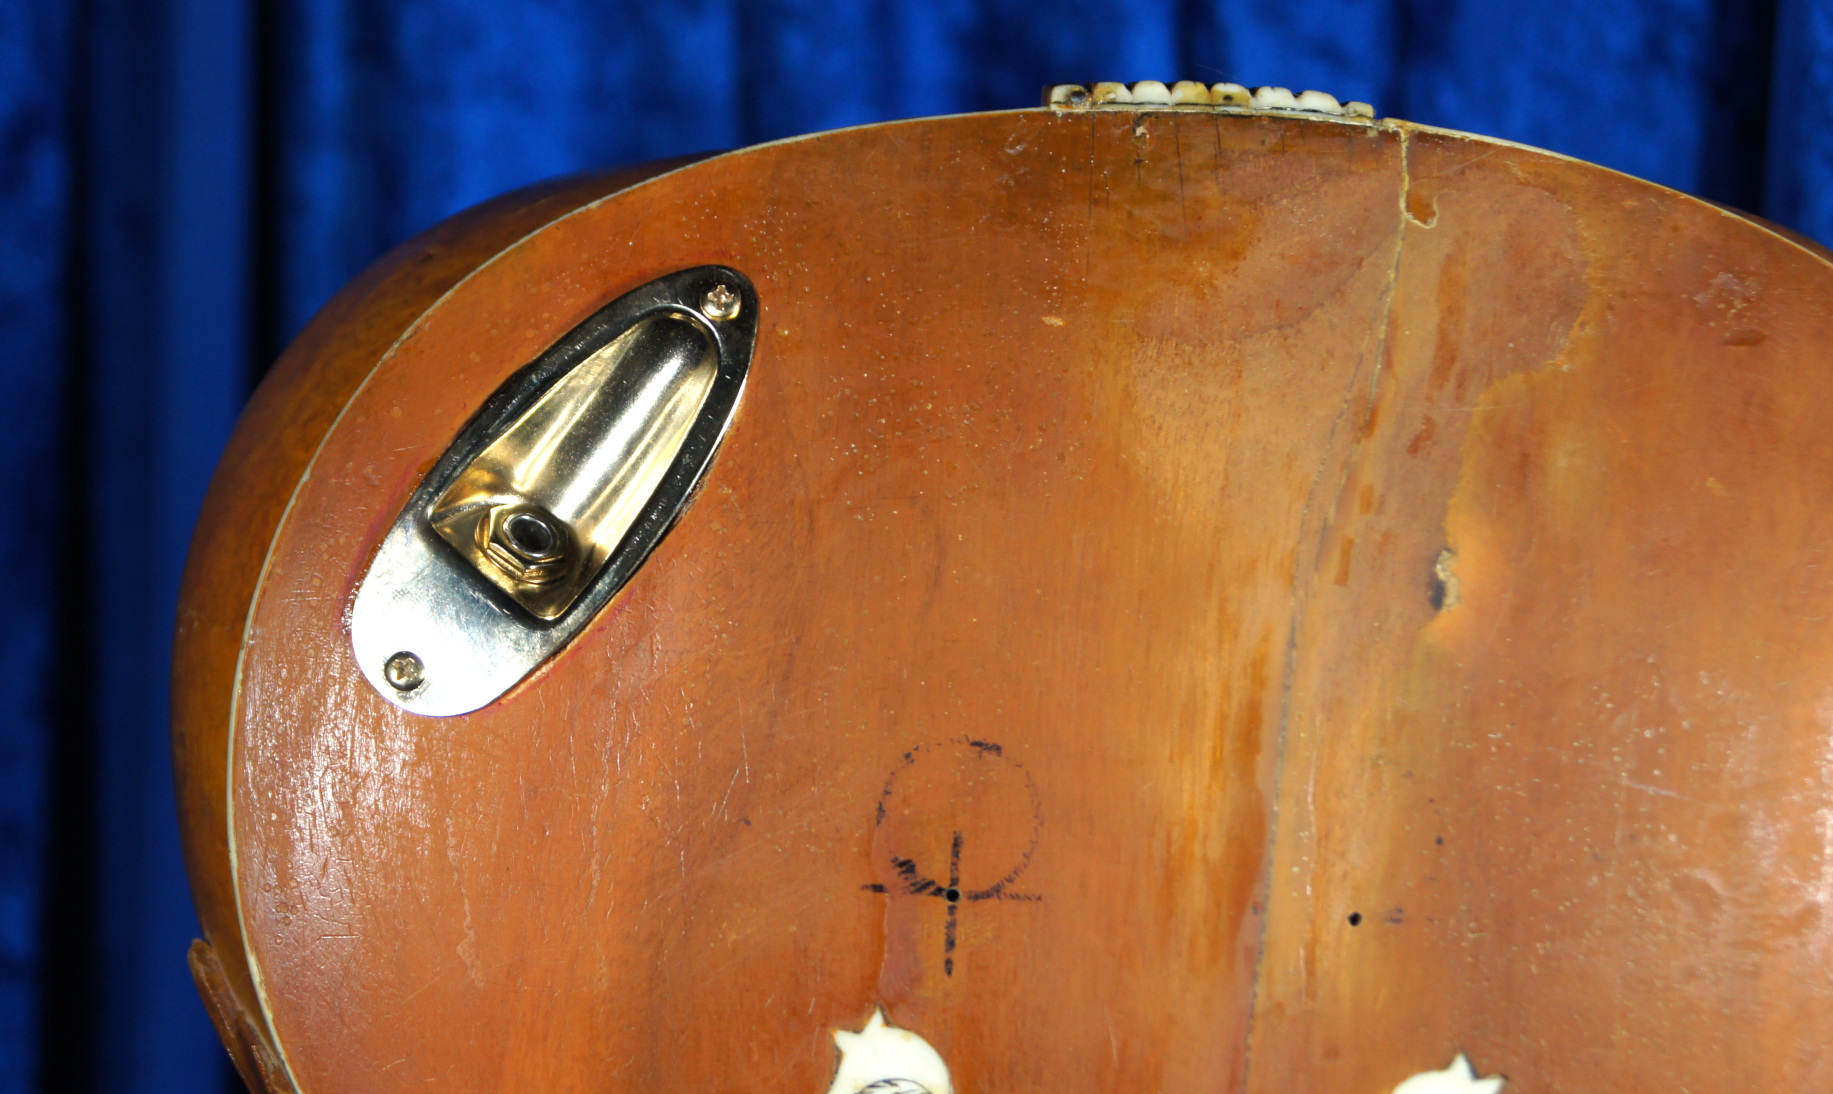
The first thing that I did was to cut a hole in the tabali so that the jack could be attached. Usually, such jacks are located at the extreme bottom side of the tabali. This habit was probably inspired by electric guitars. Unfortunately my own experience showed that this tends to make the plugs and cable point towards the ground. This can be awkward. I considered the orientation of the sitar in the normal playing position, and shifted it backwards a bit so that the plug and cable would come off parallel to the ground.
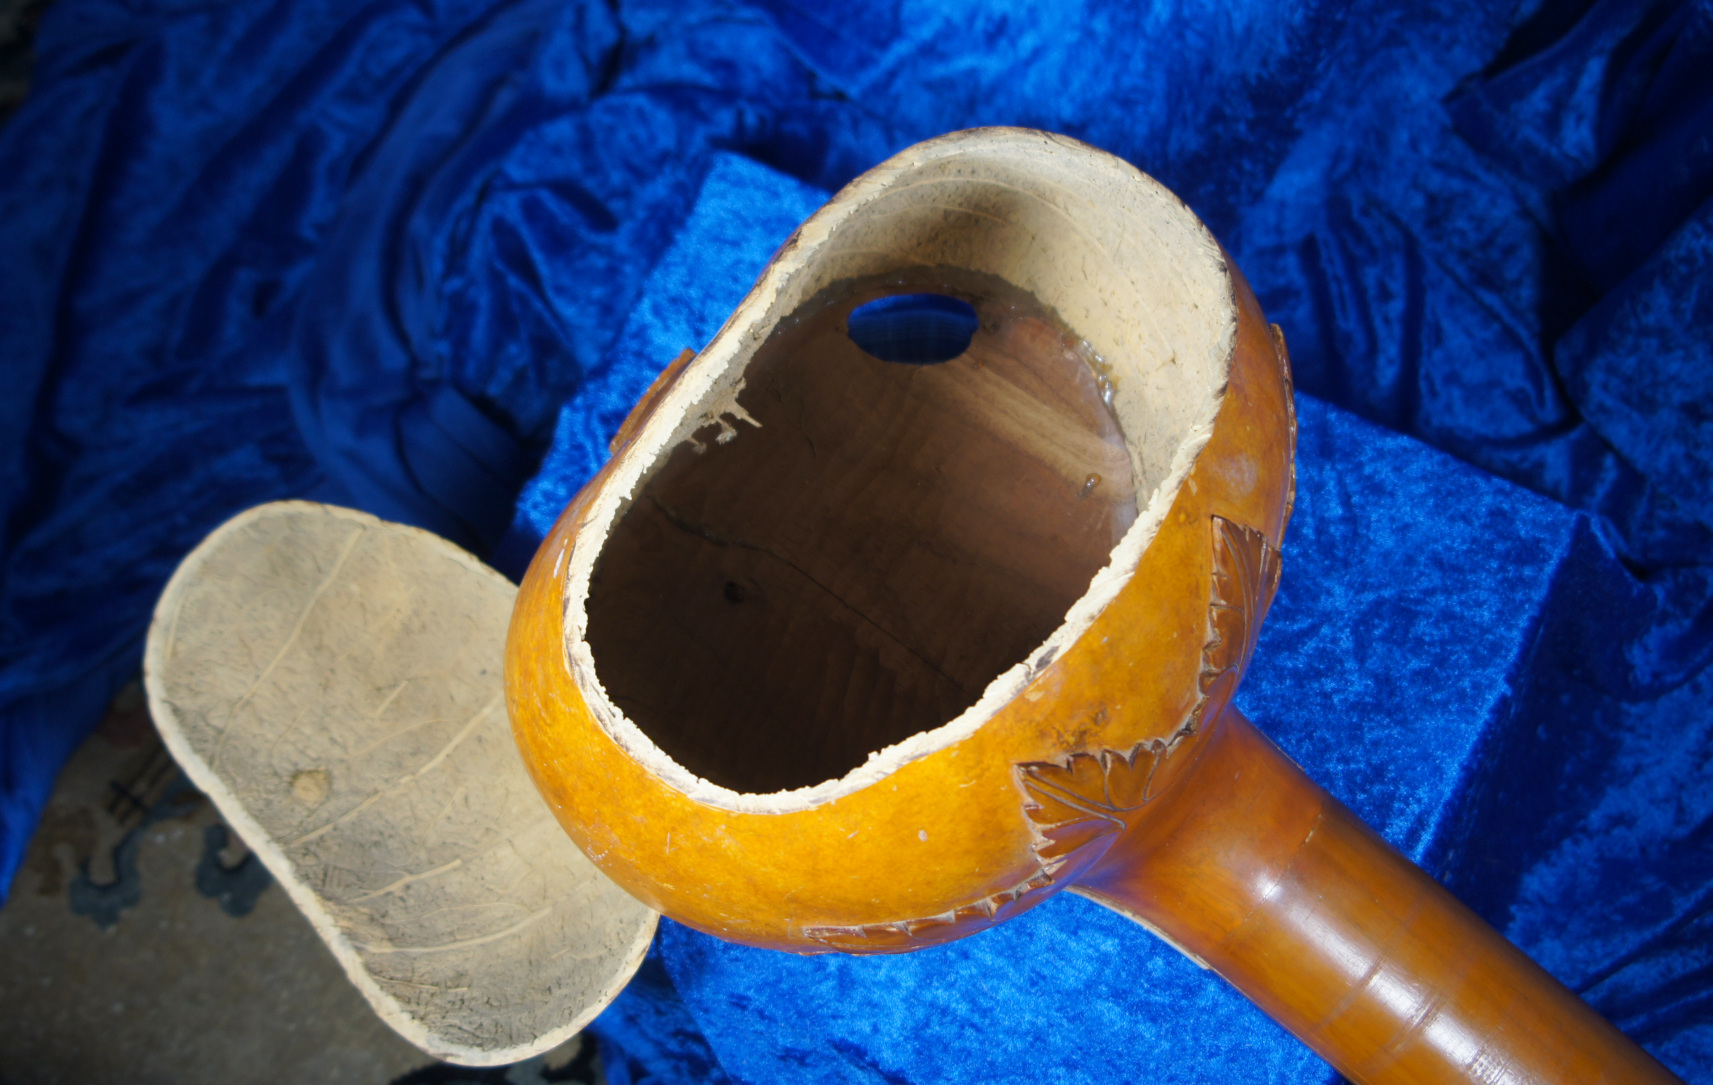
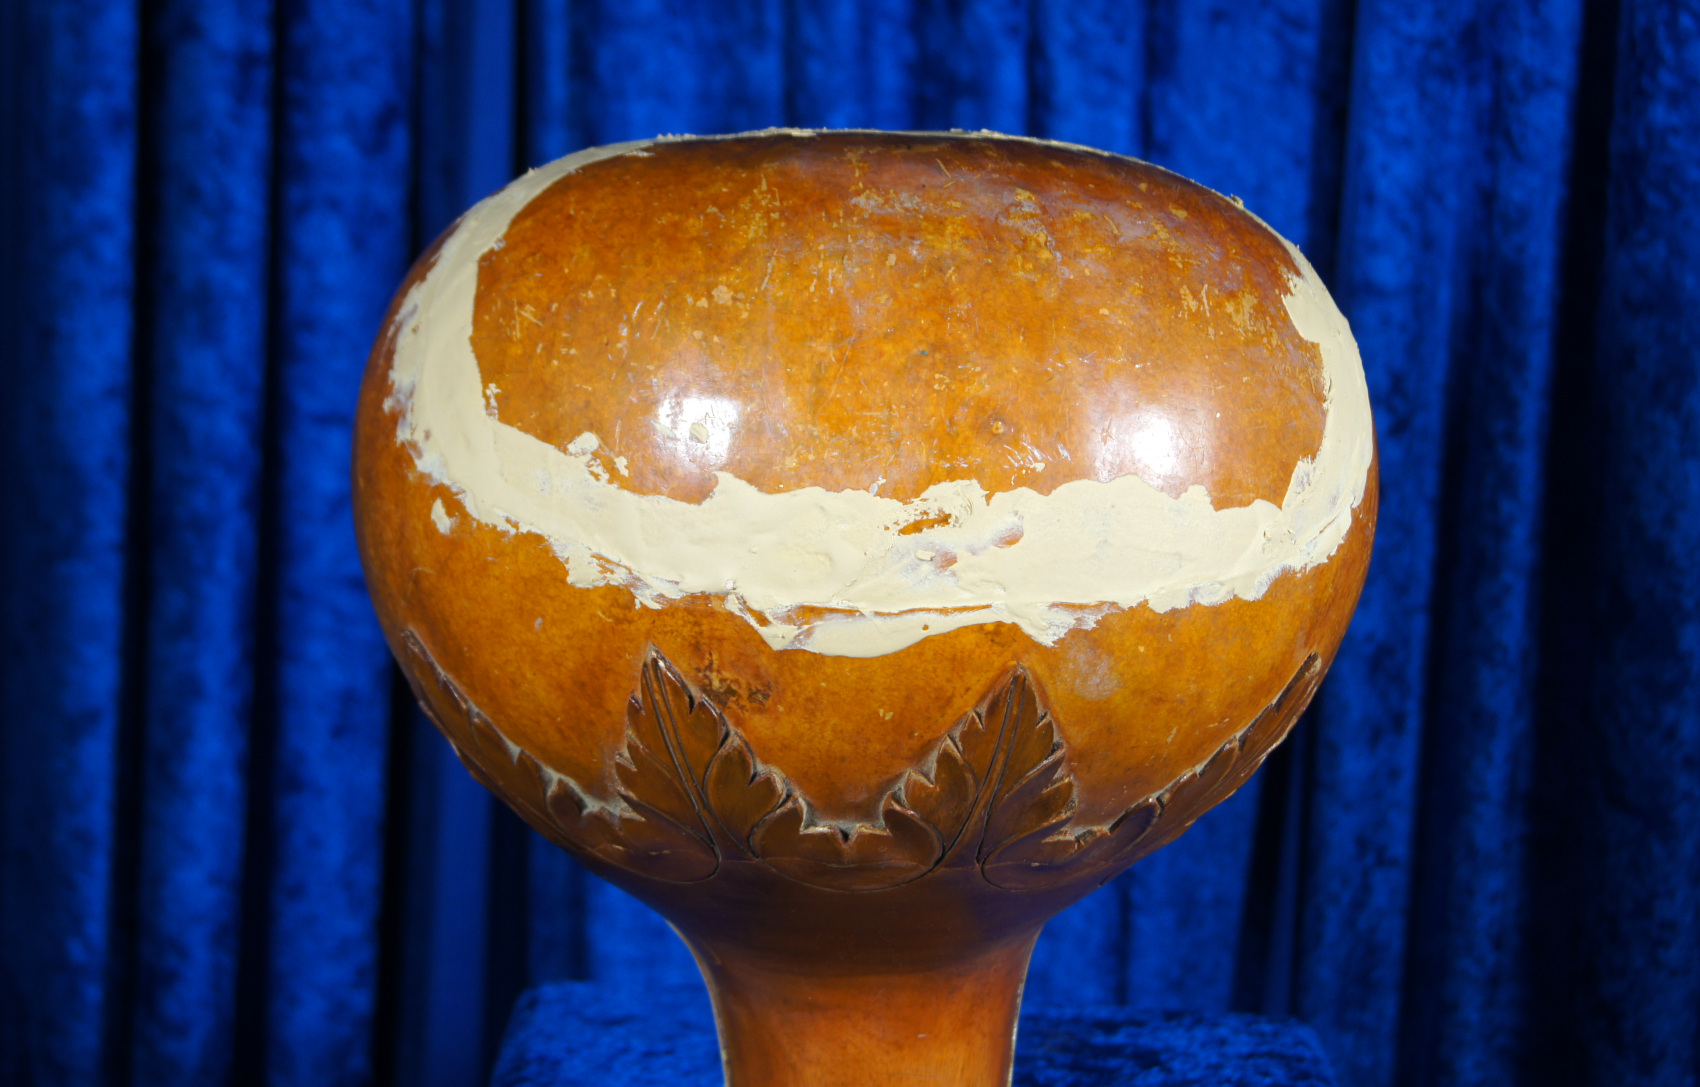
Next I cut off a large portion of the kaddu (gourd) in the rear. This gives me unfettered access to the inside of the sitar.
Finally, I added more glue to reinforce the joint.
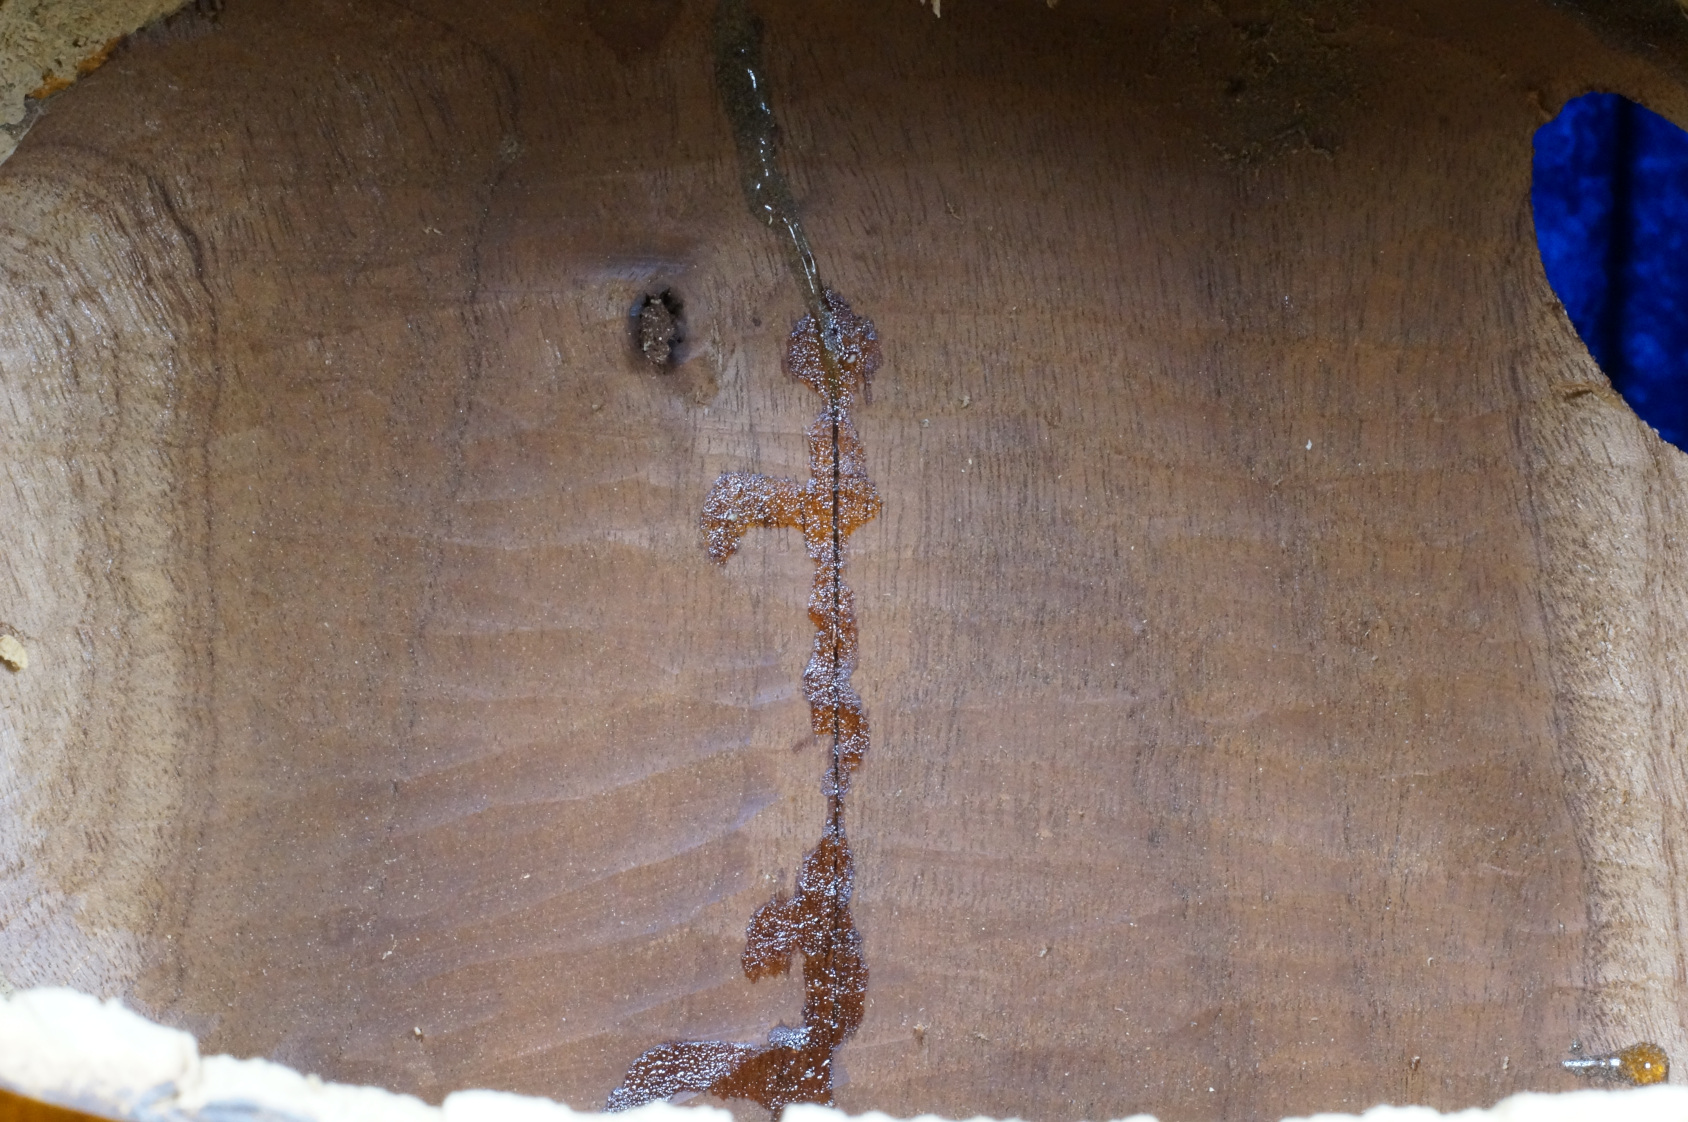
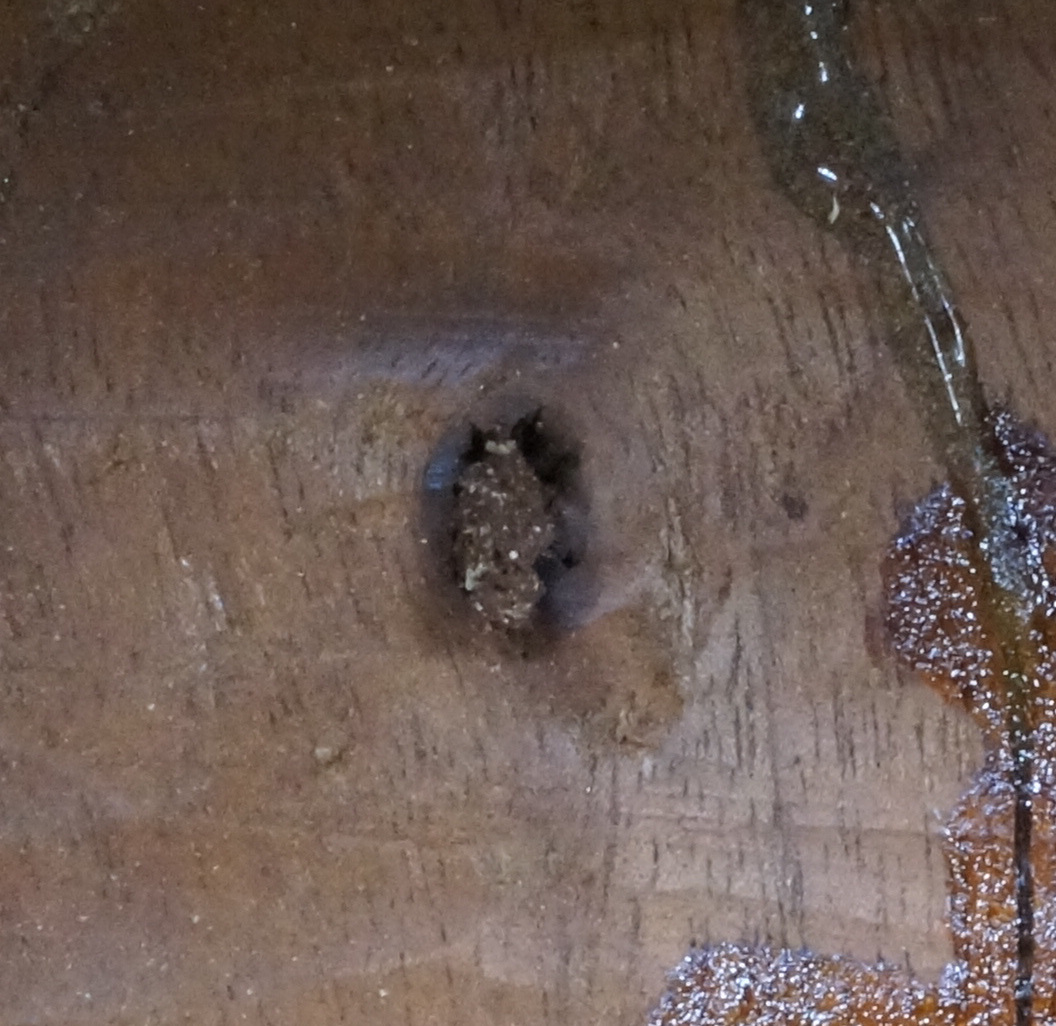
It is good to draw one’s attention to a knothole. This was there from the beginning. Knotholes are bad news for any tabali, because they are an acoustic discontinuity.
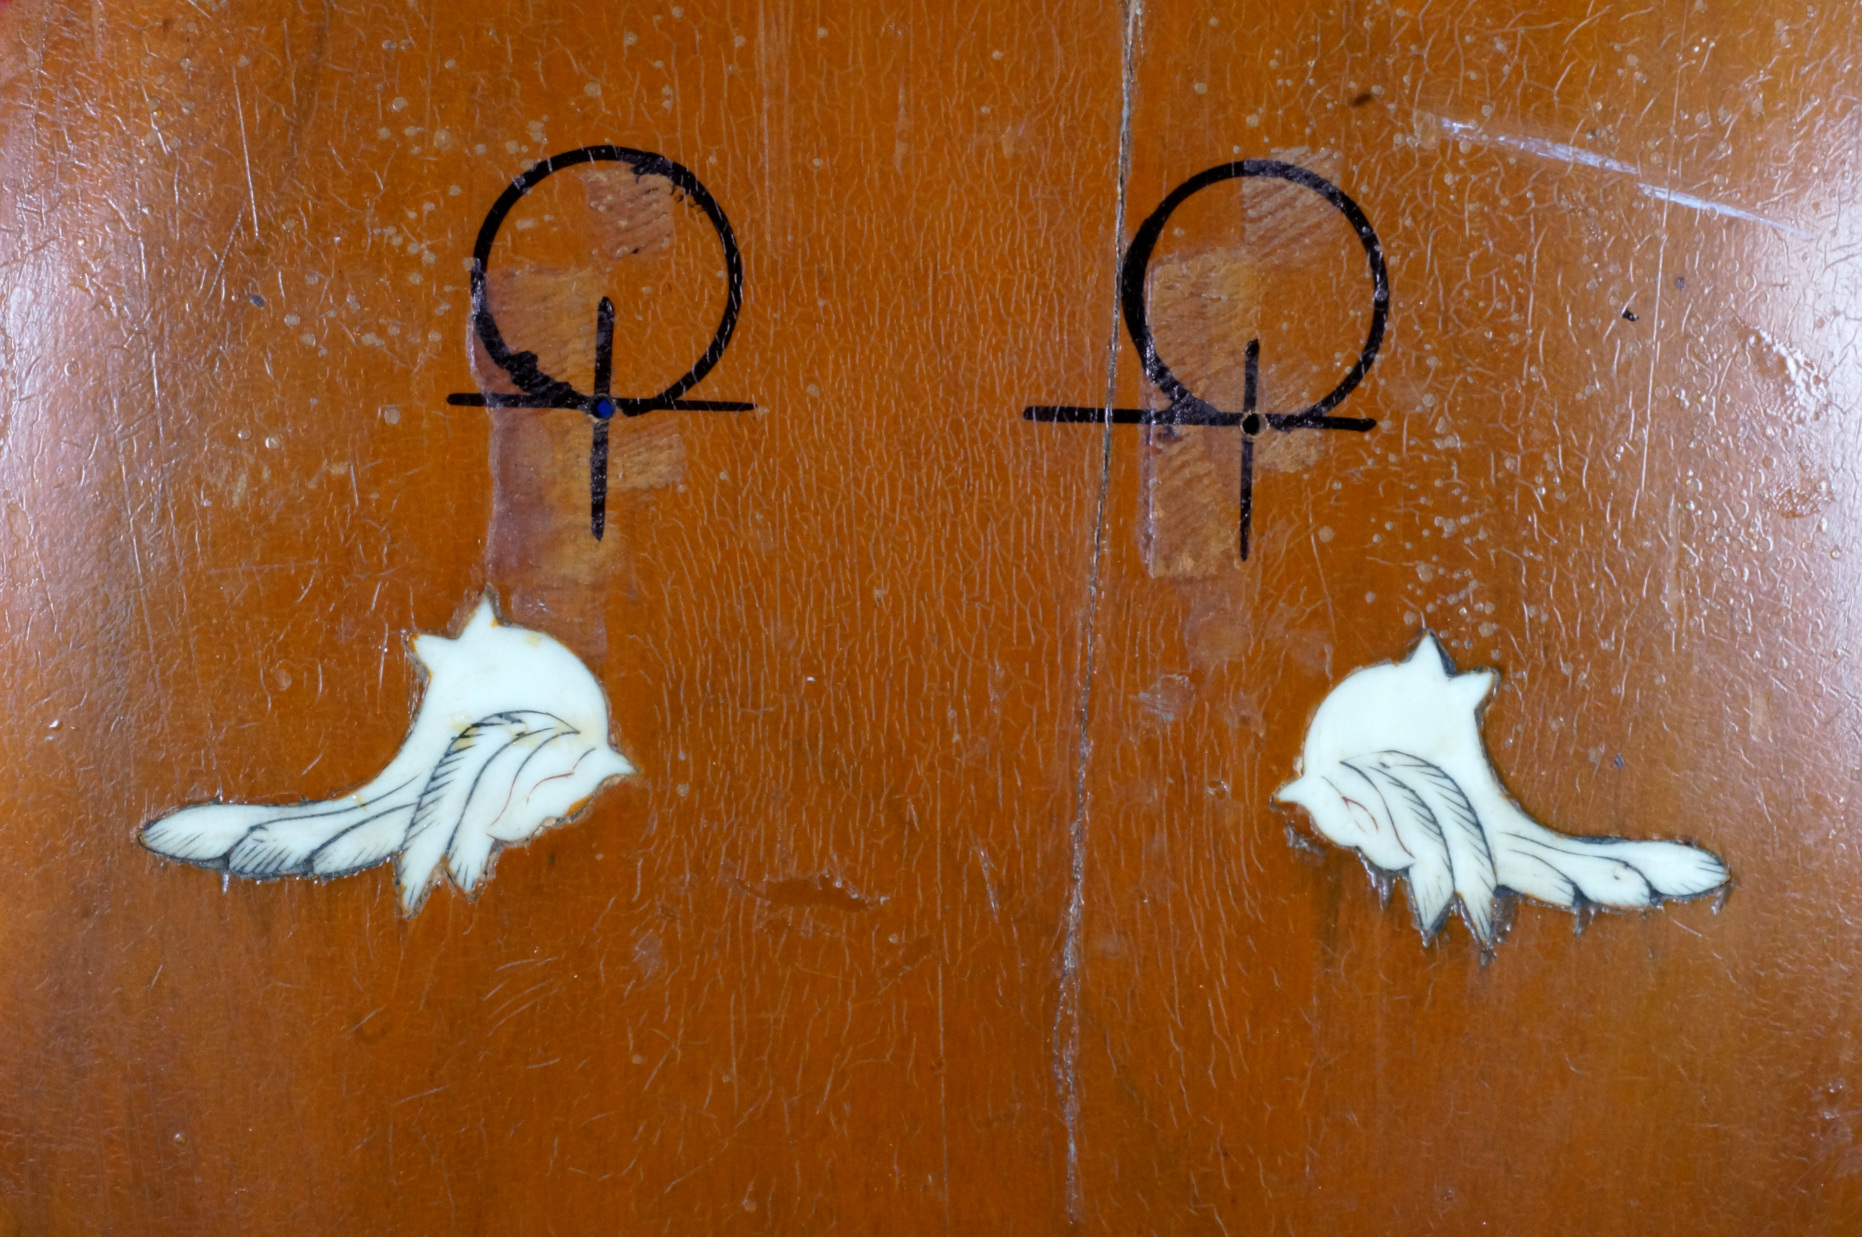
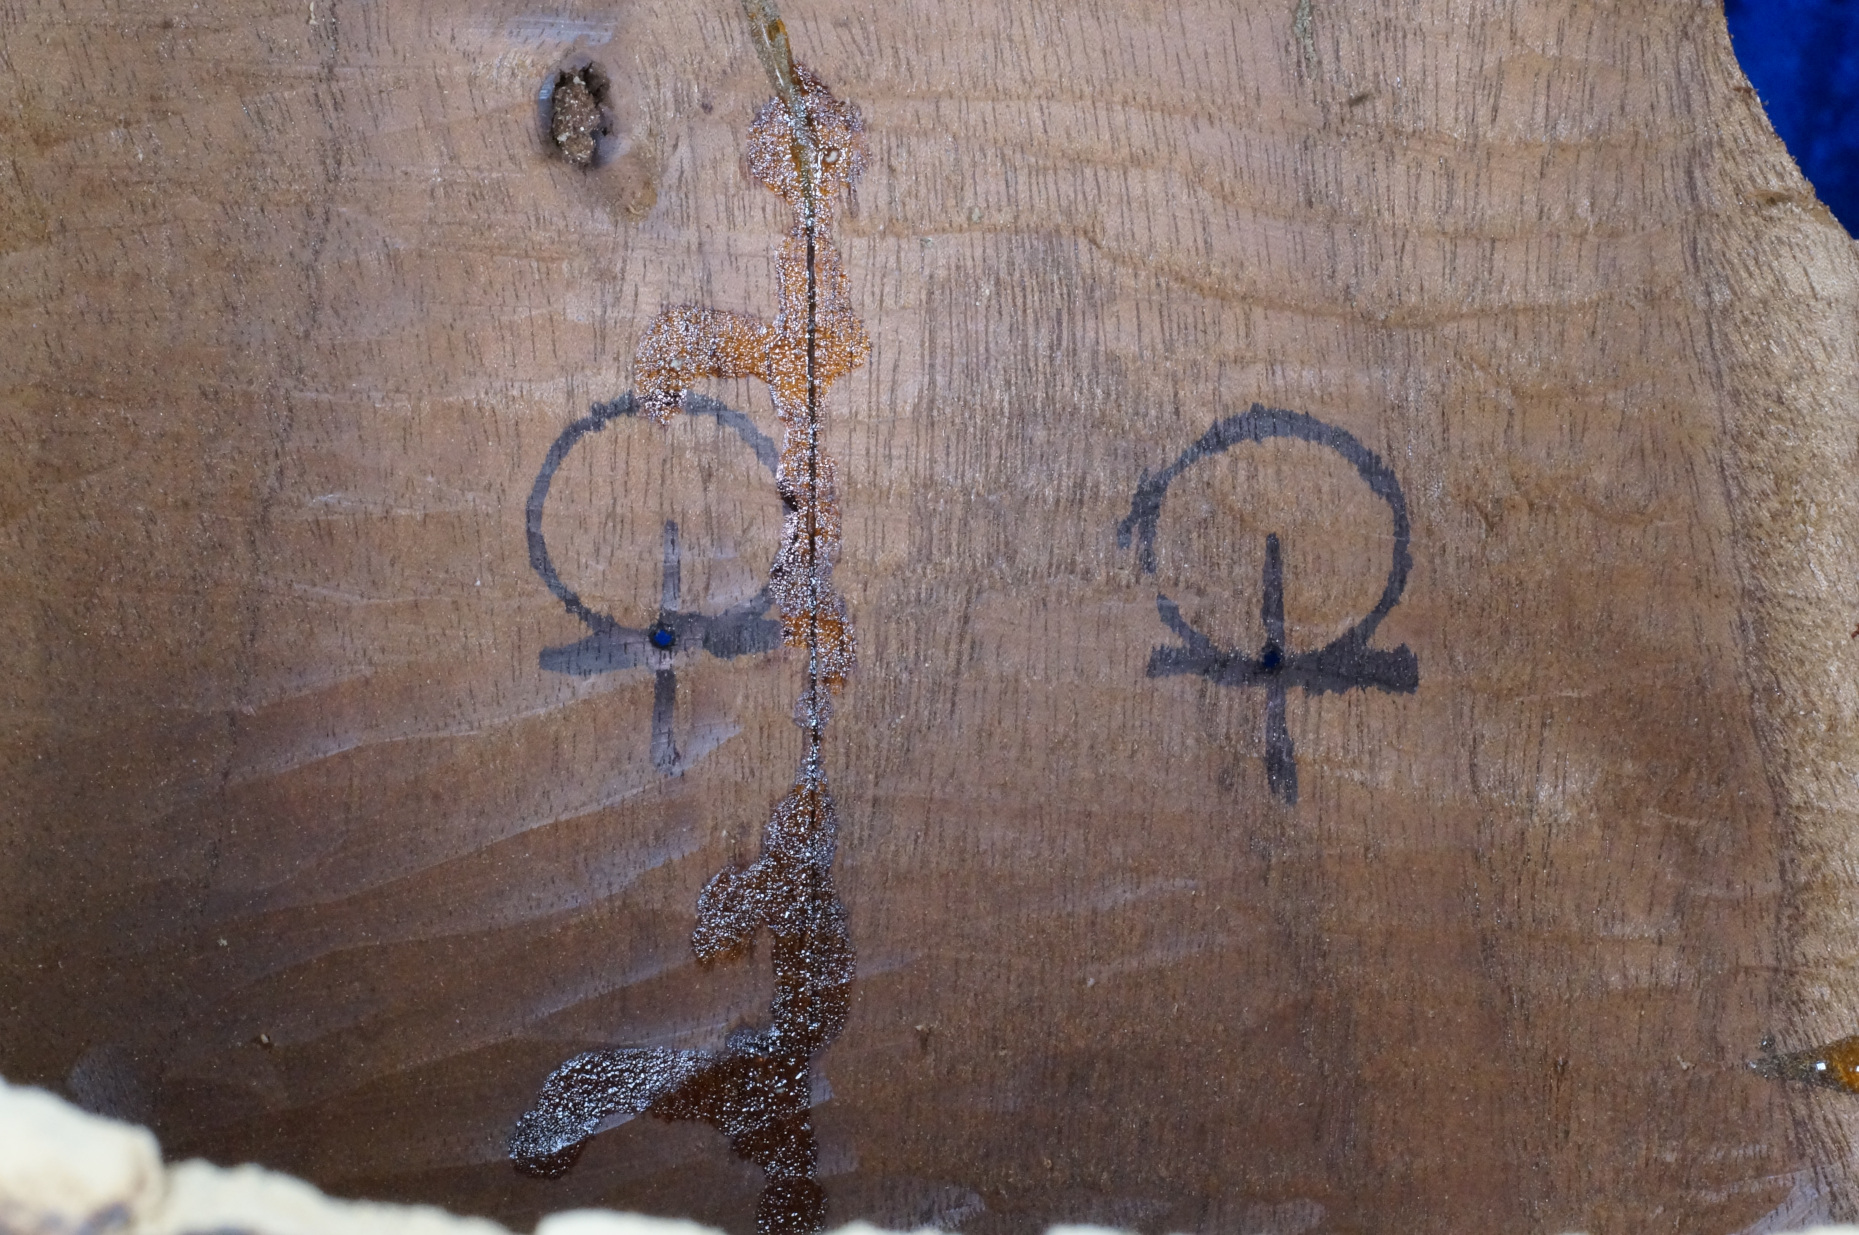
I also drilled two small holes in the tabali (centre of the two “X”). These holes are very small, no more than 2mm in diameter. These holes are there as reference. No matter what subsequent steps I take in working on the instrument, I will always know how the bridge will line up with the internal transducers.
March 9, 2023 – Mama and Keela
Opening the sitar reveals many things. One of the things that one notices is the very large number of wooden spikes. These are known as keela, and their purpose is to hold the various pieces together while the glue dries during construction.

They look innocent, but looks are deceiving. Anyone who has worked with sitars knows that they may look like harmless match sticks, but they are actually much more like steel nails protruding into the inner cavity. They are there ready to extract blood or excess flesh from the neophyte sitar repair person.
However, for me there are many memories attached to them. They immediately take me back to the 1970s in Hyderabad, and of “Mama” Pandurang.
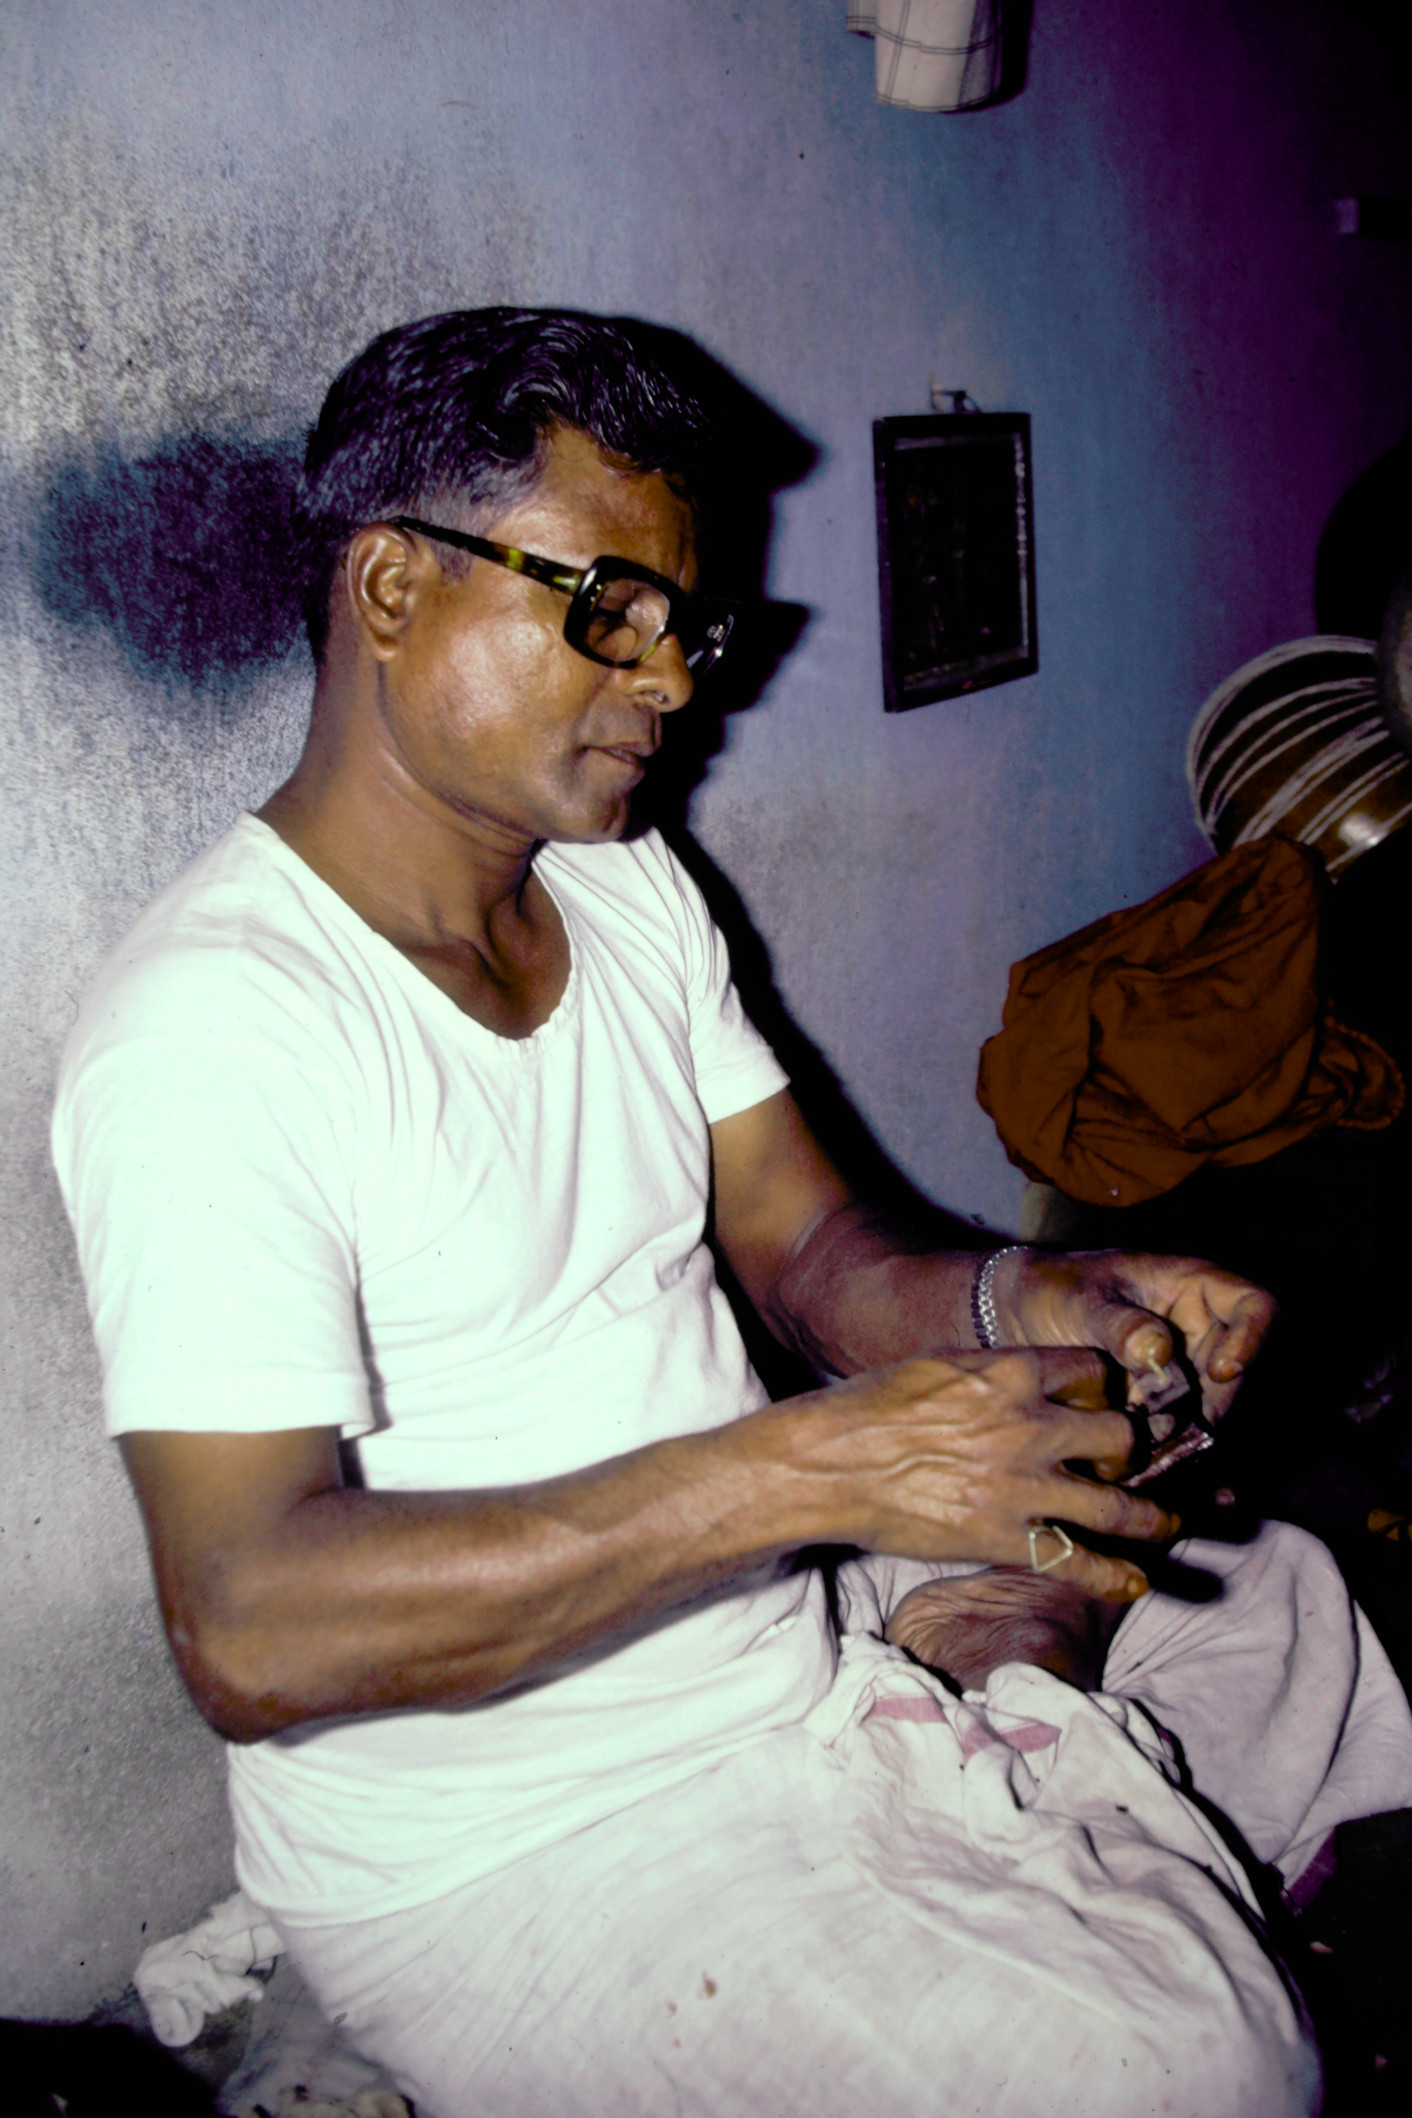
Mama must have been in his late forties or early fifties when I was just in my early 20s. He worked as a repairman of musical instruments from a tiny malghi not far from the Communist Book Store, just a stone’s throw from the clocktower. If memory serves me, (and my memory is not very good these days), it was not far from Sultan Bazaar.
To say that his malghi was small was an understatement. It was about the size of most walk-in closets.
I spent many an hour with Mama learning the ins-and outs of instrument repair. His first lesson for me was how to make the keela.
These keela are made from bamboo. Specifically they are carved from the outer skin of the bamboo. People tend to forget that bamboo is stronger than steel. The tensile strength of bamboo is 28,000 lb-per-sq-inch compared to 23,000 lb-per-sq-inch for steel. When one considers the strength-per-weigh ratio, it is six times stronger than steel.
Mama’s qualities were very impressive. He was truly a master craftsman, who could work on any musical instrument. He was very modest, quite-spoken, but above all else, he was exceptionally kind. He did not speak any English, but he did speak Telugu, Urdu, and his mother tongue of Kannada.
He died quite a few years ago.
So Mama, if you have been reincarnated somewhere, just know that I will never have your skill. But for what little I know, much of it is from you, and I am grateful.
| This book is available around the world |
|---|
Check your local Amazon. More Info.
|
March 10 – Surface Preparation, But a Problem
I was filling and sanding down the instrument, concentrating on the tabali. I was attending to this portion so that I could (hopefully) make the joint of the broken sections invisible. While doing so I encountered a BIG problem. The joint between the daan (neck) and the gullu (the wooded cowl that connects the neck to the gourd) was structurally unsound.
This is a serious problem for a sitar. Unfortunately, it is also a common problem.
To understand this problem better, we have to look at the way a sitar is strung and tuned. The first string of the sitar is the playing string (baaj tar). The majority of one’s playing will be done on this string. The second string is the Mandra Sa string (an octave below the tonic.) Although this string is occasionally played, more often it drones along with the melody to provide a sense of the tonic. When one pulls the main playing string laterally (meend), then the Mandra Sa string, as well as other drone strings, go flat. This is VERY annoying and generally not something that can be fixed.
I added glue to the problem portions. This may fix the problem, but unfortunately I may not know until then instrument is finished.
March 11, 2023 – The Transducers
I mounted two transducers and jack.
For this, I first wired up a transducer harness. BE CAREFUL OF YOUR SOLDERING AND TEST IT THOROUGHLY.
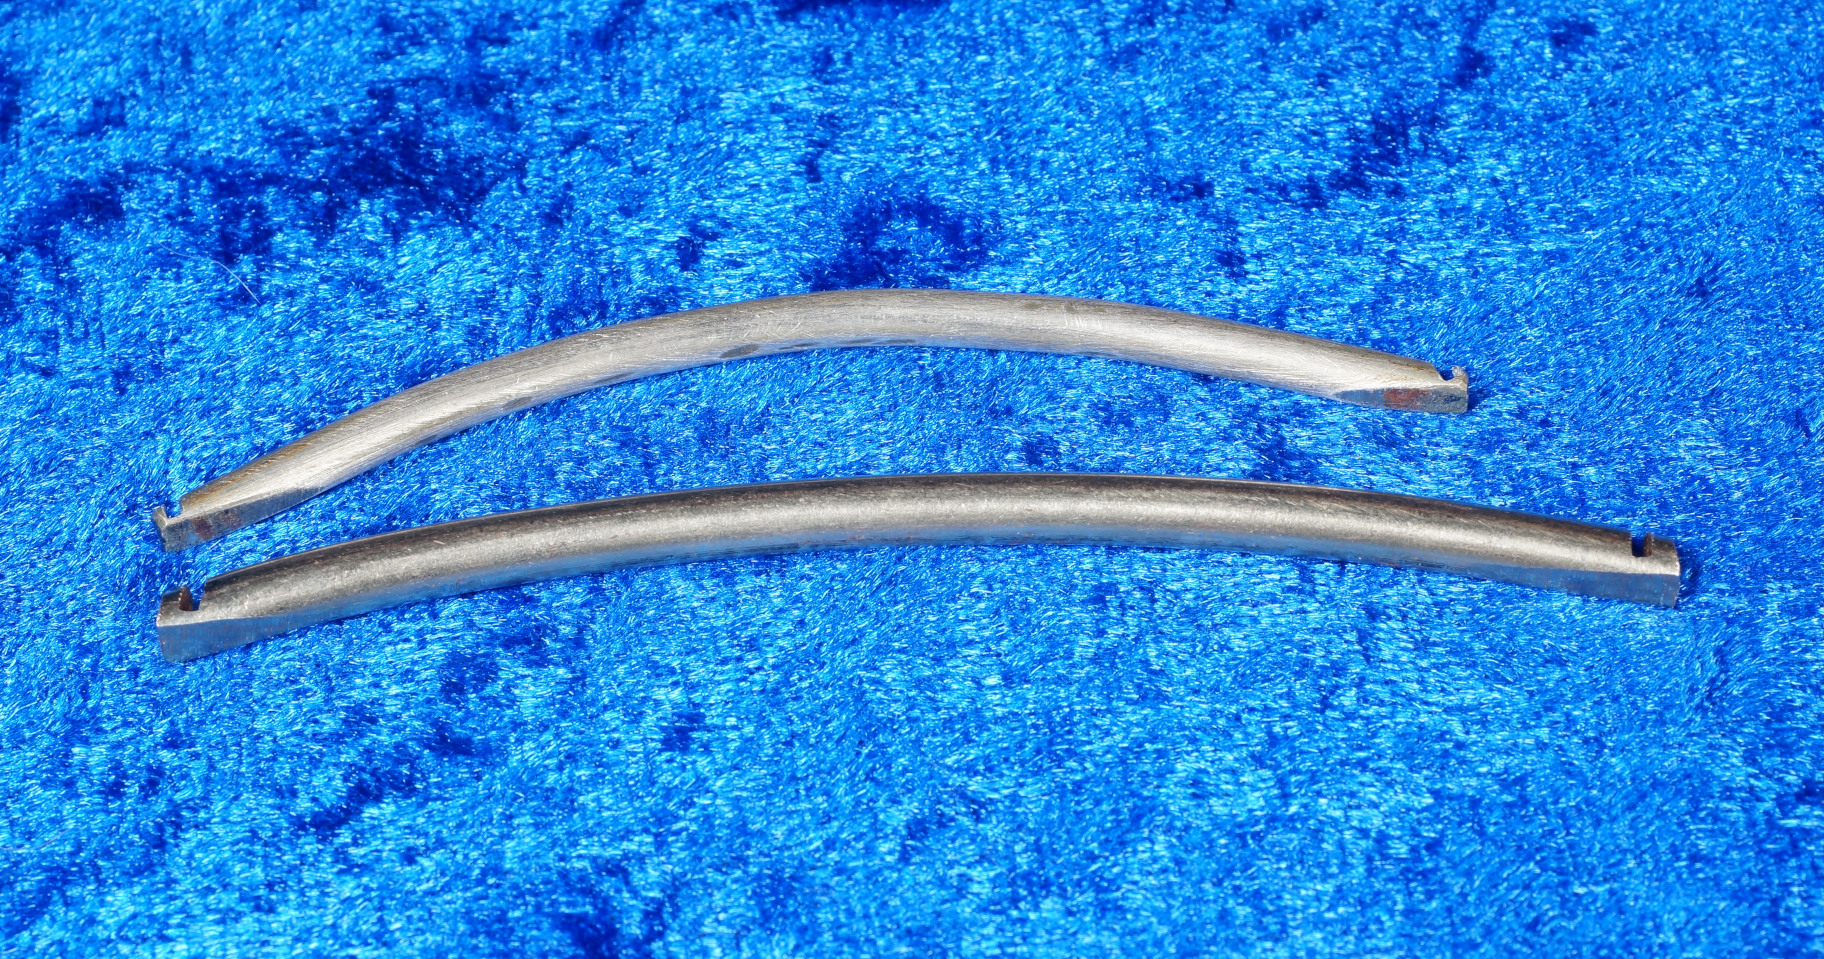
Then I bent the two ends of the jack-plate so that it would conform to the curvature of the tabali. Jack-plates are designed for guitars which have a flat front. Conversely the tabali has a slight curve, so the jack plate must be slightly modified to accommodate this.
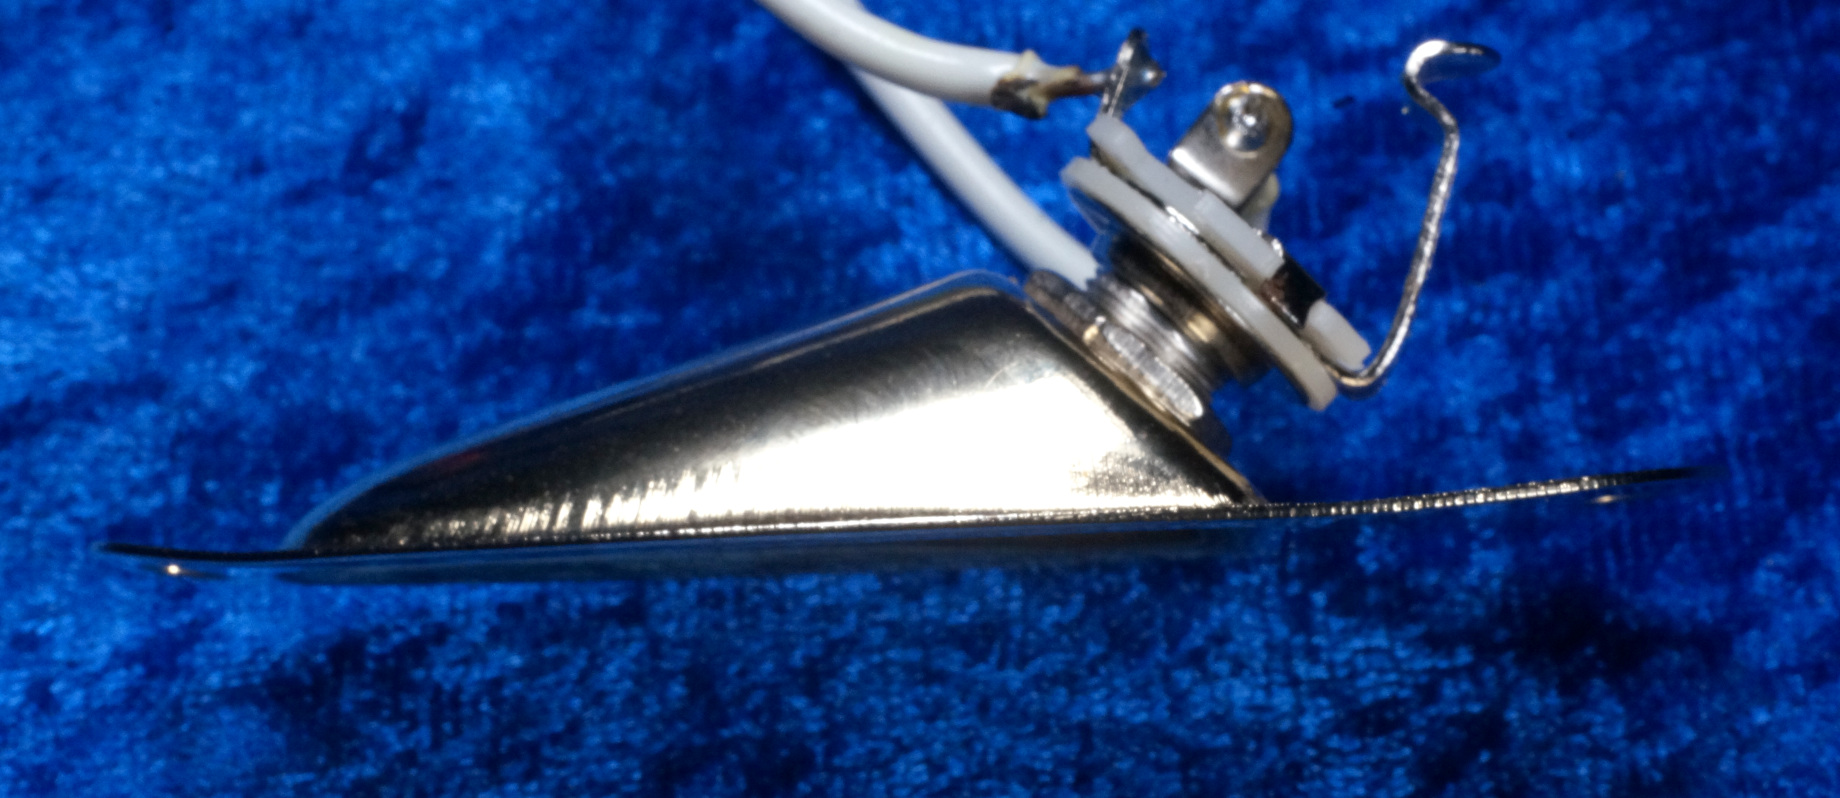
Then I mounted the transducers with super glue. I let it dry, THEN I TESTED IT THOROUGHLY!
Then I mounted the jack plate with a combination of wood screws and super glue. THEN I TESTED IT THOROUGHLY.
I did a little last minute cleaning of the contacts with acetone, THEN I TESTED IT THOROUGHLY.
After it was all done, I TESTED IT THOROUGHLY.
You had better test everything thoroughly. Once you close up the back of the sitar, it will be very difficult to go back and fix things later.
—————-
Transducers – Transducers, more commonly known as pickups or contact microphones, take the vibrations from the instrument and convert them into electronic signals. In theory, any number of transducers may be used on musical instruments, but most commonly one, two, or three are found. I decided to use two, one for each leg of the bridge.
There are a myriad of concerns when dealing with transducers. But I would like to talk about quality control and impedance.
The first consideration is quality control. I do this job often enough to warrant the purchase transducers in bulk. This has its issues. On the positive side, there is a major saving of money. On the negative side, one should expect no quality control.
In the old days before the rise of economic neoliberalism, manufacturers staked their reputations on the quality of the goods they produced. But no manufacturing process is perfect; there would always be a certain percentage of products that were not “up to specs”. Therefore, manufacturers engaged in strenuous testing to weed out and reject unsatisfactory units. The ratio of sellable units to the total number produced, is known as the “yield”.
Unfortunately today, the only consideration is cost. Manufacturers feel no sense of loyalty or obligation to either their employees, their communities, or the consumers of their products. They consider virtually any product to be sellable, without any quality control. Units that previously would have been relegated to the dustbin, now show up for sale in various quarters.
Therefore the job of quality control falls upon me. I will not go into too many details, but there are several things I look for. Specifically I am looking at how responsive or “hot” they are, and whether they are wired correctly inside.
To test both of these things, I connect a transducer to an oscilloscope. Does a light tap produce a good clear spike on the scope? This will tell me how “hot” they are. If they do not produce a nice strong response, then they are immediately discarded.
Are they wired correctly? It should be inconceivable that a transducer which is incorrectly wired would be sold on the market. When testing them, most will produce a peak and a distinctive pattern consistent with their specs. However a certain number will produce a peak/pattern in the opposite direction. In more technical terms, such transducers are out-of-phase. If only a singe transducer is used, then this is not a problem. But if multiple transducers are used, it can be a problem; because it is essential that the phase be consistent.
I am using two transducers for the sitar.
The obvious question is, “Are two transducer better than one?” If the two are well matched and properly mounted the answer is a definite “yes”.
“Do two transducer have twice the signal of one?” This is a simple question that should have a simple answer. Unfortunately, it sends my mind reeling with considerations of power coupling (current coupling) vs. voltage coupling, as well as different possible situations, both real and contrived. I will say that in all real world situations, having two transducers wired in parallel does not produce a significantly stronger signal than a single one. However, it greatly improves the signal-to-noise ratio by cutting the source impedance in half.
(Blank confused looks go here)
I will go into the reasons later, but for now it is only necessary to know that reducing the source impedance allows you to use longer instrument cables, with less sensitivity to electromagnetic interference.
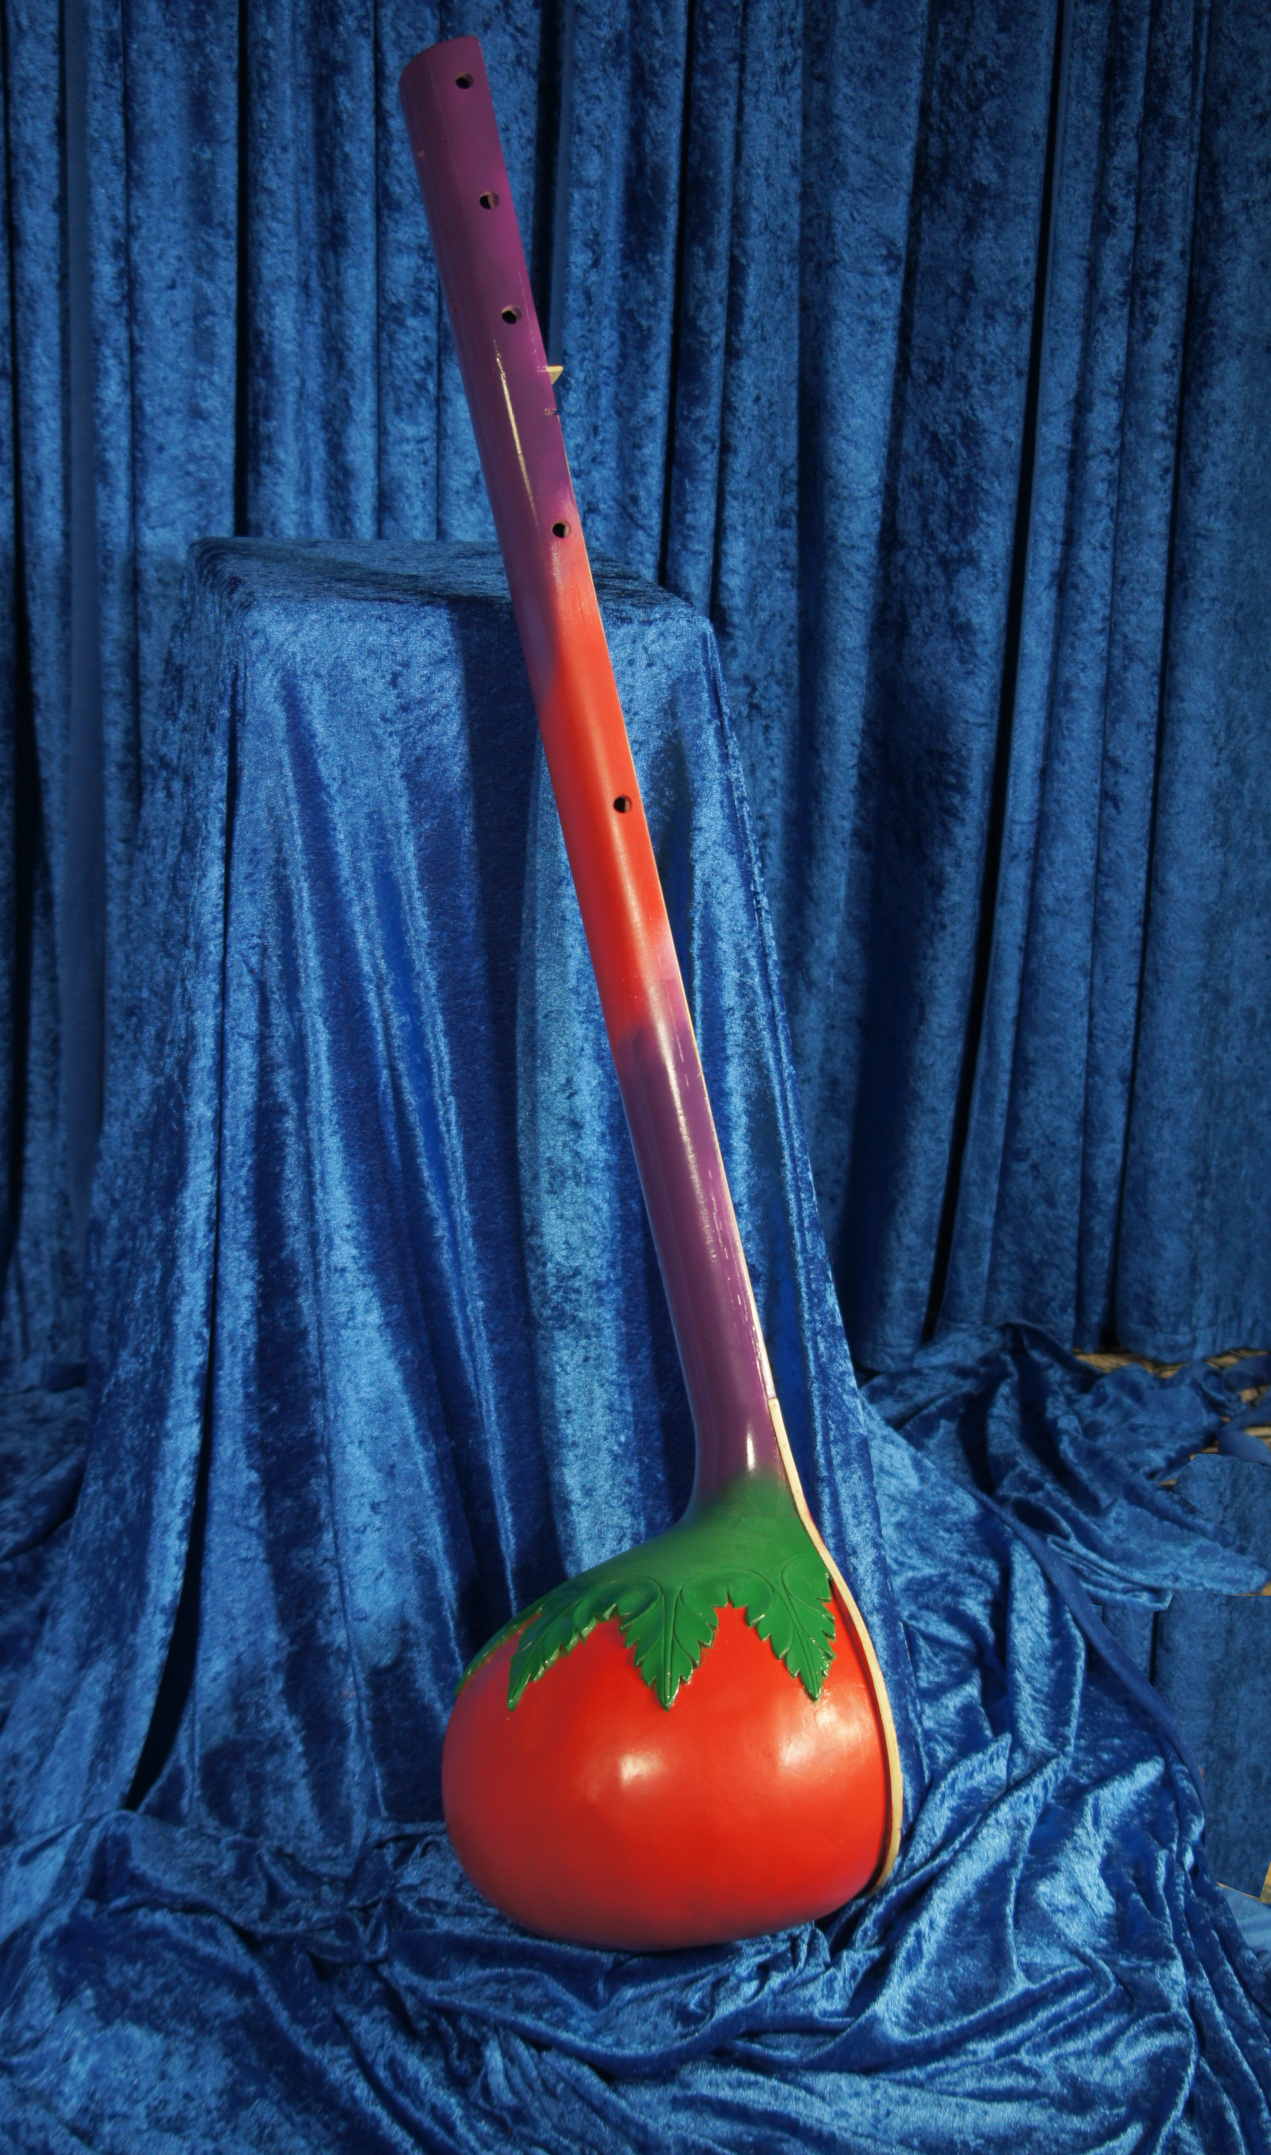
March 12, 2023 – Closing up the Kaddu
I took a can of compressed air and removed as much dust from the inside of the kaddu as I possibly could. I didn’t want dust getting on the connections in the jack and causing any problems.
I closed up the back, and glued it in place.
After a few hours, I added filler.
The next job will be rasping, sanding, and filling. It is a repetitive process that will go on for days. The purpose of which is to hide any trace that the back of the instrument was cut open.
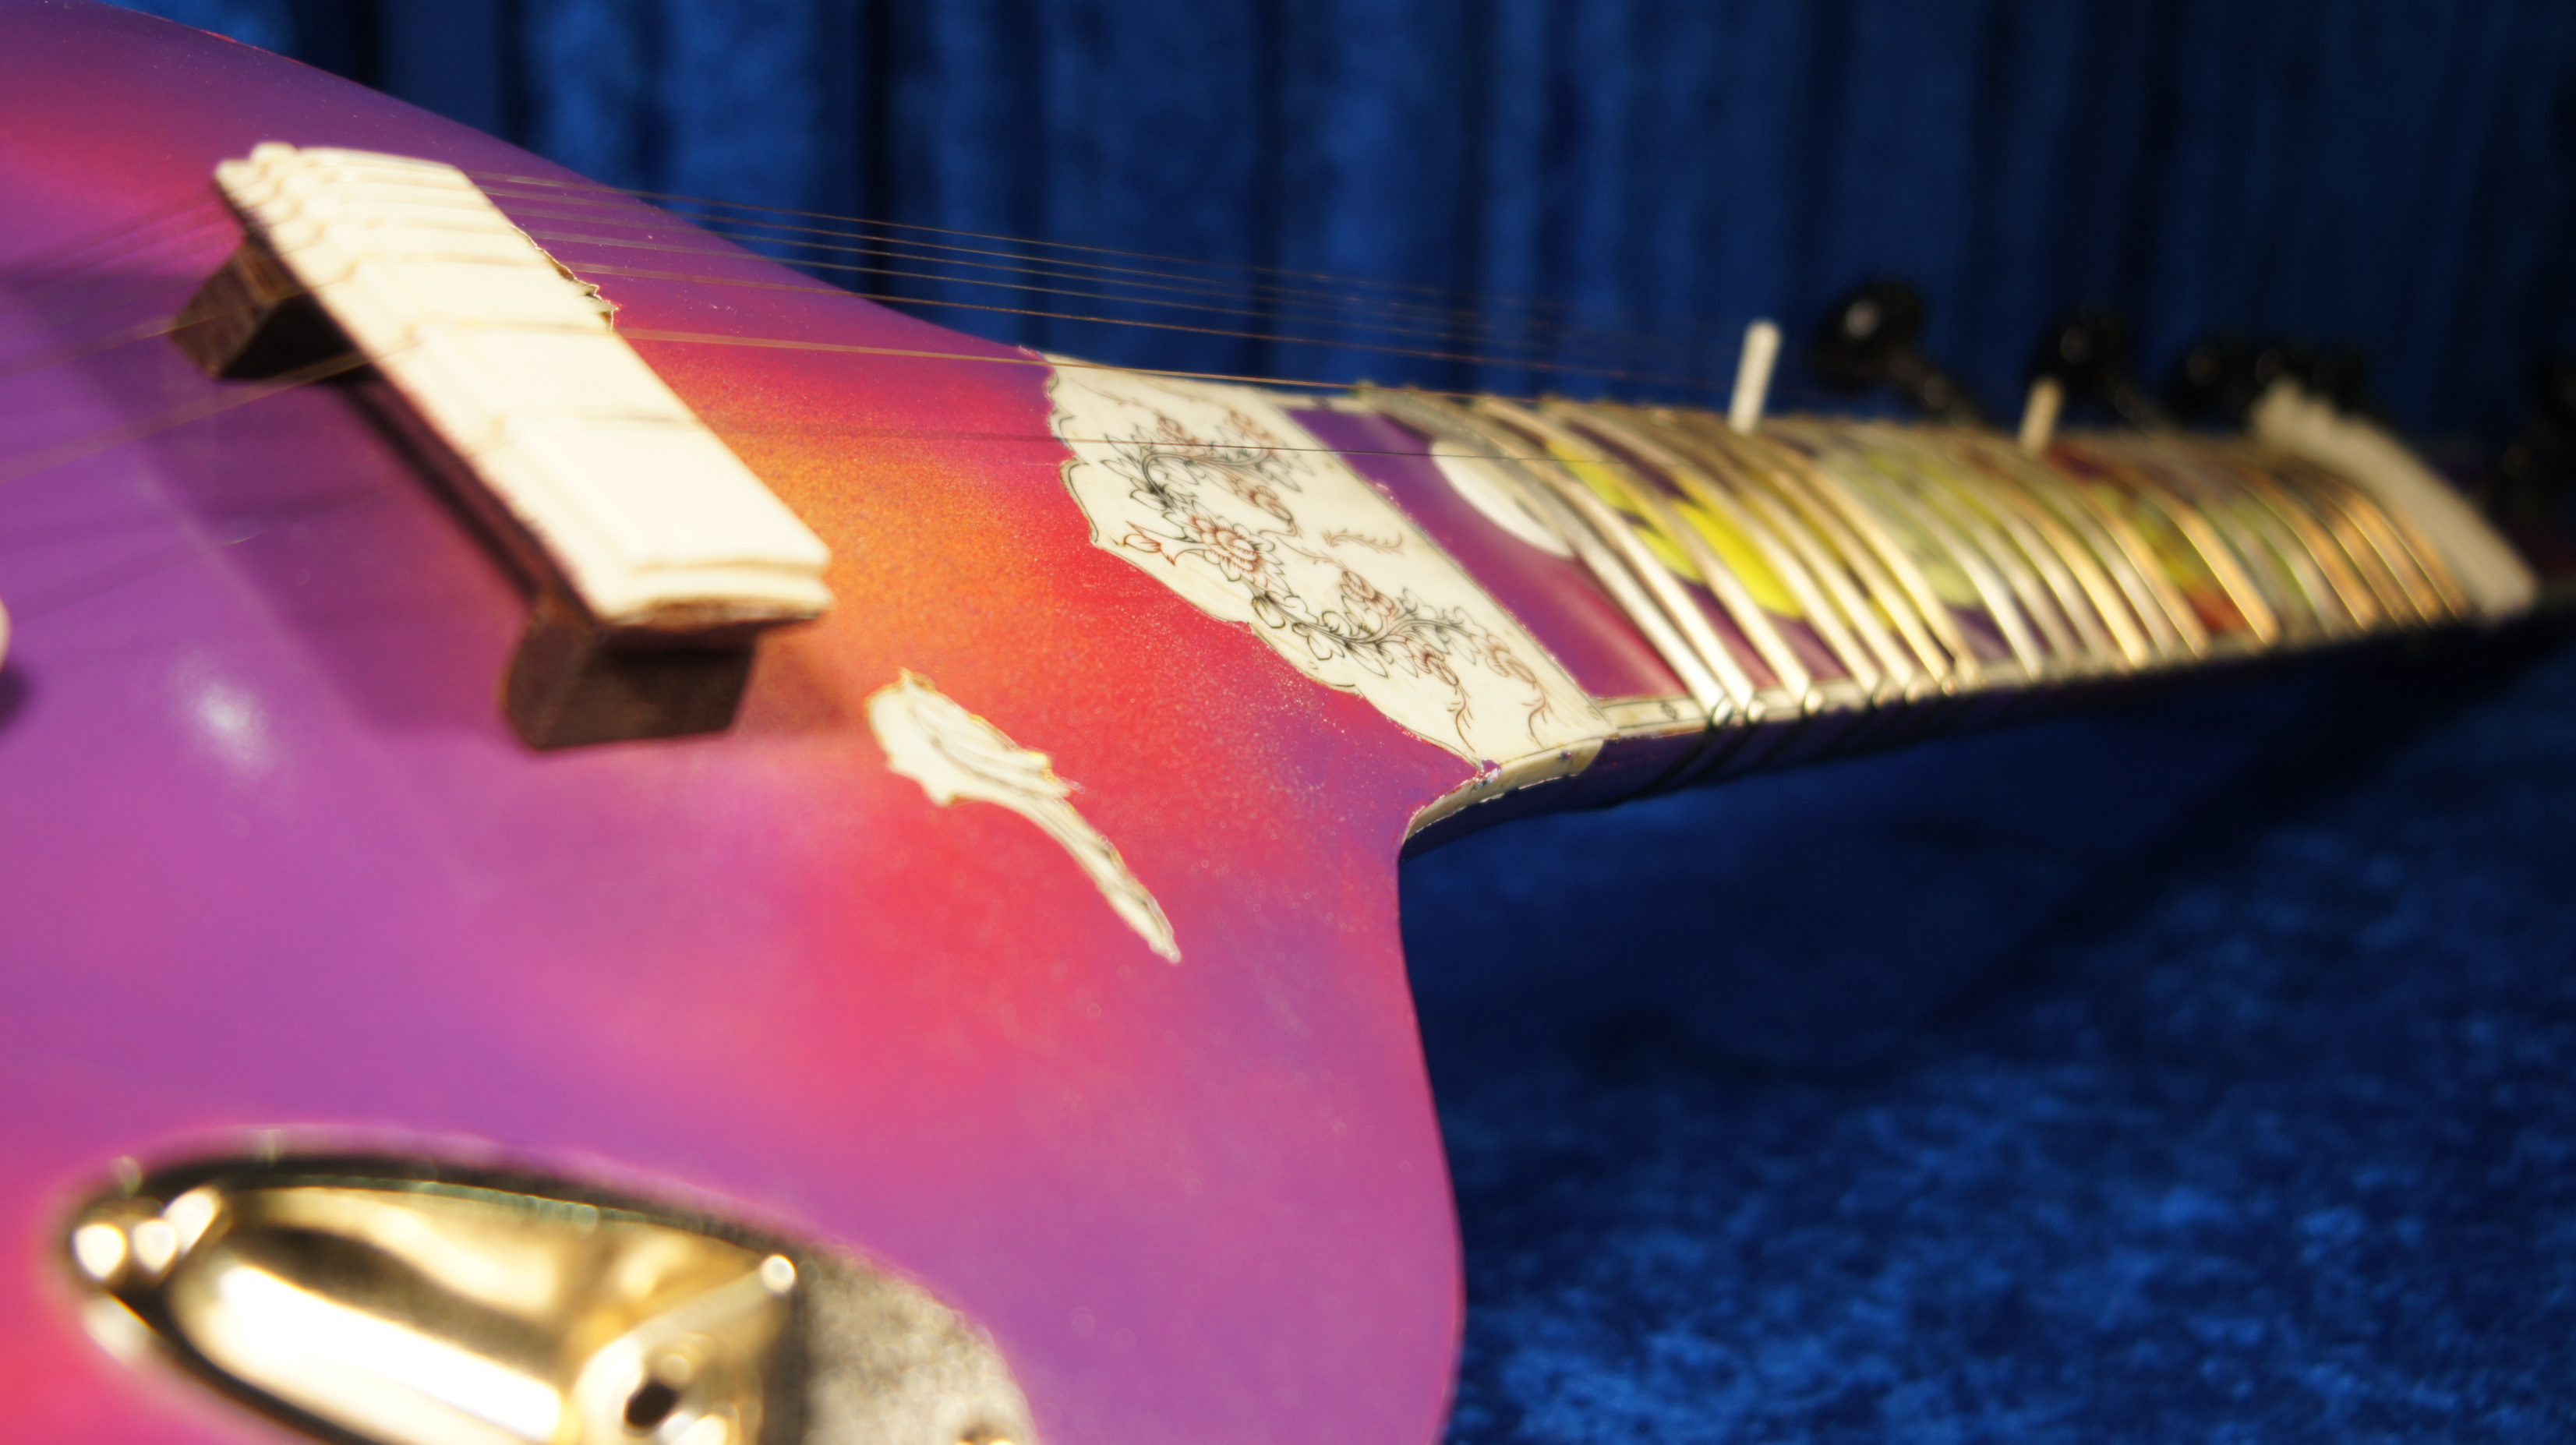
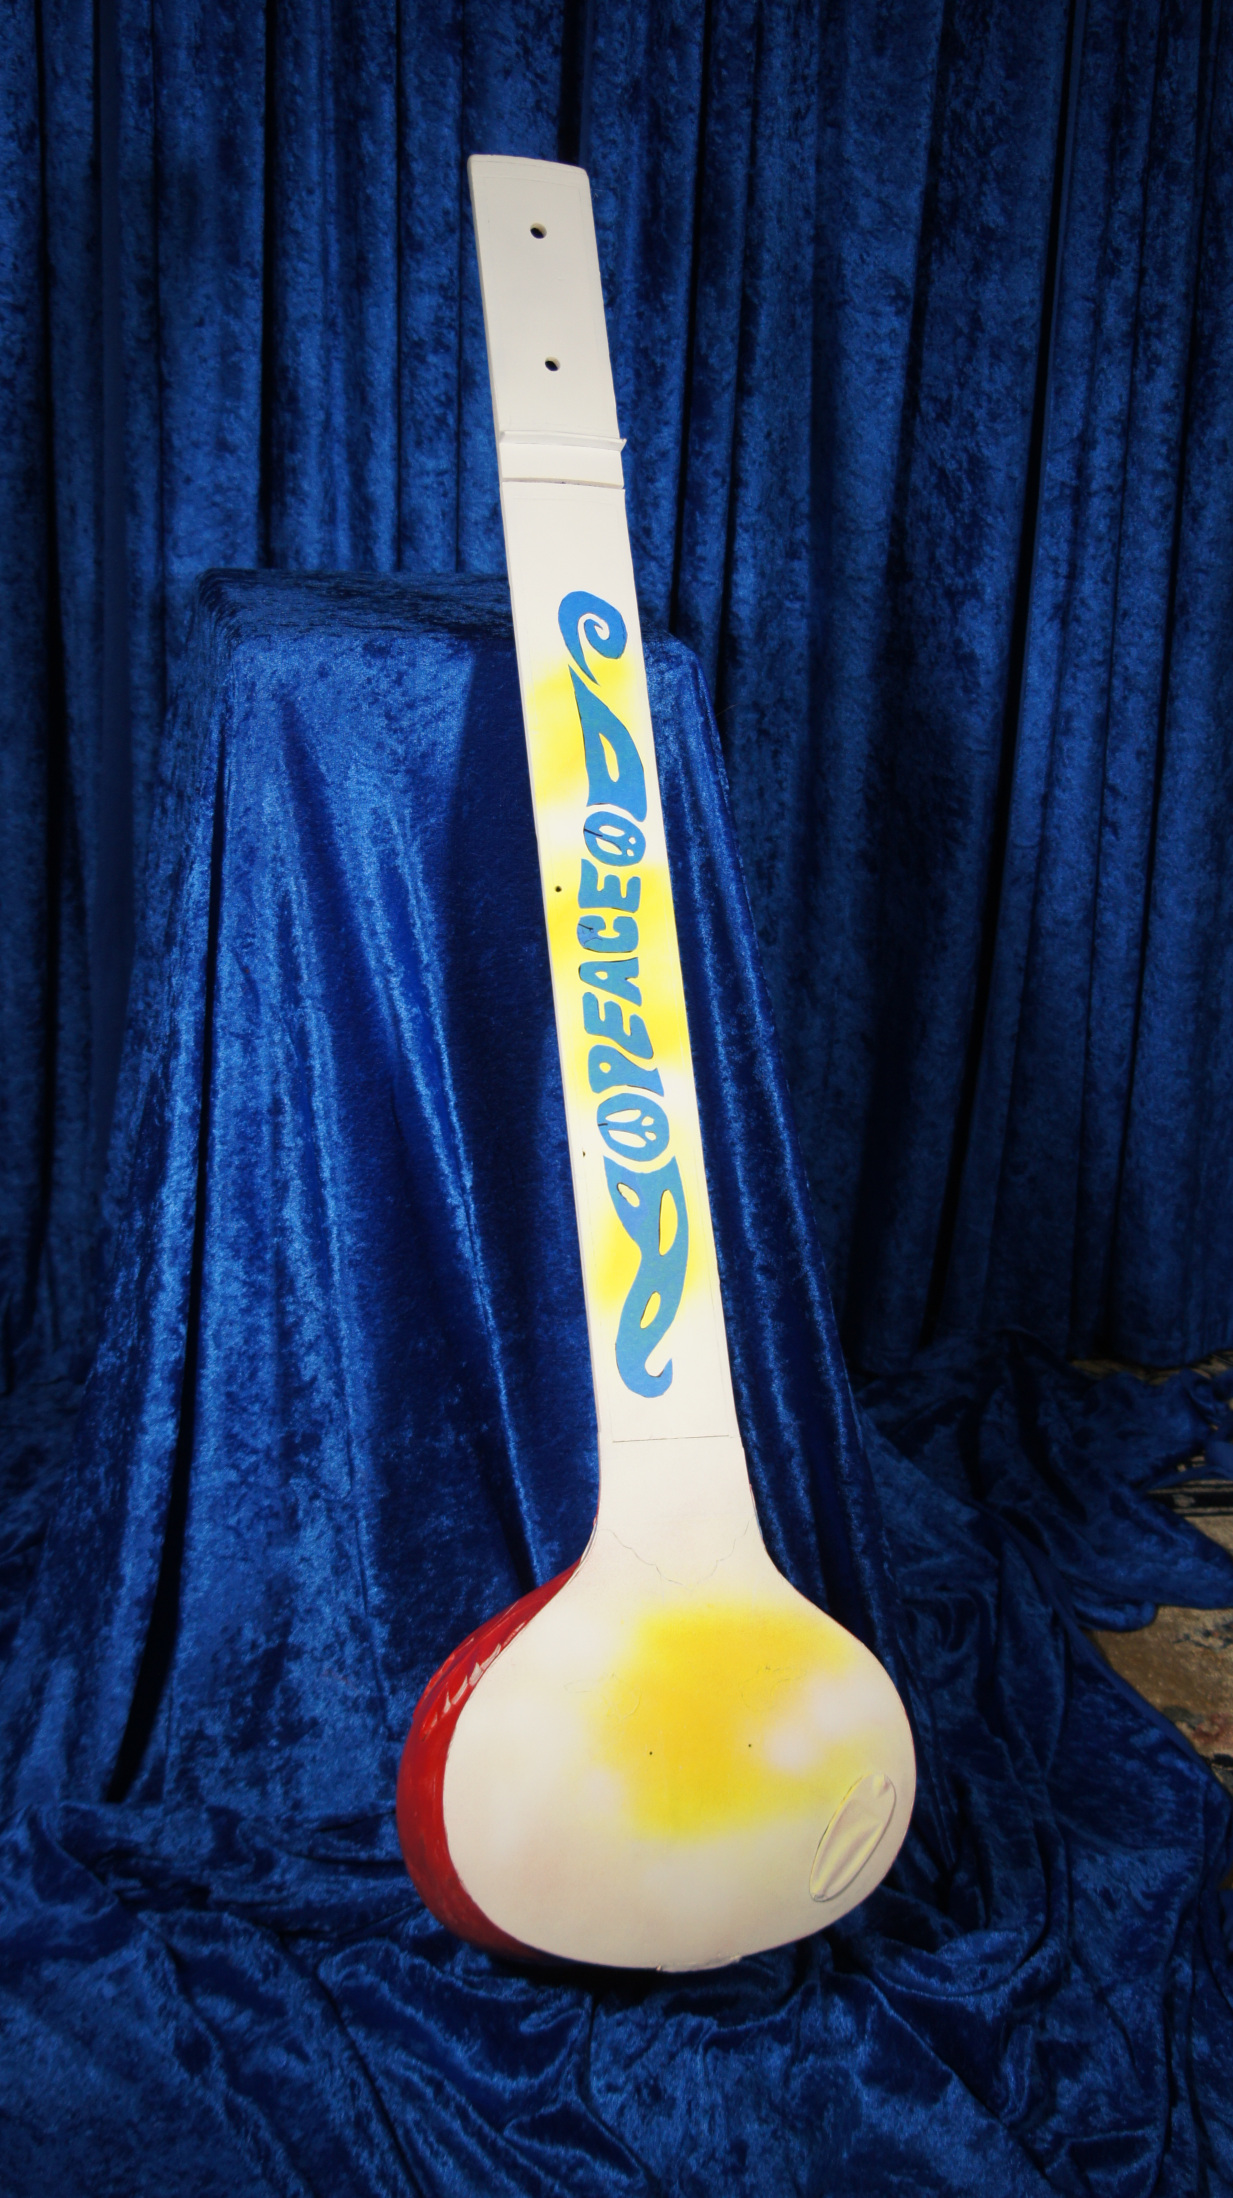
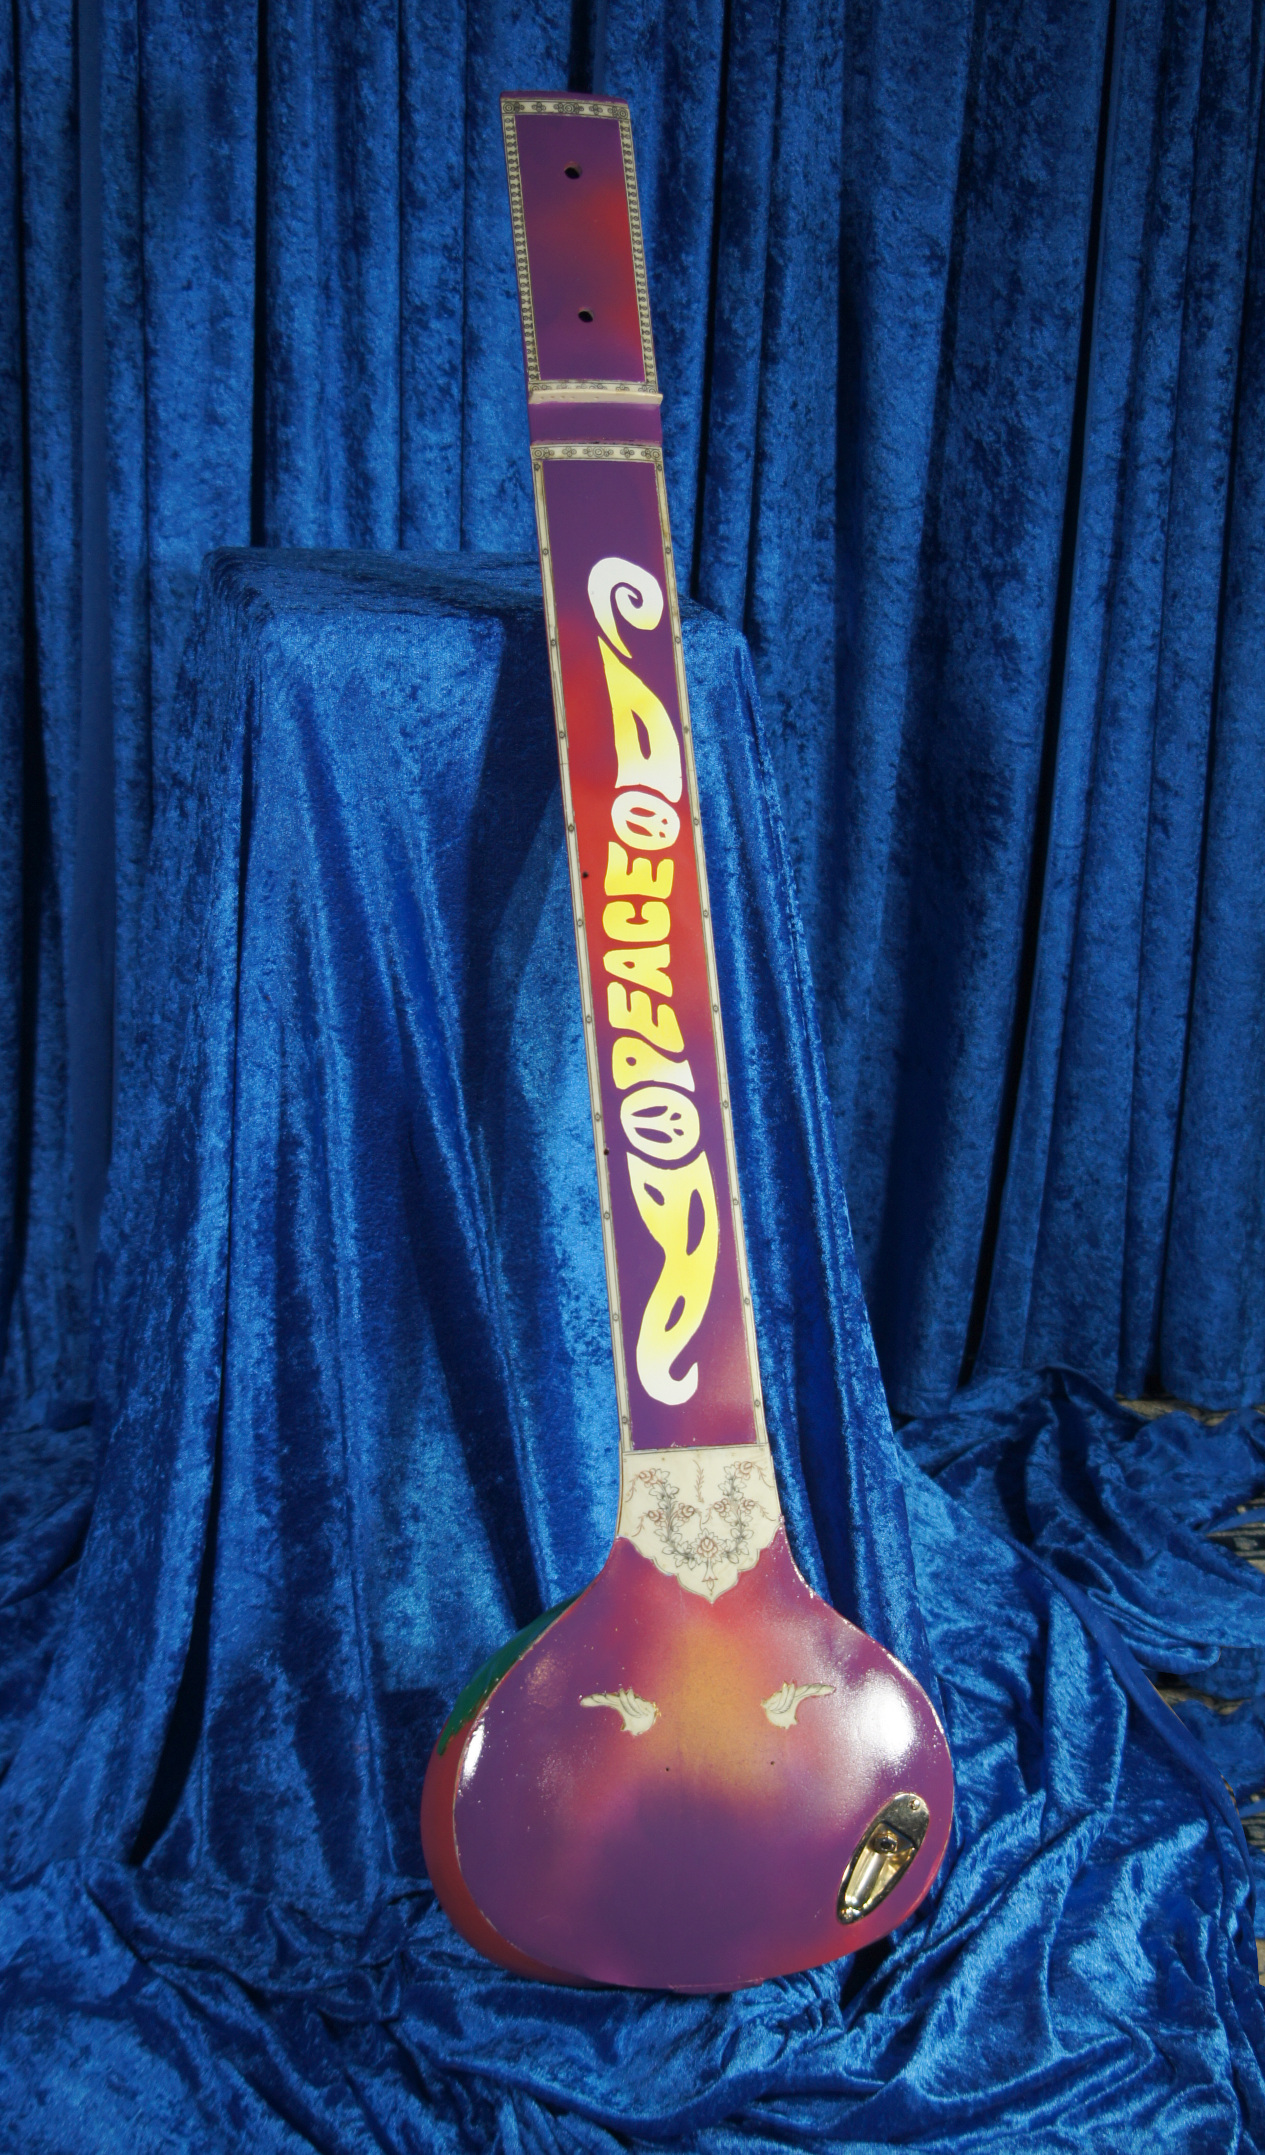
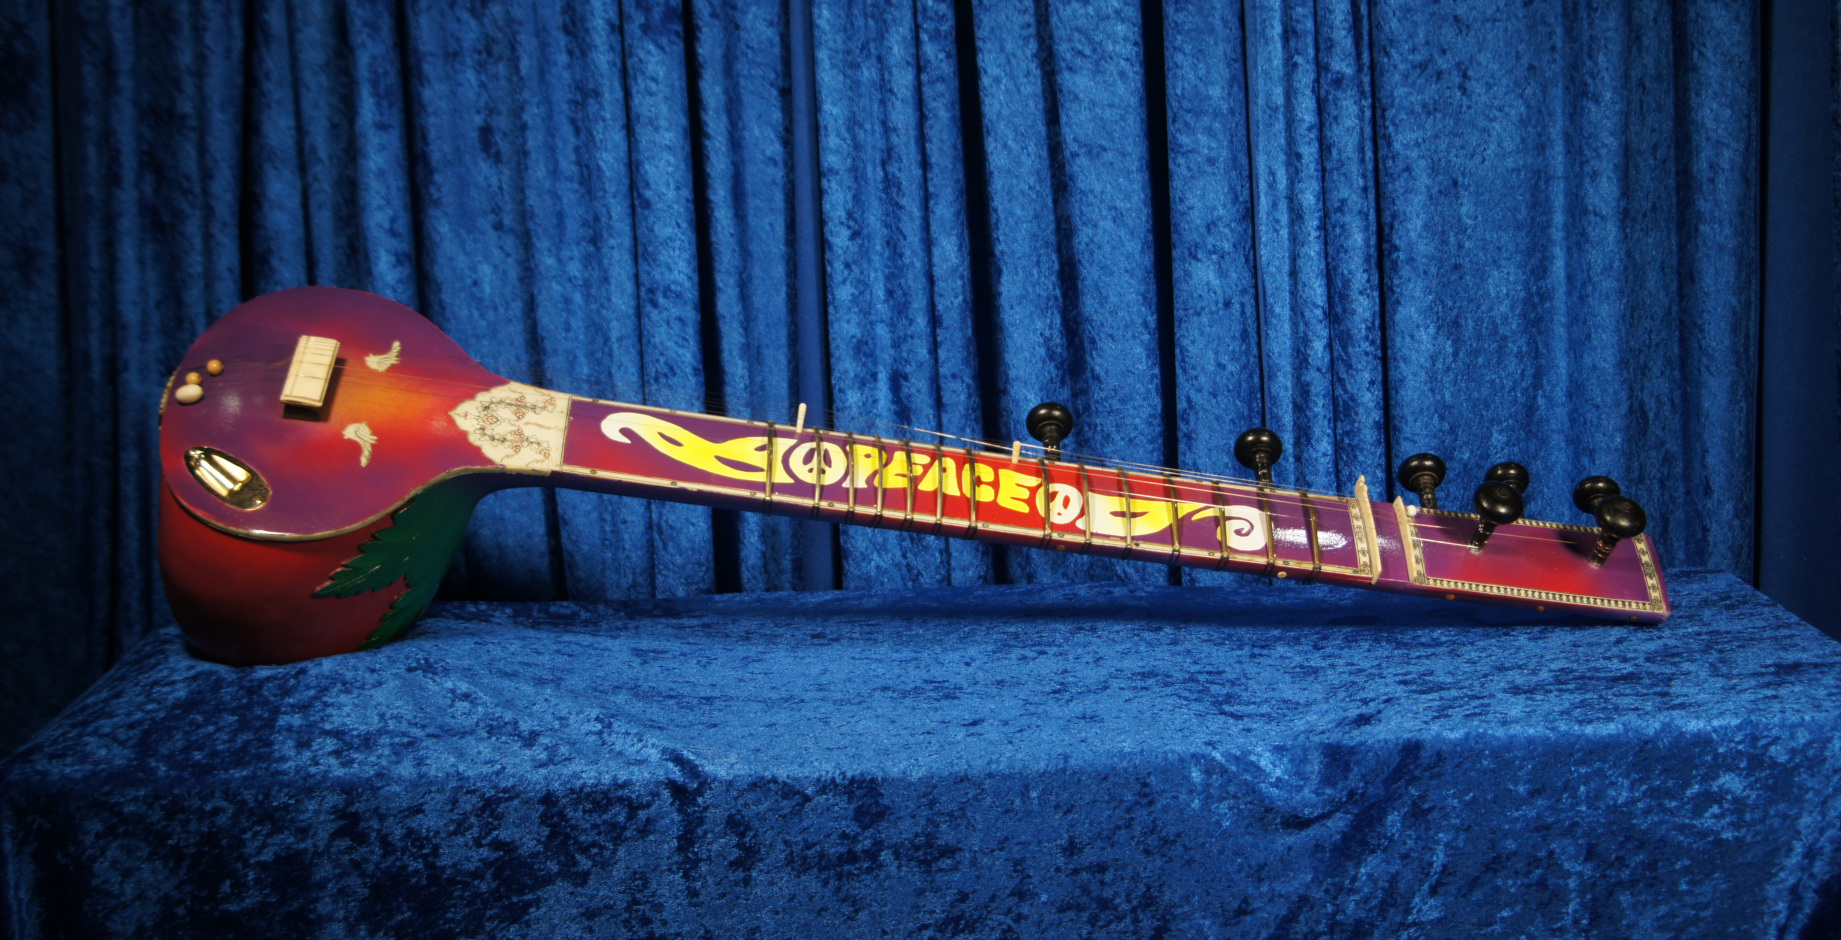
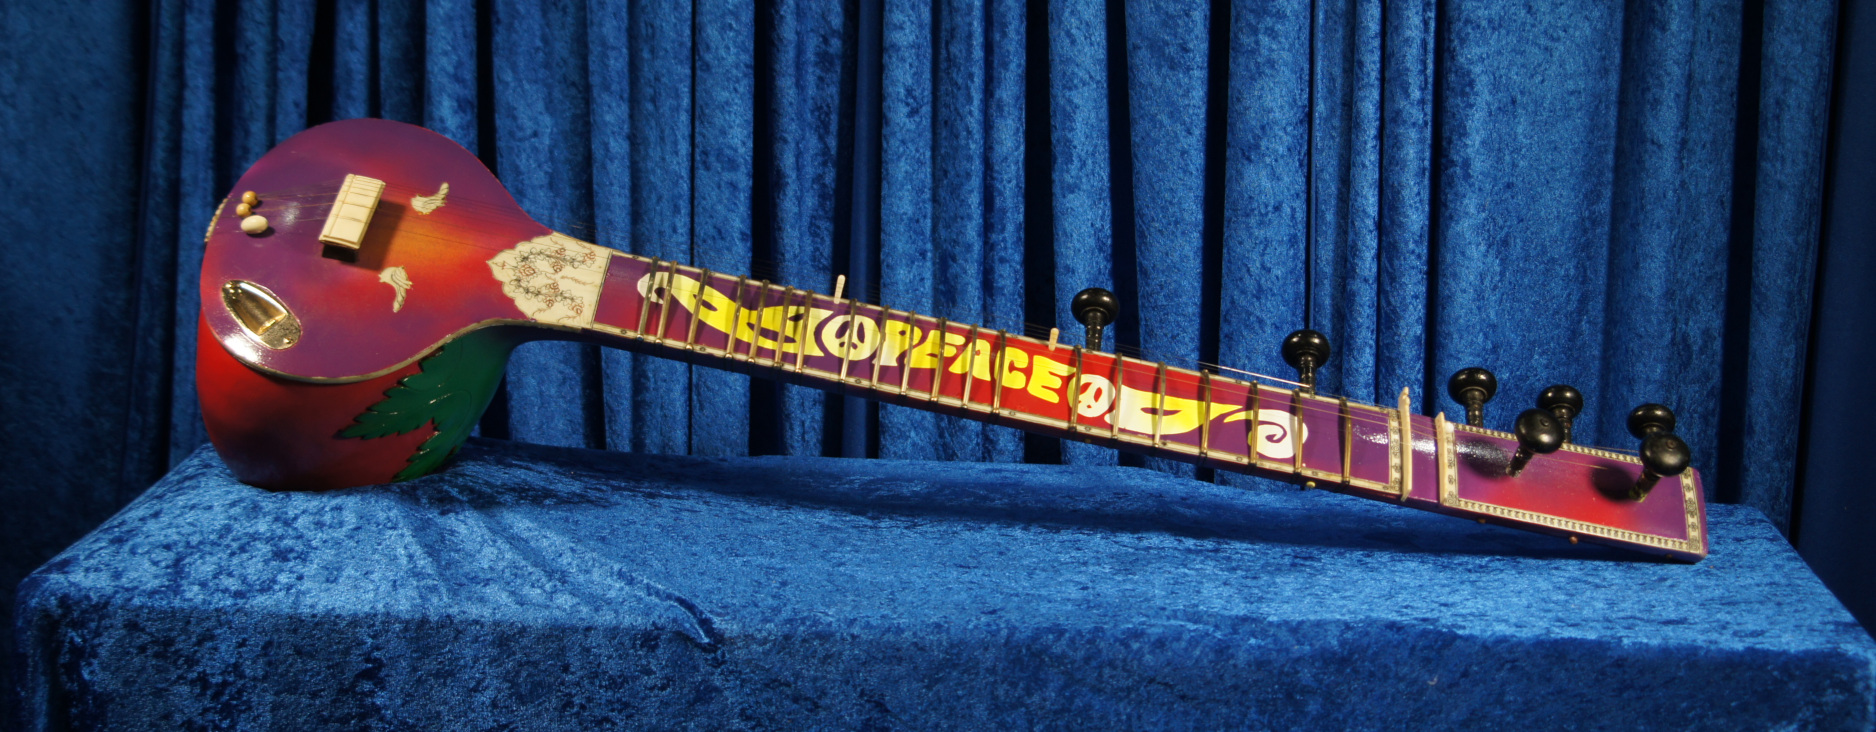
March 13, 2023 – Psychedelia
One will notice that there is a change in the title of this blog. It is now titled “Psychedelic Electric Sitar.”
Psychedelia is a 1960s aesthetic that is known for a very distinctive style. It is an aesthetic that is characterised by exaggerated colours. Themes and motifs swirl together in a phantasmagoria that is supposedly reminiscent of a hallucinogenic drug experience.
There seem to have emerged two schools of psychedelic art in the 1960s; one in Europe and another in the US.
The European school of psychedelia was dominated by a Dutch artistic collective known as “The Fool”. This collective, was composed of Simon Posthuma, Marijke Koger, Josje Leeger, and Barry Finch. A listing of their clients for artwork, clothing, and other artistic endeavours, reads like a who’s Who of 1960s pop culture. These include The Beatles, Eric Clapton, the Hollies, Procol Harum, The Incredible String Band, and a host of others.
.jpg)
Conversely, the American school of psychedelia was dominated by artists such as Peter Max, Wes Wilson, Bonnie Maclean and Rick Griffin. Much of their work centred around poster art.
So why am I doing this?
The answer is very simple. Chandra and myself are frequently called upon to sit in on covers of 1960s music; much of which uses the sitar. This particular instrument with its lack of sympathetic strings (tarafdar), is ideal for such situations, because we seldom are given much time between pieces to retune. A 60s electric psychedelic sitar motif fits the need perfectly. Furthermore, we already have three sitars and a surbahar of traditional decoration, so we really do not need another one of the same. Let me do something different.
March 14 – Masking and Priming
I took masking tape and covered up everything that I do not want painted.
I applied primer to the sitar. I do not really care about complete coverage. It is much better to make a light coat, let it dry, lightly sand the instrument, then repeat the process. Multiple thin coats applied in this process are much better than a single thick coat.
In an ideal world the surface preparation is compete before applying the primer. However in the real world, it is difficult to assess what the surface is going to be like until one applies the primer. Therefore I repeatedly go back to the filling and sanding stage until things are really satisfactory. This process will take several days
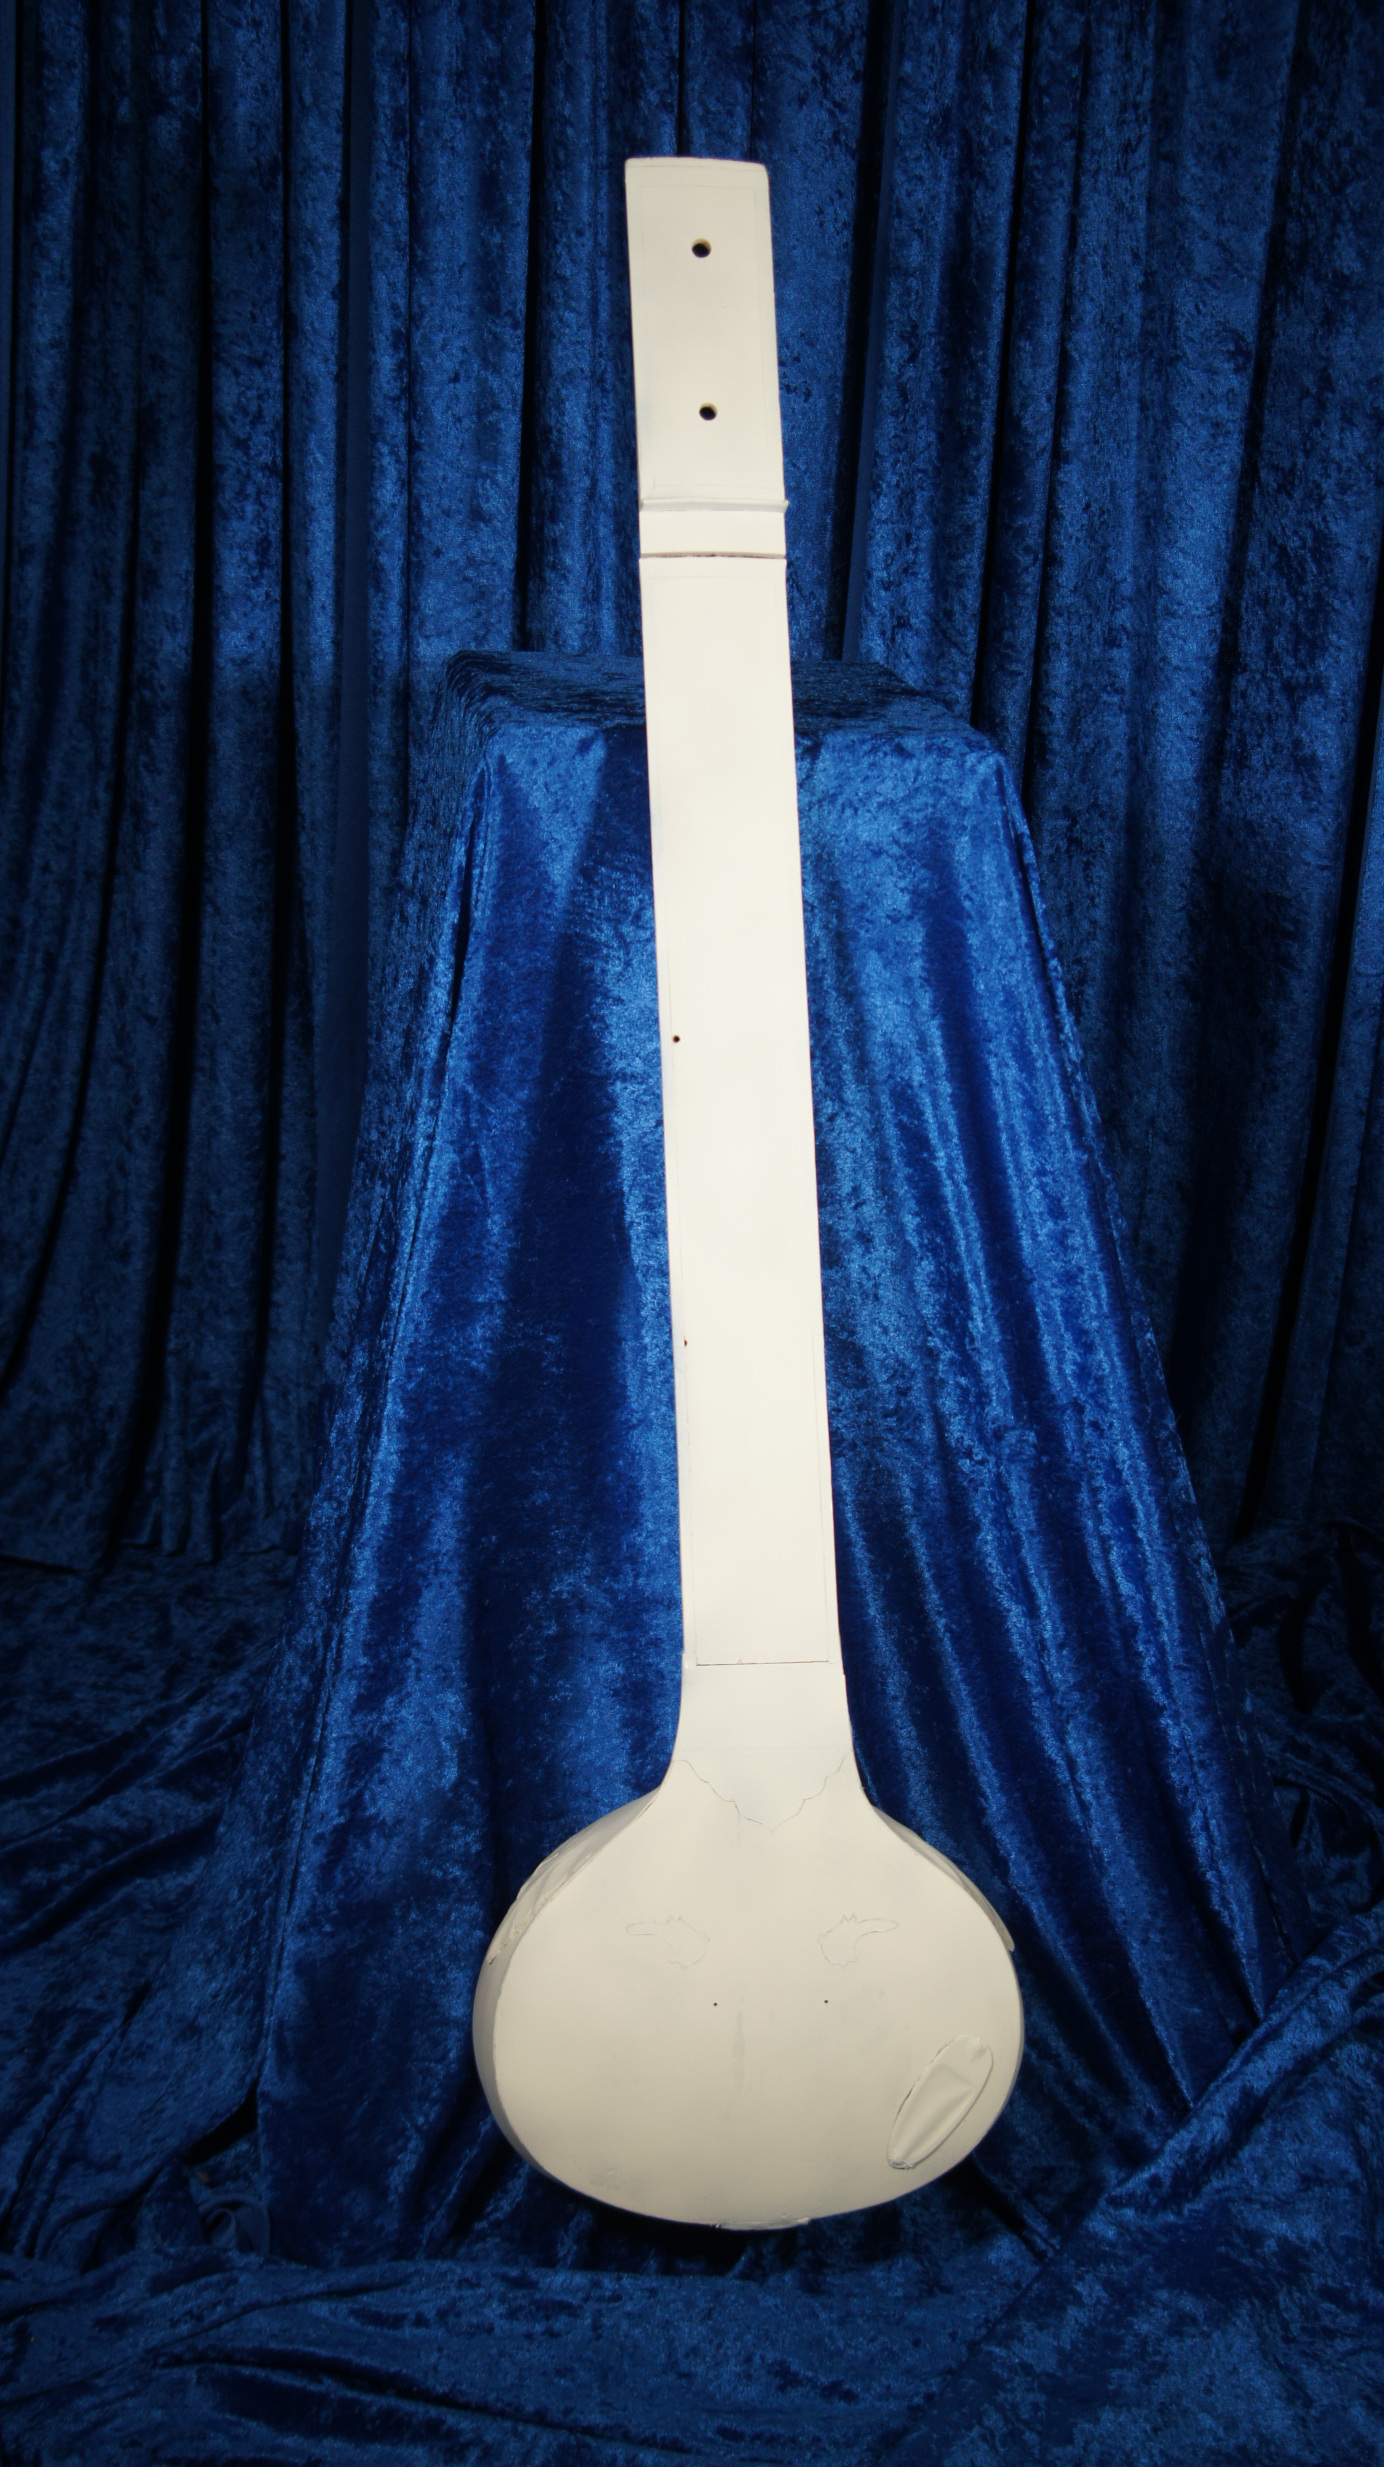
One should take note of one thing. I am applying primers and sealers to this instrument because it is already acoustically compromised. For most instruments, I would not consider applying them to any surface other than the kaddu.
March 15, 2023 – Source Impedance
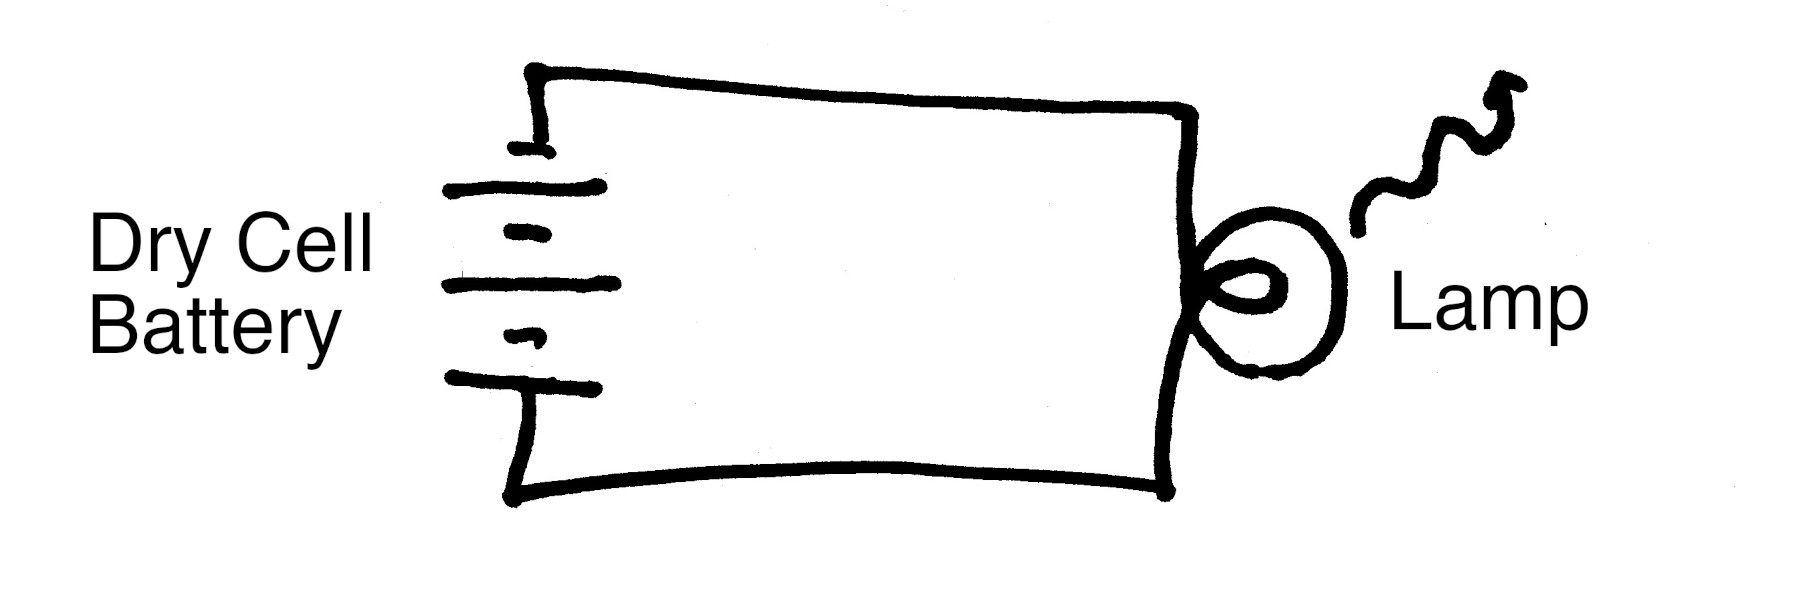
Let us return to the topic of source impedance for a bit. We will especially deal with the topic of source impedance as it relates to electrified stringed instruments. We will start with a simple gedankenexperiment.
Imagine that you have a dry cell connected to a small lamp. Not surprisingly, the lamp lights up.
Now let us put two lamps in parallel, such that it will now be drawing twice the current. In this situation, it is still likely that both lamps will illuminate.
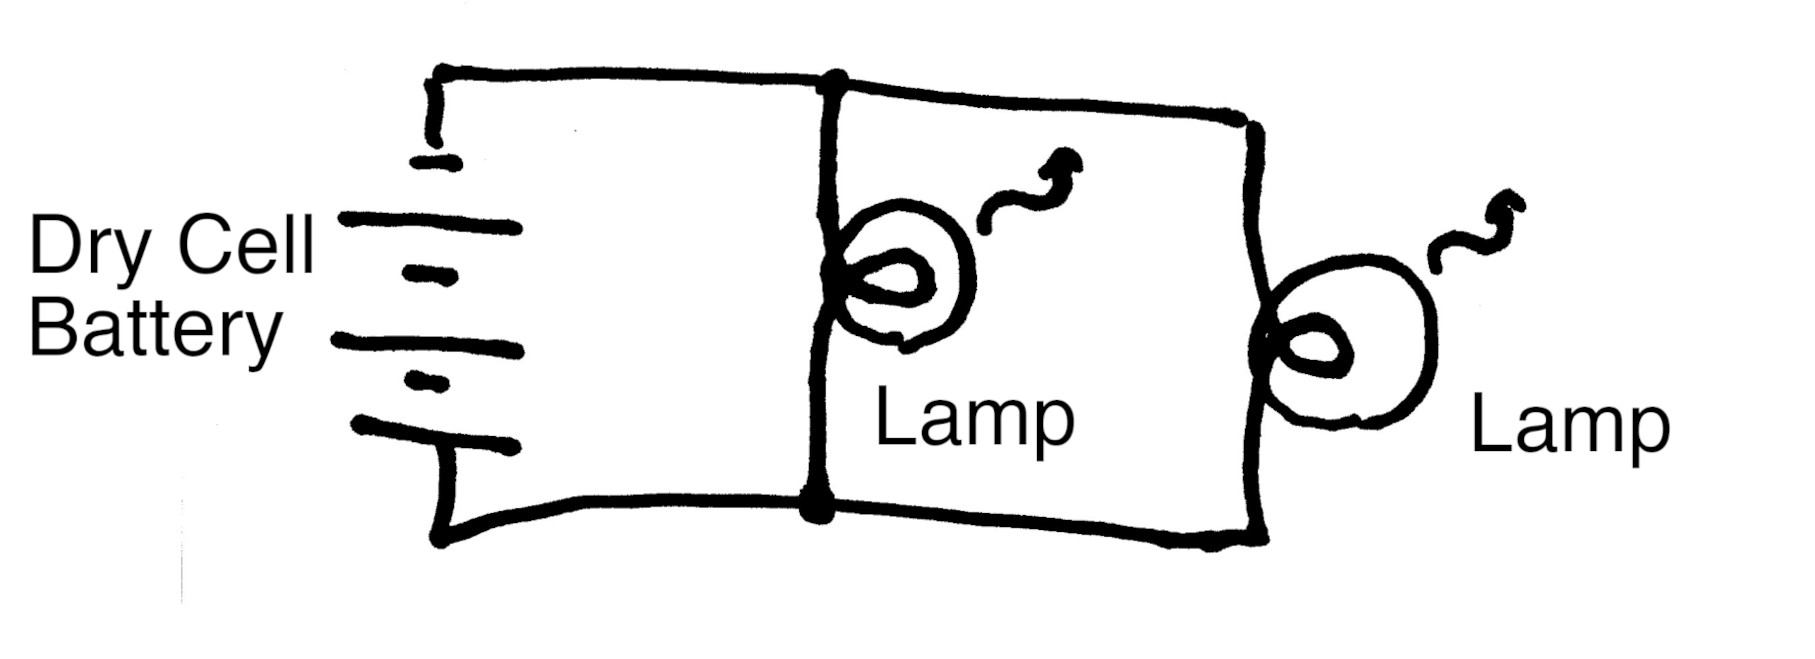
But as we keep adding lamps, at some point the demand for current becomes so great that the dry cell will not be able to handle it. At that point the lamps will not illuminate.
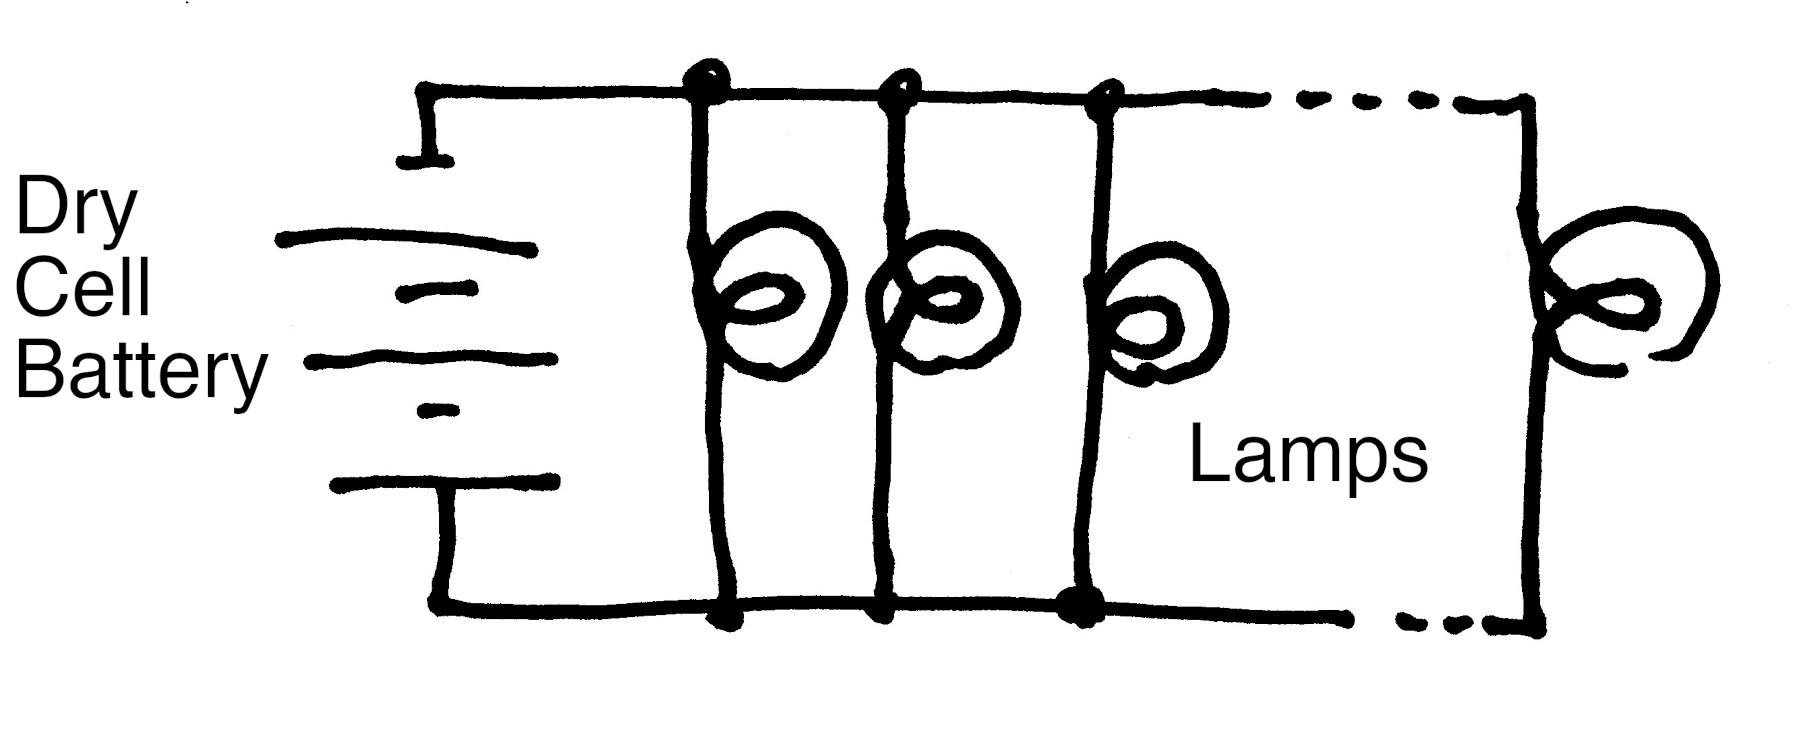
What is happening here is that our source of electricity (the dry cell) has an internal resistance. As one continues to make greater and greater demands upon the source, at some point this internal resistance becomes so significant that the dry cell is not able to handle it.
Every source of electricity has an internal source resistance.
You may be asking yourself, “Fine, that is source resistance; but what is source impedance?”
Impedance is nothing more than resistance to alternating current. Audio components have to deal with alternating currents of up to 20,000 times a second! For comparison, the wall current in your house is either 50 or 60 times a second. Electronic components behave differently at high frequencies compared to direct current. Since we are dealing with sound, we will be concerned with source impedance, rather than source resistance.
The next question concerns how lowering the source impedance reduces noise. This is a bit complicated, so let us refer to the schematic shown below:
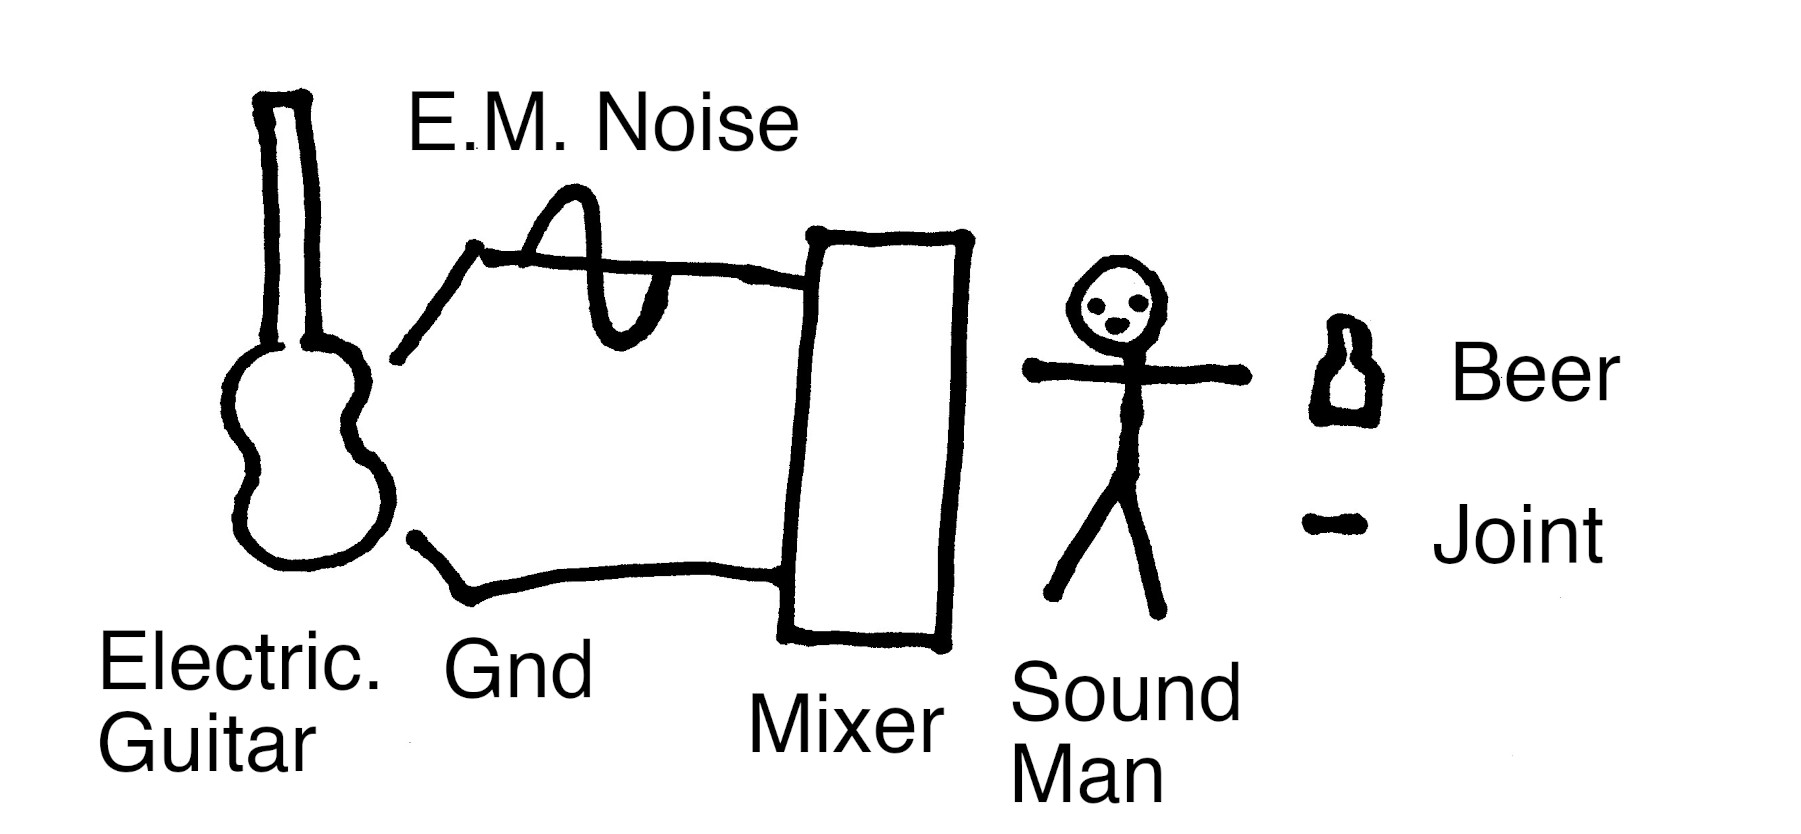
In the above diagram we see an electric guitar with instrument cable connected to a mixer, a sound man, and his two assistants. In this case, the instrument cable acts like a large antenna. It is sitting there on stage ready to pick up any electromagnetic signals in the area. (We can presume that no electromagnetic interference can be imposed upon the ground wire.)
In this last diagram, the sound man is not at all happy with the electromagnetic noise on the instrument cable.
There are three tried-and-true methods to make the soundman happy again:
- Reduce the noise on the instrument cable.
- Increase the beer
- Increase the weed
For the purposes of this blog, we will concentrate on first approach. Specifically, we will speak of using source impedance as a technique to reduce noise.
OK, we see that the instrument cable is acting like an antenna.
You may now be asking yourself. “If this is a giant antenna, then why doesn’t my local radio station come through?” Well the answer is that in some unfortunate situations, they do come through, and you can hear an AM broadcast coming through your system. But fortunately, stage equipment is designed to reject the high frequency radio signals which show up on the instrument cable, so it does not happen very often.
But there are other sources of electromagnetic interference which are not so easy to eliminate.
60/50 cycle hum is one example of difficult to eliminate electromagnetic interference. If one filters out hum by way of its frequency response, then one runs the risk of also filtering out the bass player (bass players don’t like that). Even in Indian music, since the cut-off in the frequency response is not very sharp, but rather a slope (known as “Q”), attempting to filter out this hum also cuts into the left hand drum of the tabla. So this approach has limited utility.
Other pesky sources of electromagnetic noise are the various clicks, pops, and hash noise that comes from high power equipment. Some of the most common sources are air conditioners. Removing this by means of filtering is impossible, because they occupy a very broad portion of the electromagnetic spectrum.
Therefore musicians have come up with a variety of ways of dealing with electromagnetic interference (noise) over the last hundred years.
Imagine a simple situation. If the instrument cable acts as an antenna, what happens if we simply short it to ground. If you take your electric guitar, sitar, or what-not, and short the cable to ground, I guarantee that all noise will disappear! Unfortunately so will your playing.
Although shorting the cable to ground is not a practical method of reducing electromagnetic interference, it does hint at another approach. If we can reduce the source impedance by using multiple transducers in parallel, it will retain a good signal level while partially shunting the noise to ground. This is the manner in which multiple transducers improve the signal-to-noise ratio.
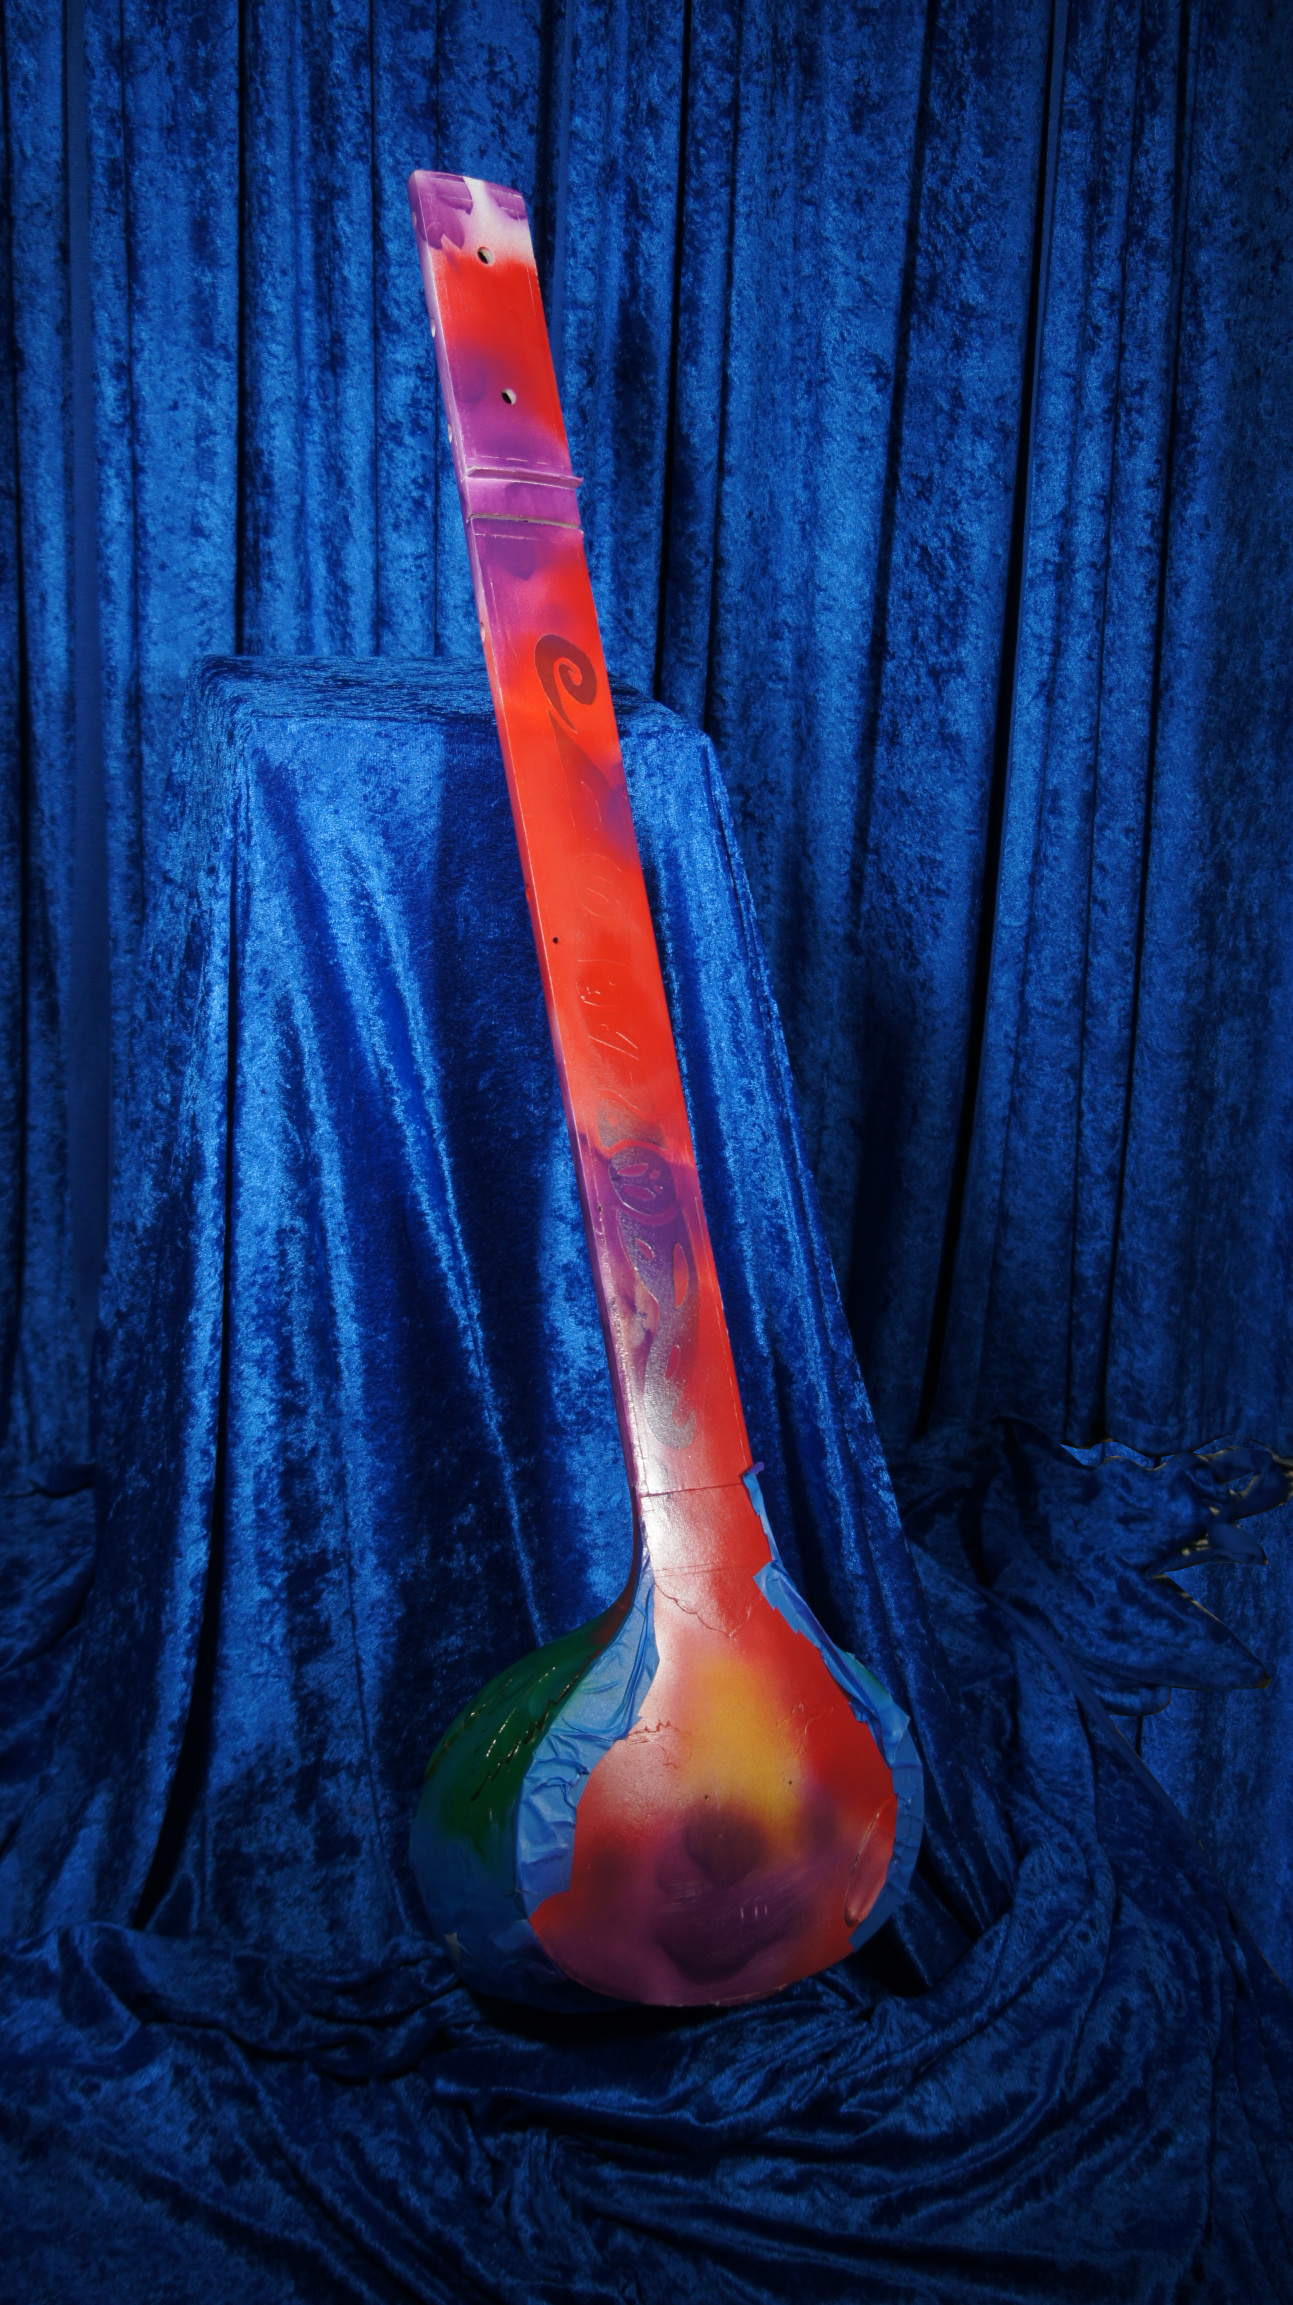
March 16, 2023 – Painting
I have started to paint the sitar. I am using cans of spray paint. As previously mentioned, I apply a thin coat of paint, lightly sand it, then repeat the process an indefinite number of times.

March 17, 2023 – More Masking
More masking done.
March 18, 2023 – Stochasticity and Determinism in Psychedelia
The sun was setting low as I pulled my bicycle up to the 1920s style two storied house. There was a gathering of people here in celebration of something. I have completely forgotten what it was in celebration of, but in the circle that I move in, it never required much of a reason.
Everywhere there was activity. There was a large Victorian styled front porch in which a band was playing. It was playing a variety of original rock/jazz fusion. Around fifty people were randomly going in and out of the house, yard, and spilling out onto the side-walk (footpath). Although there were people of all ages, the majority were in their mid 20s. A large number of them were graduate students at the local university. The celebratory atmosphere was augmented by a variety of recreational chemicals; legal and otherwise.
In the driveway was a car. Random people would come up to the car, grab a paintbrush, and begin to decorate it in whatever colour they fancied.
This was not San Francisco in the 1960s; this was Houston circa 2018. Yet here was a solid expression of an art-form and culture that existed decades before most of these people were even born.
This set me thinking about the aesthetic dynamics of what was going on here. As I am working on my psychedelic electric sitar, many of these thoughts are returning.
In any art-form there are two overall approaches one can take to obtain the final product. On one hand, there is a deterministic approach. This is a collection of tools and techniques which are geared toward very controlled and predictable results. On the other hand, there is a stochastic approach, which yields somewhat random and unpredictable results.
The collective endeavour of painting the car precluded the possibility of there being any kind of cohesive artistic vision. It was a collective artistic expression that was an extreme example of the random quality of stochasticity.
The stochastic elements of my sitar are provided by over-spraying different colours. This produces an interesting, but unpredictable gradient between them.
In contrast, there is a wholesome degree of determinism. This shows up in preplanned hard edges which are obtained by masking.
A good work of psychedelia will be a proper balance of stochastic and deterministic approaches.
Will I attain such a balance?
I don’t know.
March 19, 2023 – Still More Masking and Painting
March 20, 2023 – Krylon
Krylon paint is TERRIBLE. Its coverage is atrocious, it runs terribly. Furthermore, it is the only paint I have seen that will fester when applied to itself. It is clear that I will lose several days of work just from using this horrible stuff.
March 21, 2023 – Removed Masking
| Are you interested in a secular approach to teaching Indian music. |
|---|
Indian music is traditional taught in a fashion that is linked to Hindu world views. But there are situations, often in schools, where this approach may not be the best. In such situations The Music of South Asia may be the best resource for you.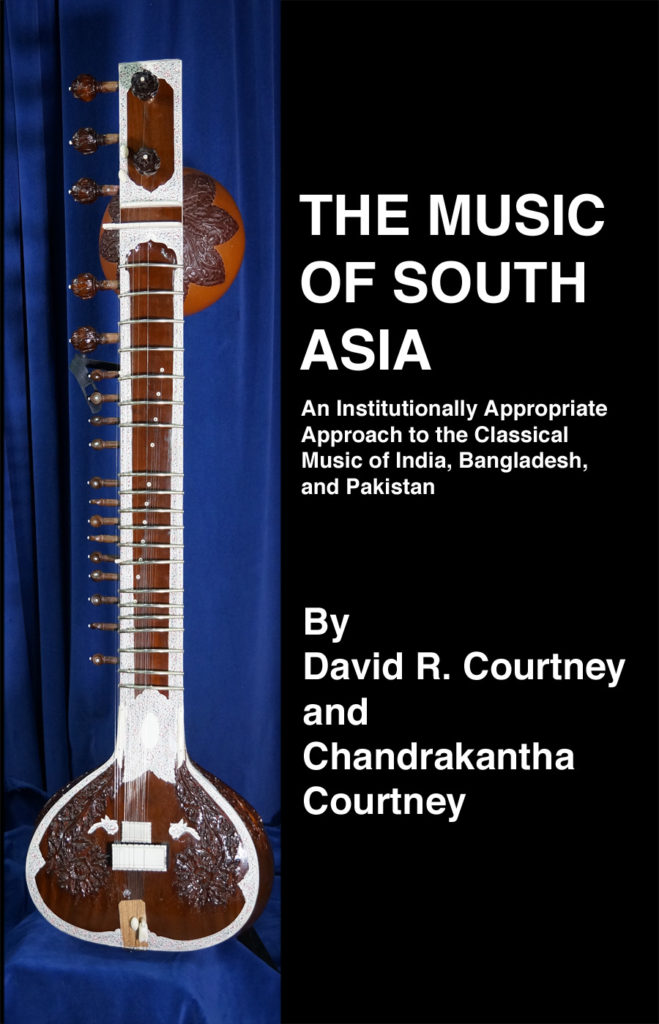 |
March 22, 2023 – Touching Up / Texas A&M
I was just doing some touch-ups for the sitar. The process of masking was pretty good, but there were a few spots that needed attending to.
This took several hours. The work was tedious, but it really did not require a lot of attention. Consequently, my mind wandered.
As I was working on the sitar, memories of me building a tanpura fifty years ago kept coming back to me. These memories became especially powerful as the result of a small day trip I made a few days ago.
On Sunday, just a few days ago, I went to Texas A&M University. I tagged along with a friend who was taking his son back to school after spring break. By some chance of fate, he is in Dunn Hall, the same dormitory in which I spent my freshman year, exactly half a century ago (fall 1972-spring 1973).
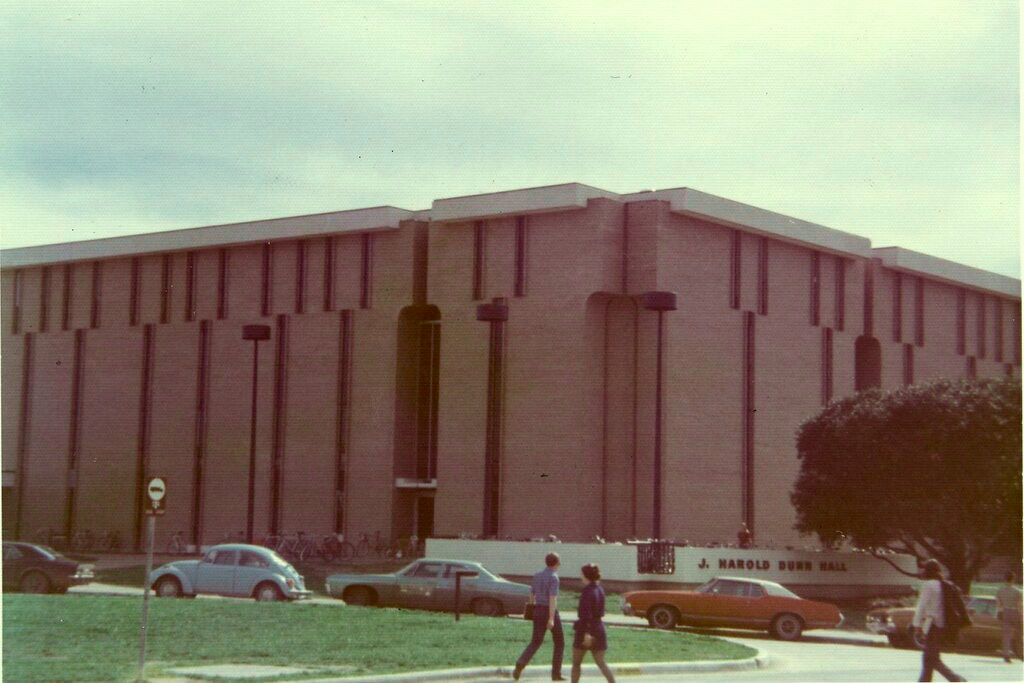
Fifty years ago today, I would have spent my time sitting outside Dunn Hall working on my tanpura. This is something that I have thought a lot about while working on this project.
My freshman year defined who I am today. This in itself is a very normal thing; but in my case it defined things in a negative fashion. I arranged my life to be diametrically opposite of what it was at that time.
There were a number of stressors which made my freshman year the beginning of the most difficult and unhappy period of my life.
On the surface, things should have been very good. I did not have the burden of student loans like many of today’s students do. I was interested in my subject. The university had an excellent reputation, and I had a steady girlfriend. Everything should have been great; but they were not.
Let me begin with the Texas A&M. It has always had good reputation academically; but it has a very disturbing culture. It has a long history of glorifying the most ignoble aspects of American society (e.g., militarism). It also glorifies aspects of American culture which may be harmless, but I absolutely cannot stand (e.g., football). Furthermore, it has a very long history of honouring some of the worst people the US has ever produced (e.g., Lowry Mays, George H.W. Bush). The University’s regressive ethos chafed me to no end. I felt totally out of place, and this was a great source of stress.
Another source of stress was bioengineering. It was a subject that I had a tremendous interest in, but had never actually considered the lifestyle that went along with it. As I progressed through my studies, I was looking ahead to a life where I would have 1.3 wives 2.5 kids, a dog, and a house in the suburbs. I would be an engineer for 15 years, then in sales and management for 15 years. The suffocating conventionality of the life ahead of me was as abhorrent as a condemned man’s impending execution.
But the biggest problem was my girlfriend; her name was Karen McMaster. She was a beautiful young girl whose father was British and her mother was American. We had been going together for about two years. This should have been a source of great happiness for me, but it was actually a source of extreme stress.

The problem was that Karen was rapidly going blind. My feelings of helplessness were overpowering. I pretended that it didn’t bother me, and that it was just “part of life”. But the more that I tried to suppress the stress, the worse things became.
My response to these various stressors was one of escapism. This escapism centred around Indian music. Why Indian music? The answer simply is that it was as remote from my then condition as was humanly possible.
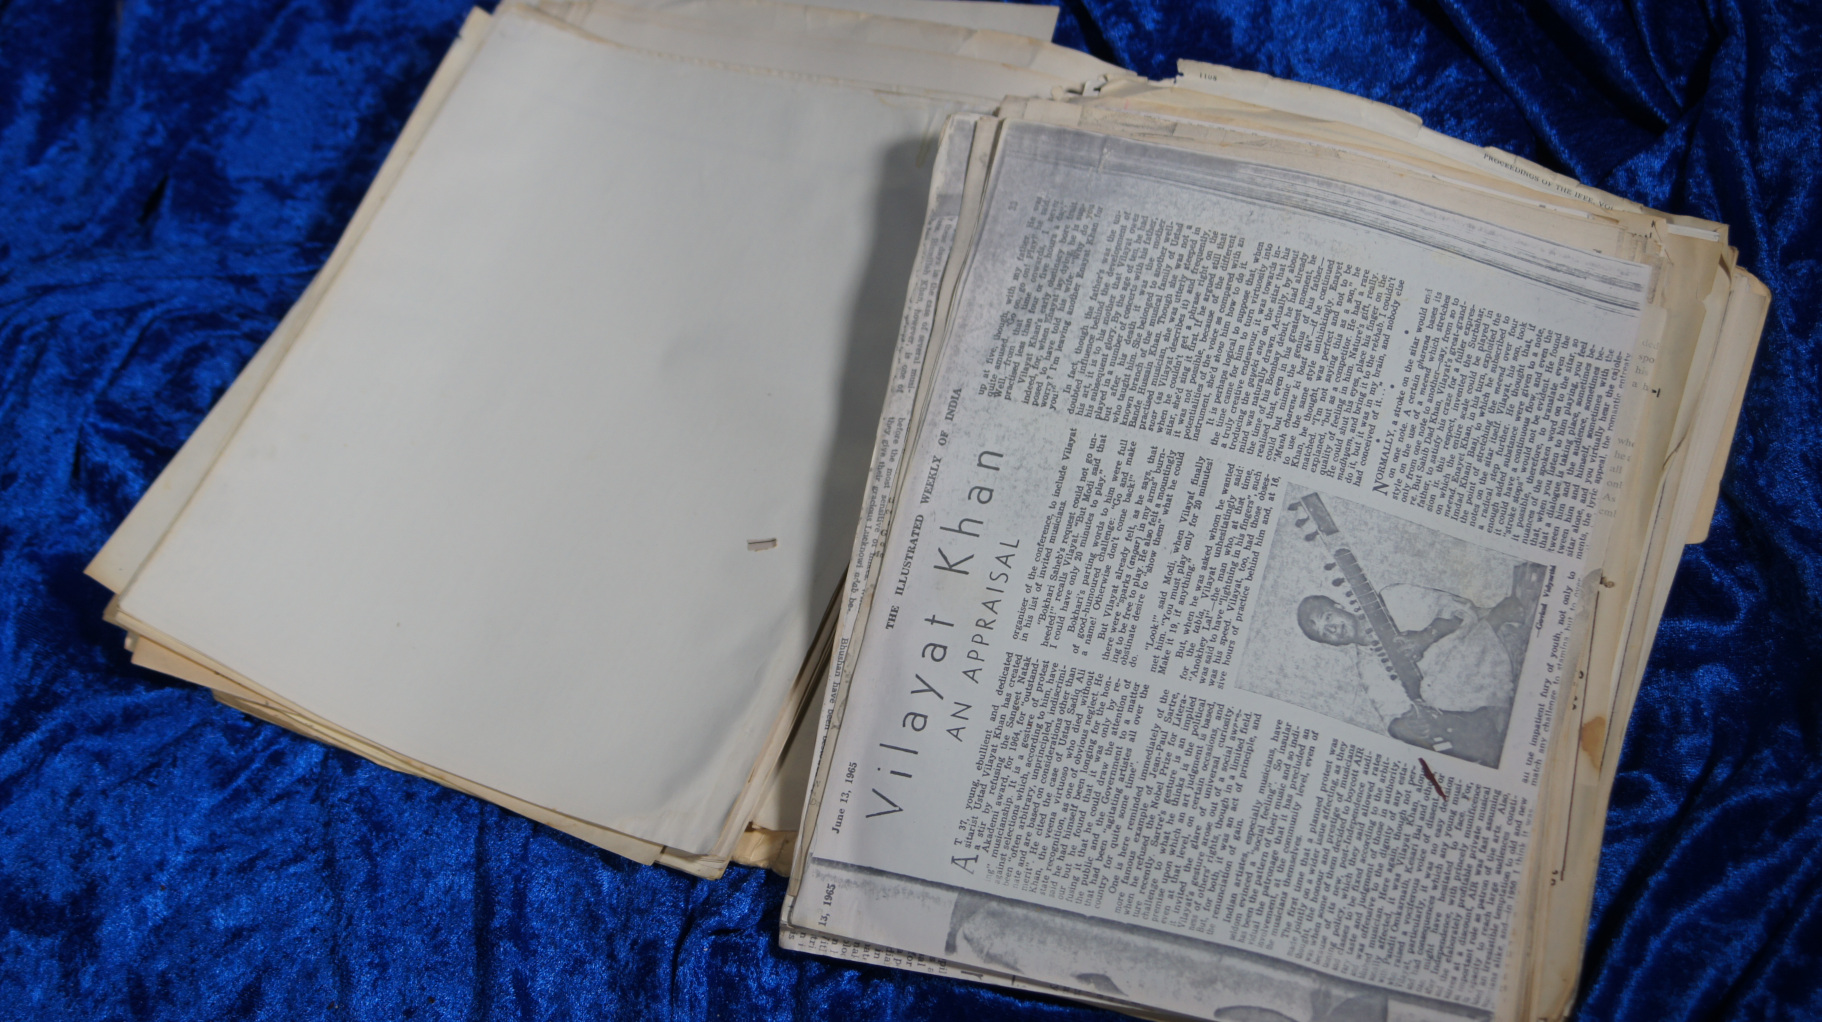
This escapism took two forms. On one hand, I would spend the days in the library pouring over old copies of Illustrated Weekly of India. Any time I ran across any article that was relevant to Indian music, I would photocopy it. But more relevant to this blog, was the time that I spent building a tanpura. For this, I spent a lot of time outside Dunn Hall working on the instrument.
But the escapism did nothing to deal with the stressors. I felt like an animal that was caught in a trap. As such, I would have gladly gnawed off my own leg just to escape.
Things could no longer continue.
I did what I had to do. I got on a train headed for San Francisco to enrol in the Ali Akbar College of Music.
That evening on the railway platform was one of those few truly pivotal moments of my life. I left my family, my home, and the university. I left my entire previous life for a new life, just to get away from the stressors. When I left Karen on the railway platform, I never saw her again; our relationship did not survive the physical separation.
Karen’s health continued to decline, and she died a few years later at the age of 27.
That is how my freshman year defined my life in a totally negative fashion. An Indian musician is NOT a bioengineer. Going back and forth between India and Houston is NOT College Station. I do NOT associate with people who glorify greed, militarism, or other ignoble aspects of American life. More importantly, Chandra is NOT Karen McMaster.
And that is exactly the way that I want it.
March 23, 2023 – Shellac
I applied shellac.
March 24, 2023 – Testing the Impedance
We have discussed impedance. We discussed what it is, and how important it is to getting a good signal-to-noise ratio.
We did not discuss how it also impacts the quality of sound. This entails going into such arcane concepts as the input impedance of one’s amplifier/mixer, capacitance of the cables, and a myriad of other concerns which are both highly technical, and beyond the scope of this blog.
However, we do need to talk about how to measure our impedance.
One’s first impression would be that measuring impedance requires some specialised electronic equipment. Fortunately, this is not the case. Although measuring the source impedance (referred to a Zsource) of our electric sitar is not intuitive, once we see how to do it, it is embarrassingly simple.
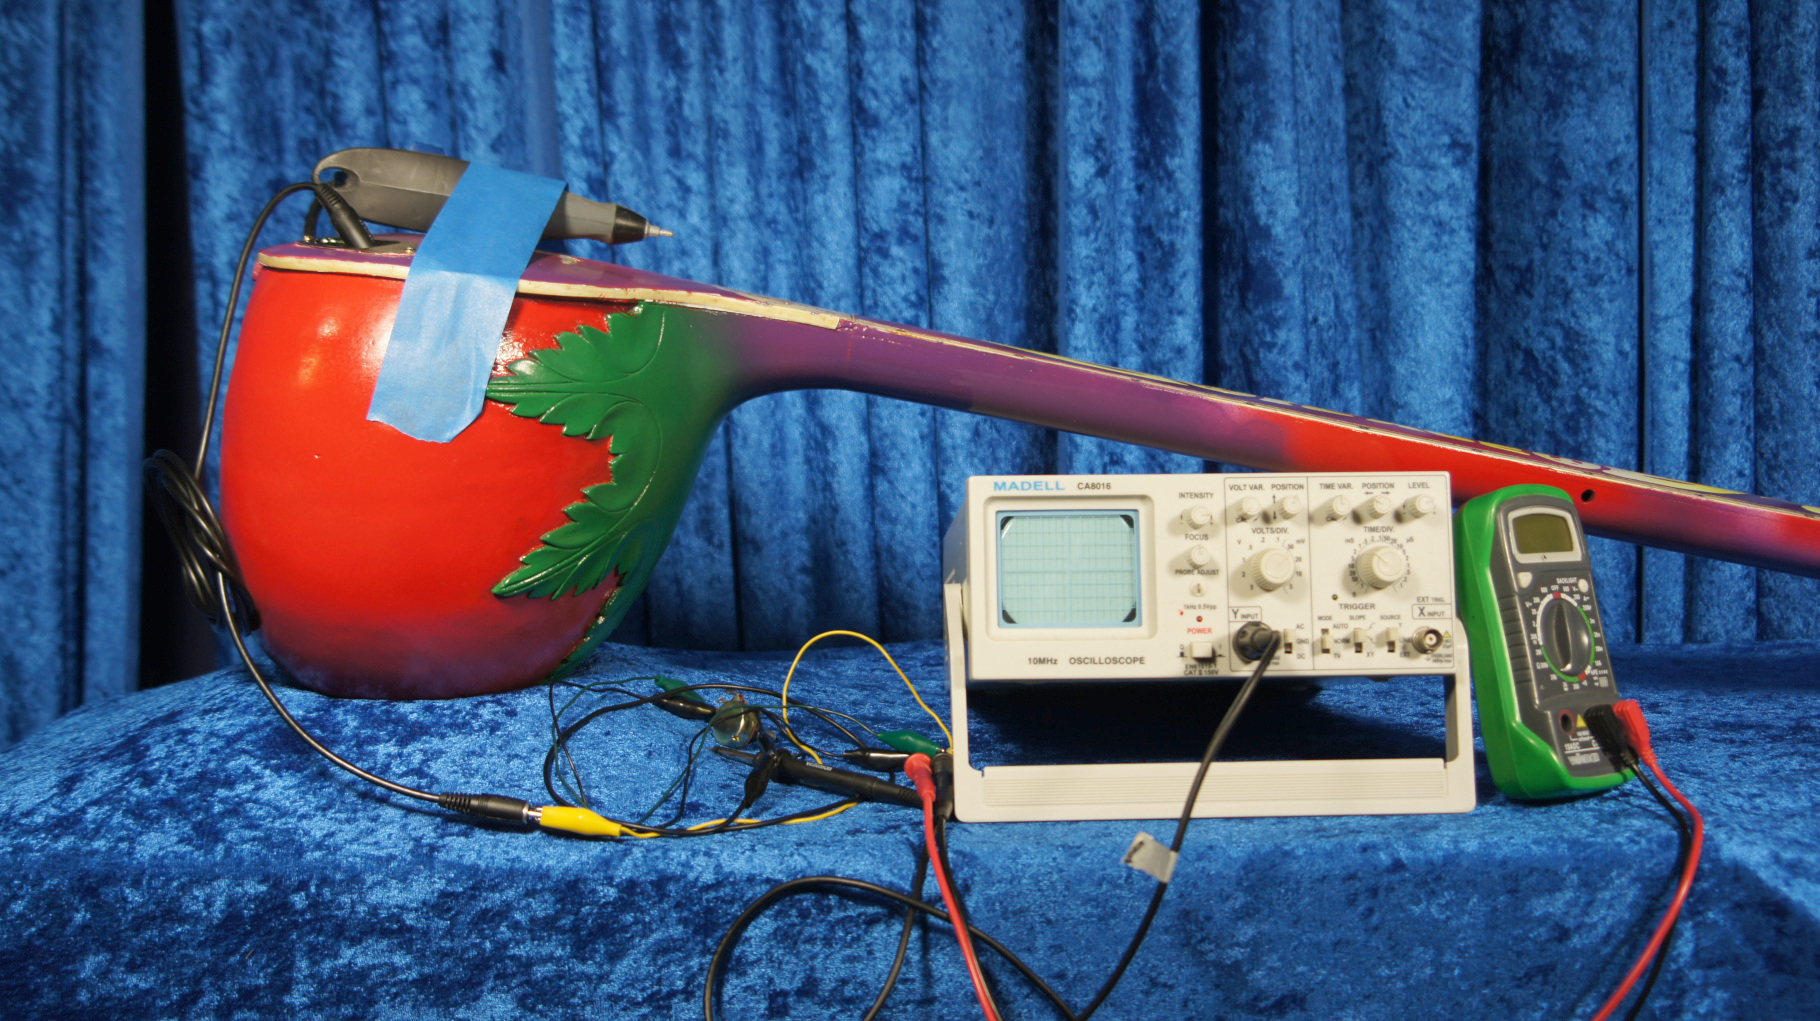
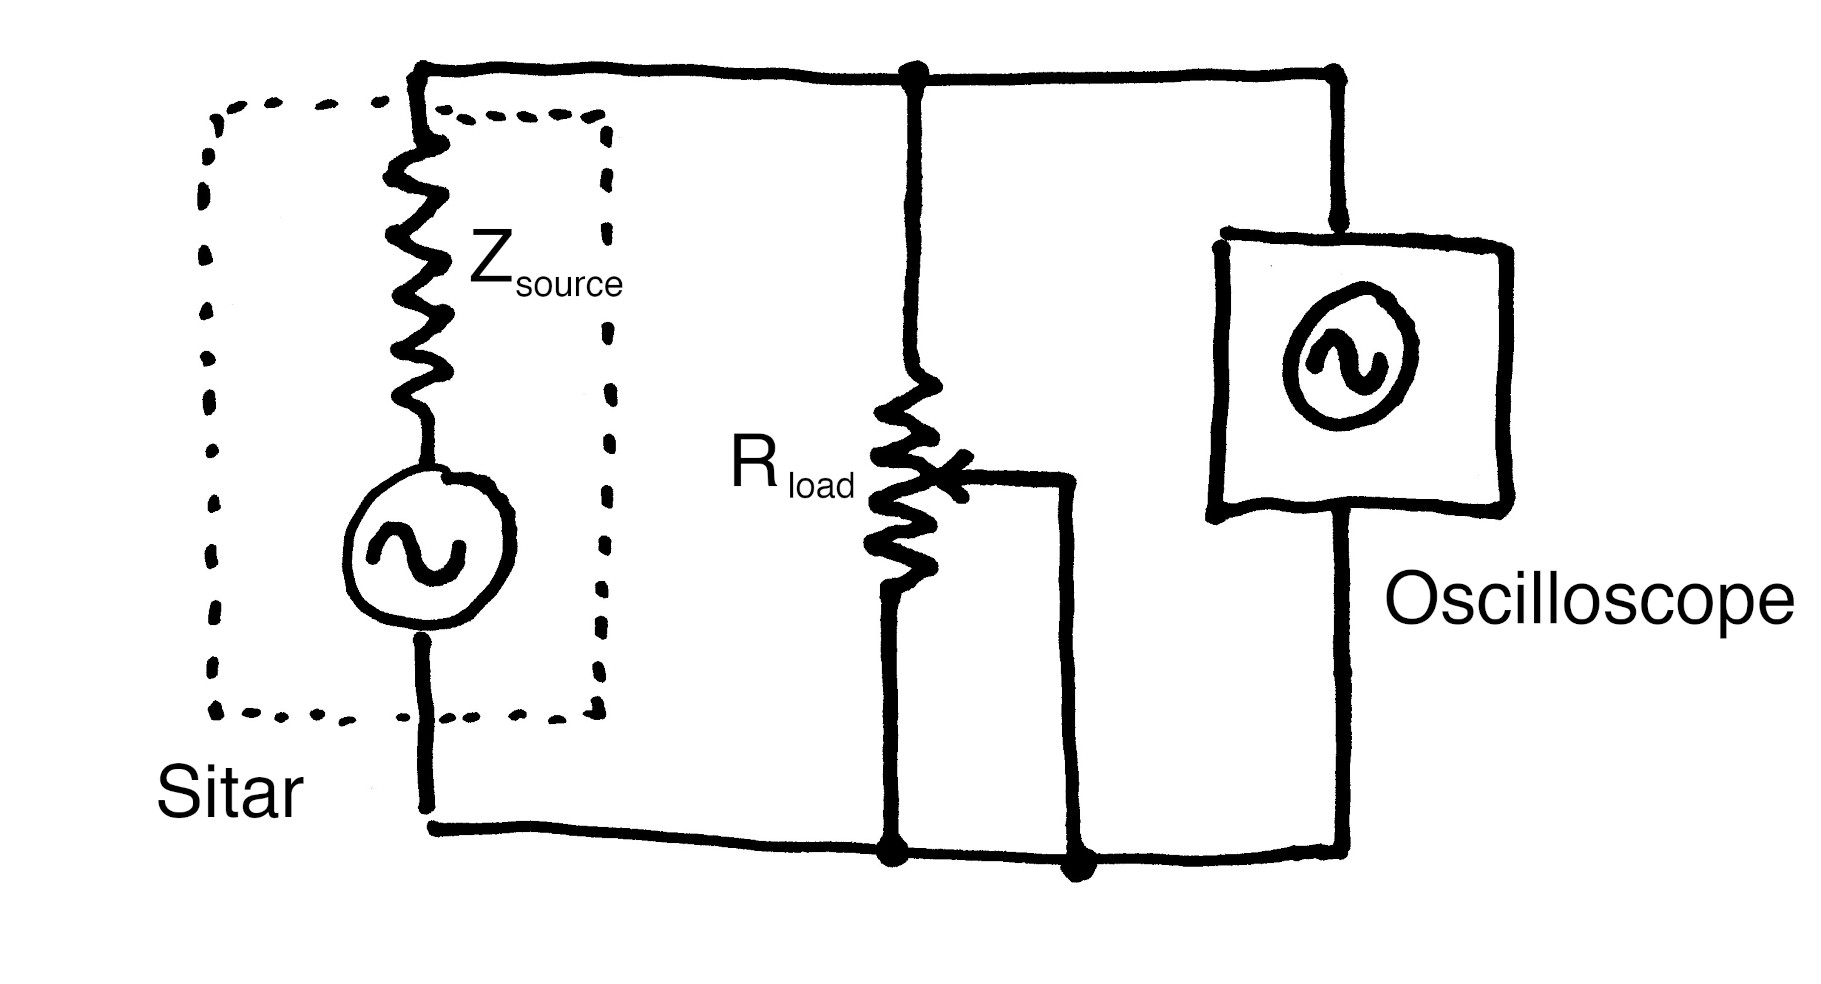
The equipment for measuring the impedance is shown below. It consists of nothing more than a potentiometer, an ohm-meter, an oscilloscope, our electric sitar, an etching pin, and a variety of alligator clip jumper cables.
We need to set everything up as shown below:
Let us now make some measurements.
Measuring the impedance is a three step process:
- Measure a signal without any load
- Adjust the load until the signal drops to 1/2 its original value
- Measure the load
Let us go over these three steps in greater detail.
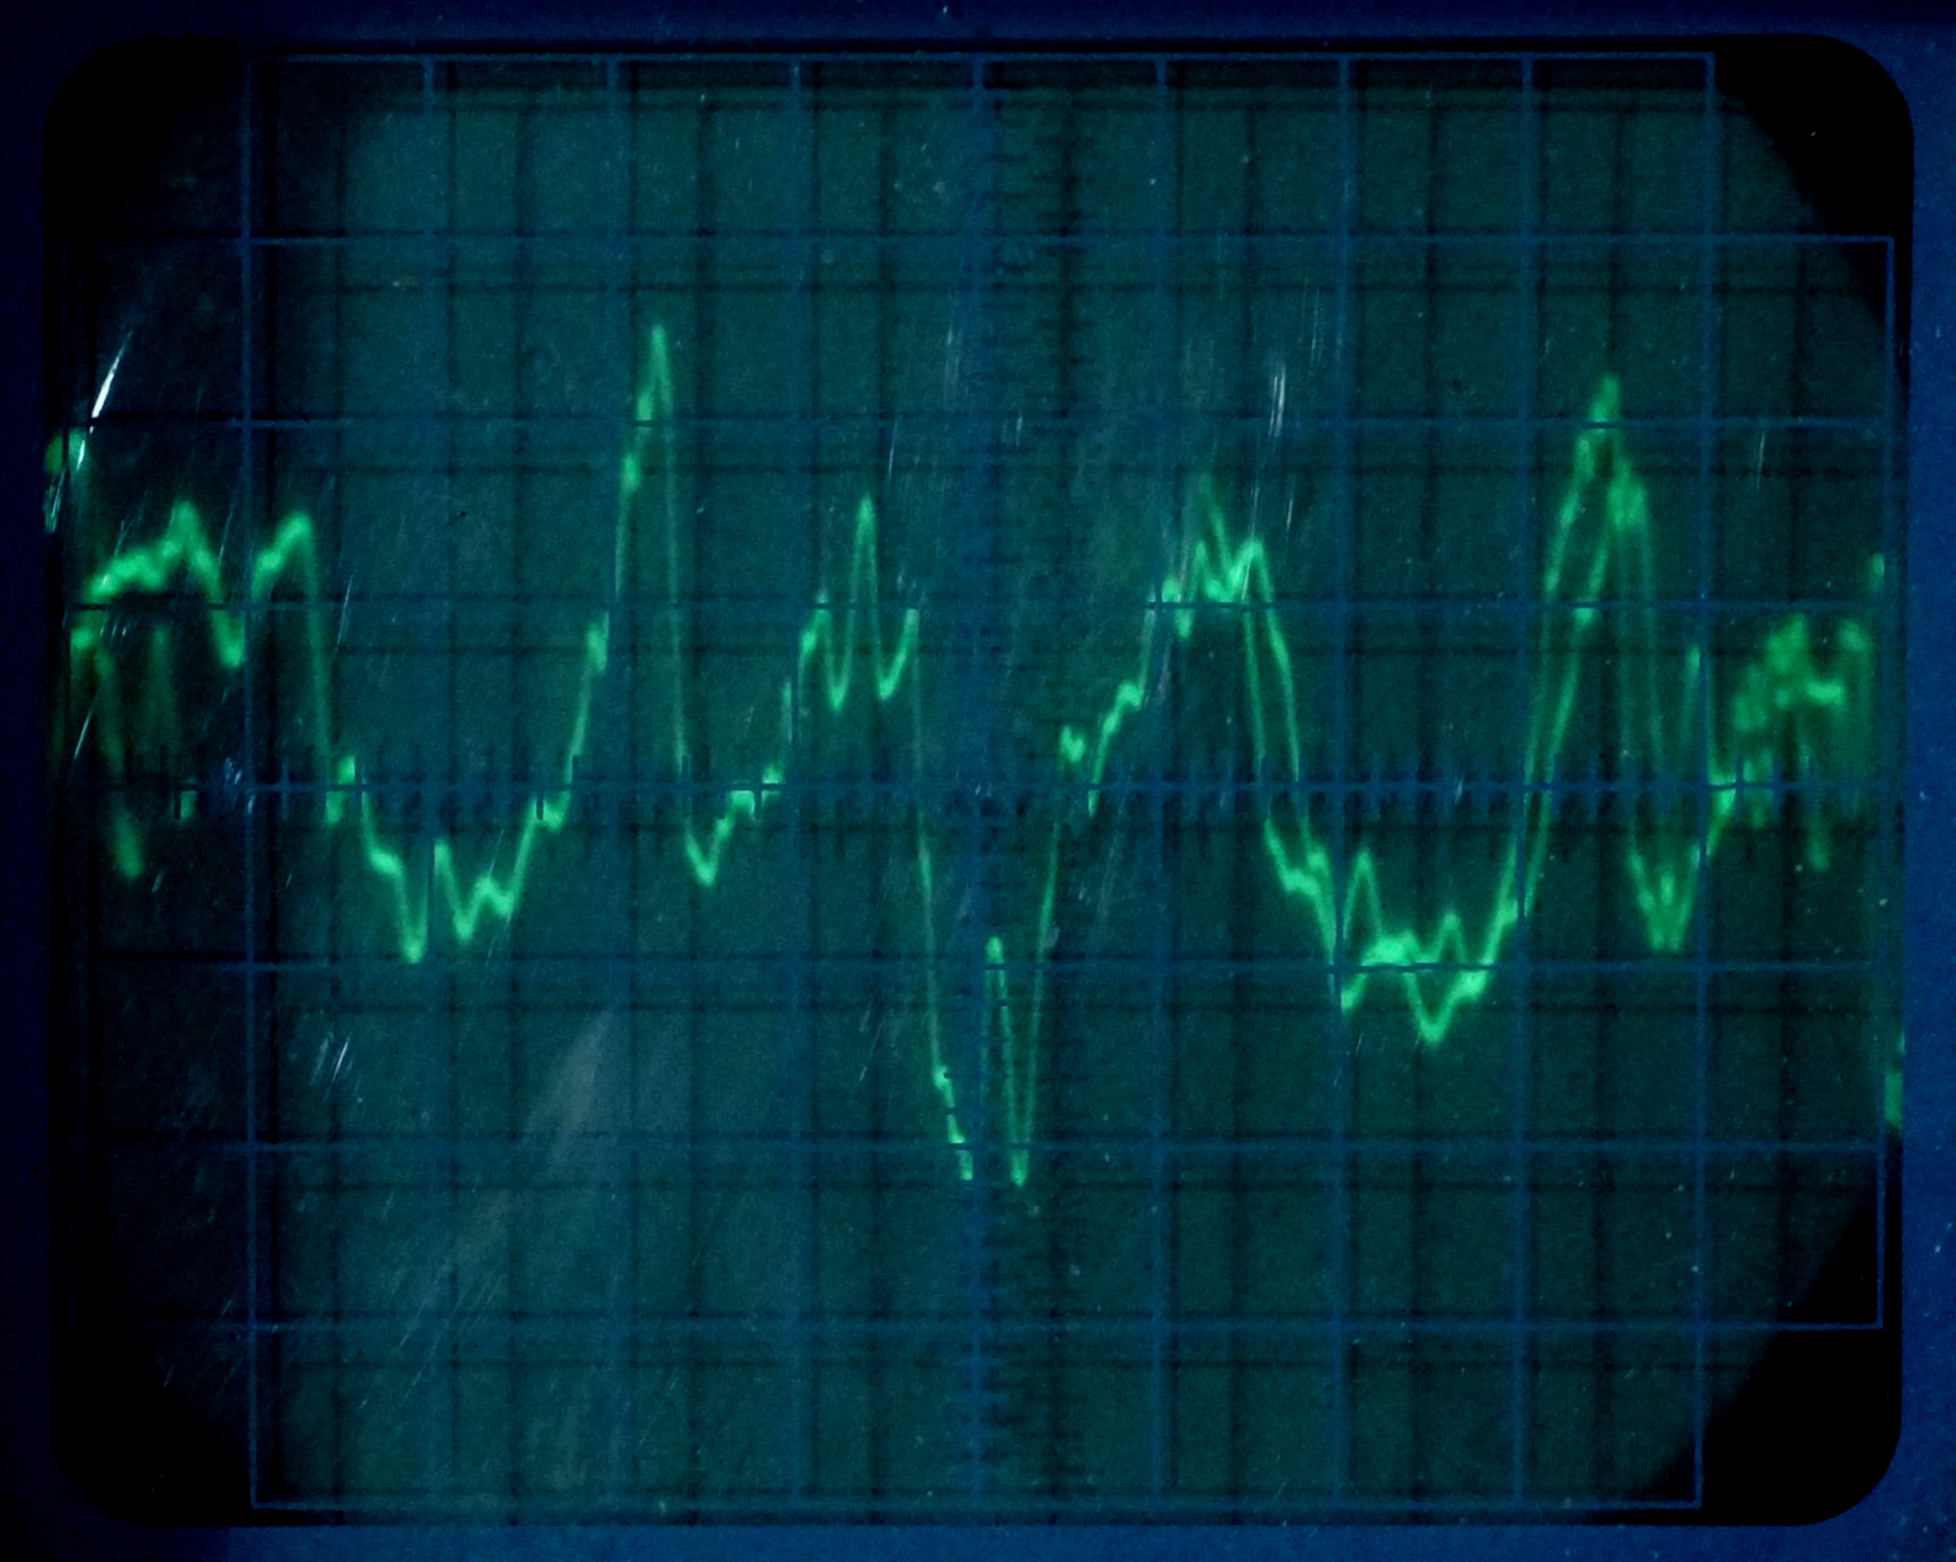
1) Measure a signal without any load – The schematic is shown below:
We have taped our etching pen to the tabali with masking tape. When the etching pen is turned on, it will vibrate. This sends vibrations through the sitar. These vibrations are picked up by the piezoelectric transducers, which in turn output an electric signal. This signal is then fed into the oscilloscope.
It is important that the oscilloscope be a real hardware device. One should not think that a software version on one’s computer is sufficient. Unlike the audio interface of the computer, the oscilloscope has an extremely high input impedance enabling it to make precise voltage measurements. Conversely, the audio interface to your computer was never designed to be a precision measuring device, and will produce erroneous results.
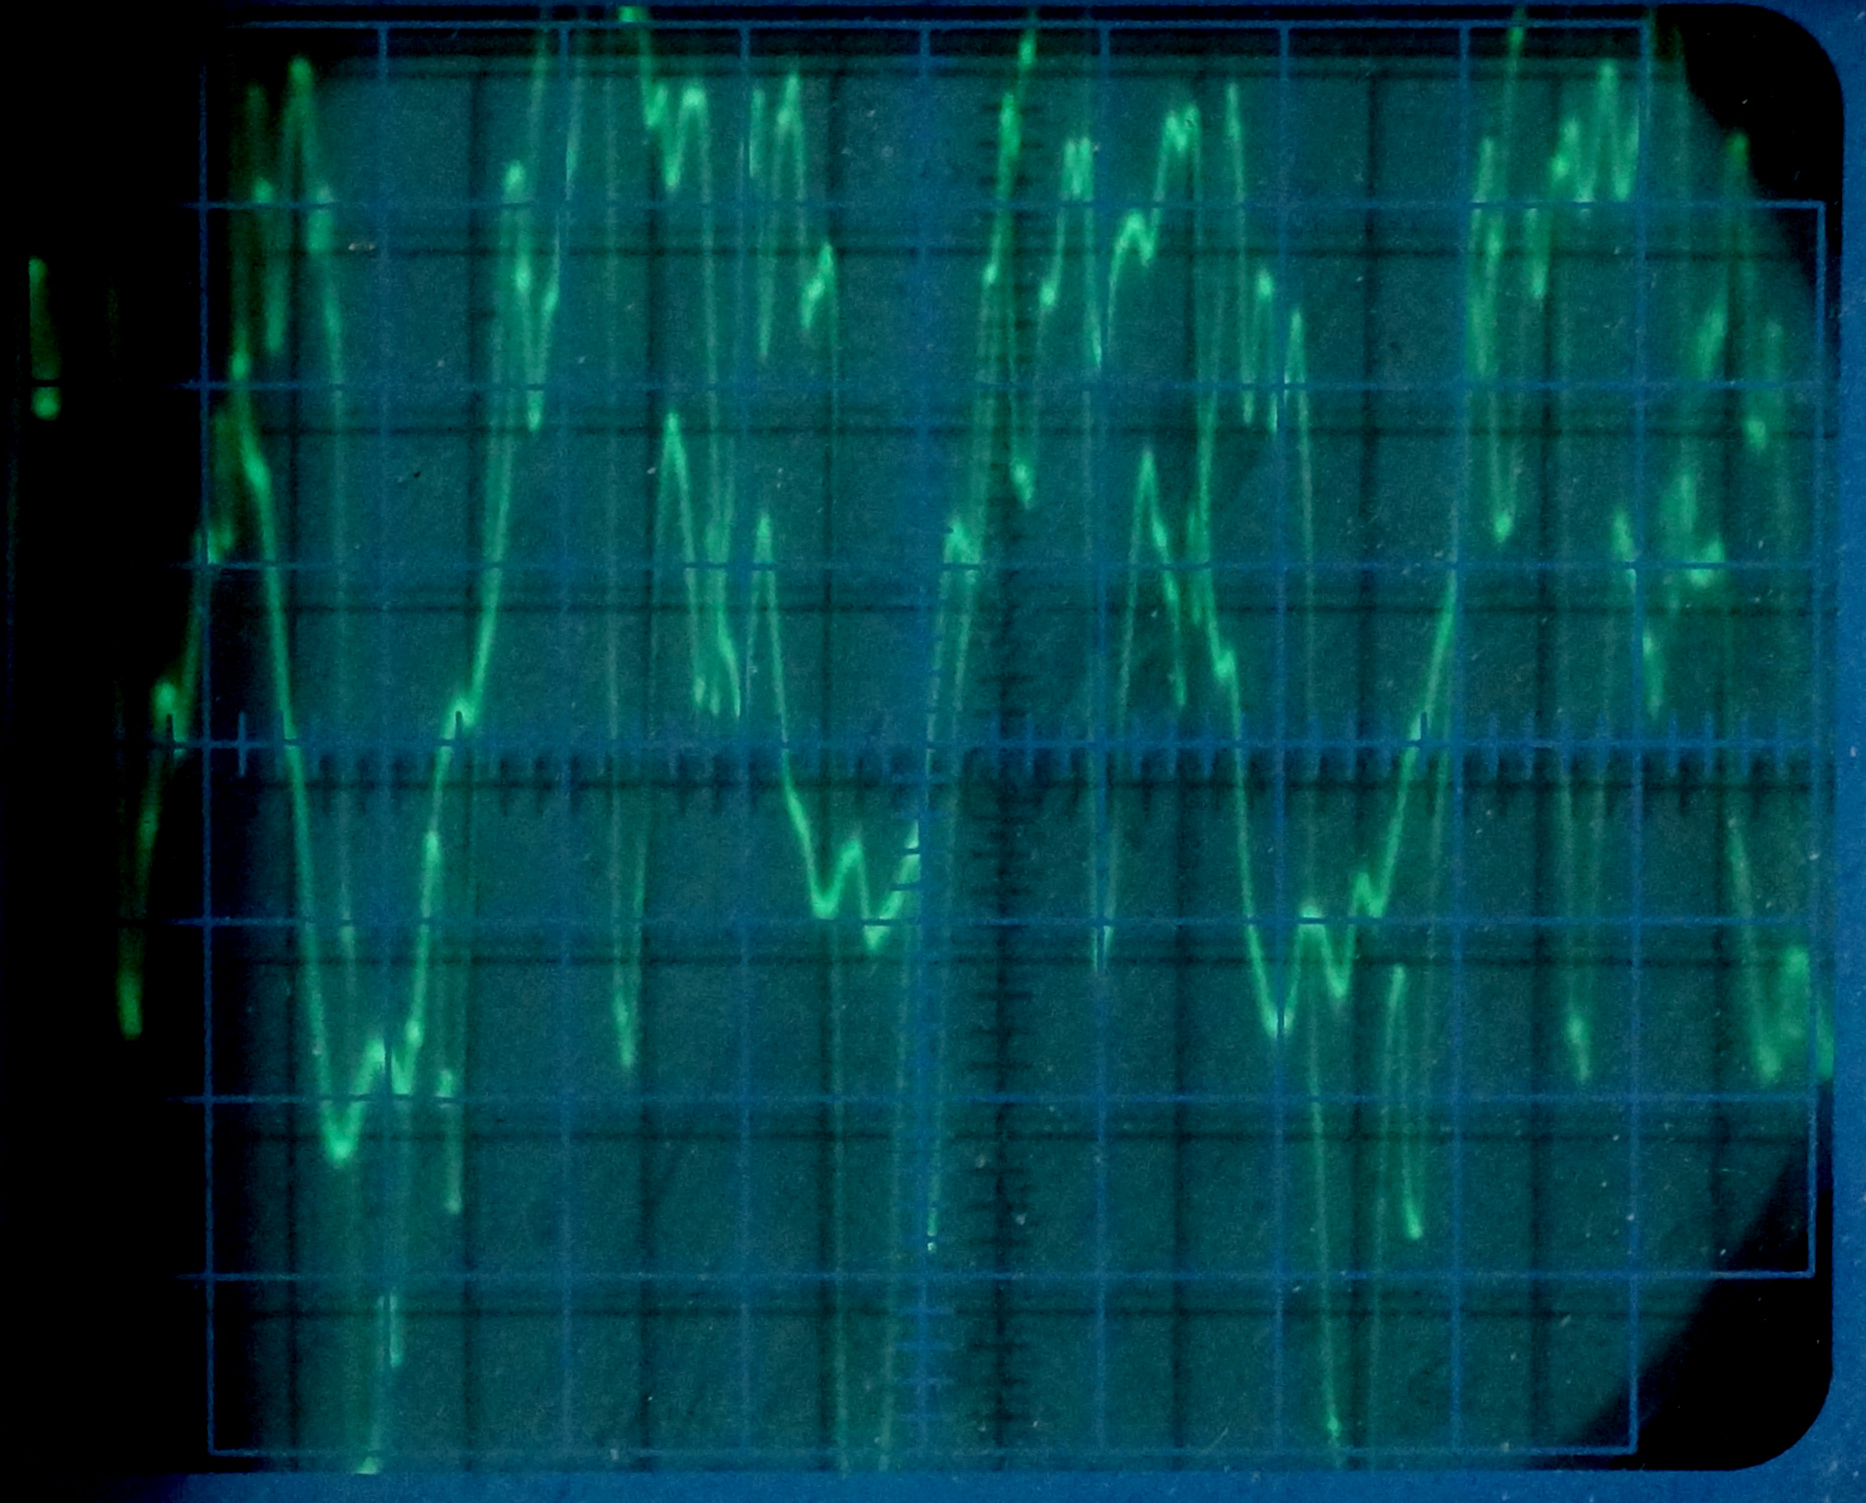
We are only interested in getting a reference signal. We do not really care what the exact voltage is. Simply adjust the oscilloscope until one has a full excursion of the trace.
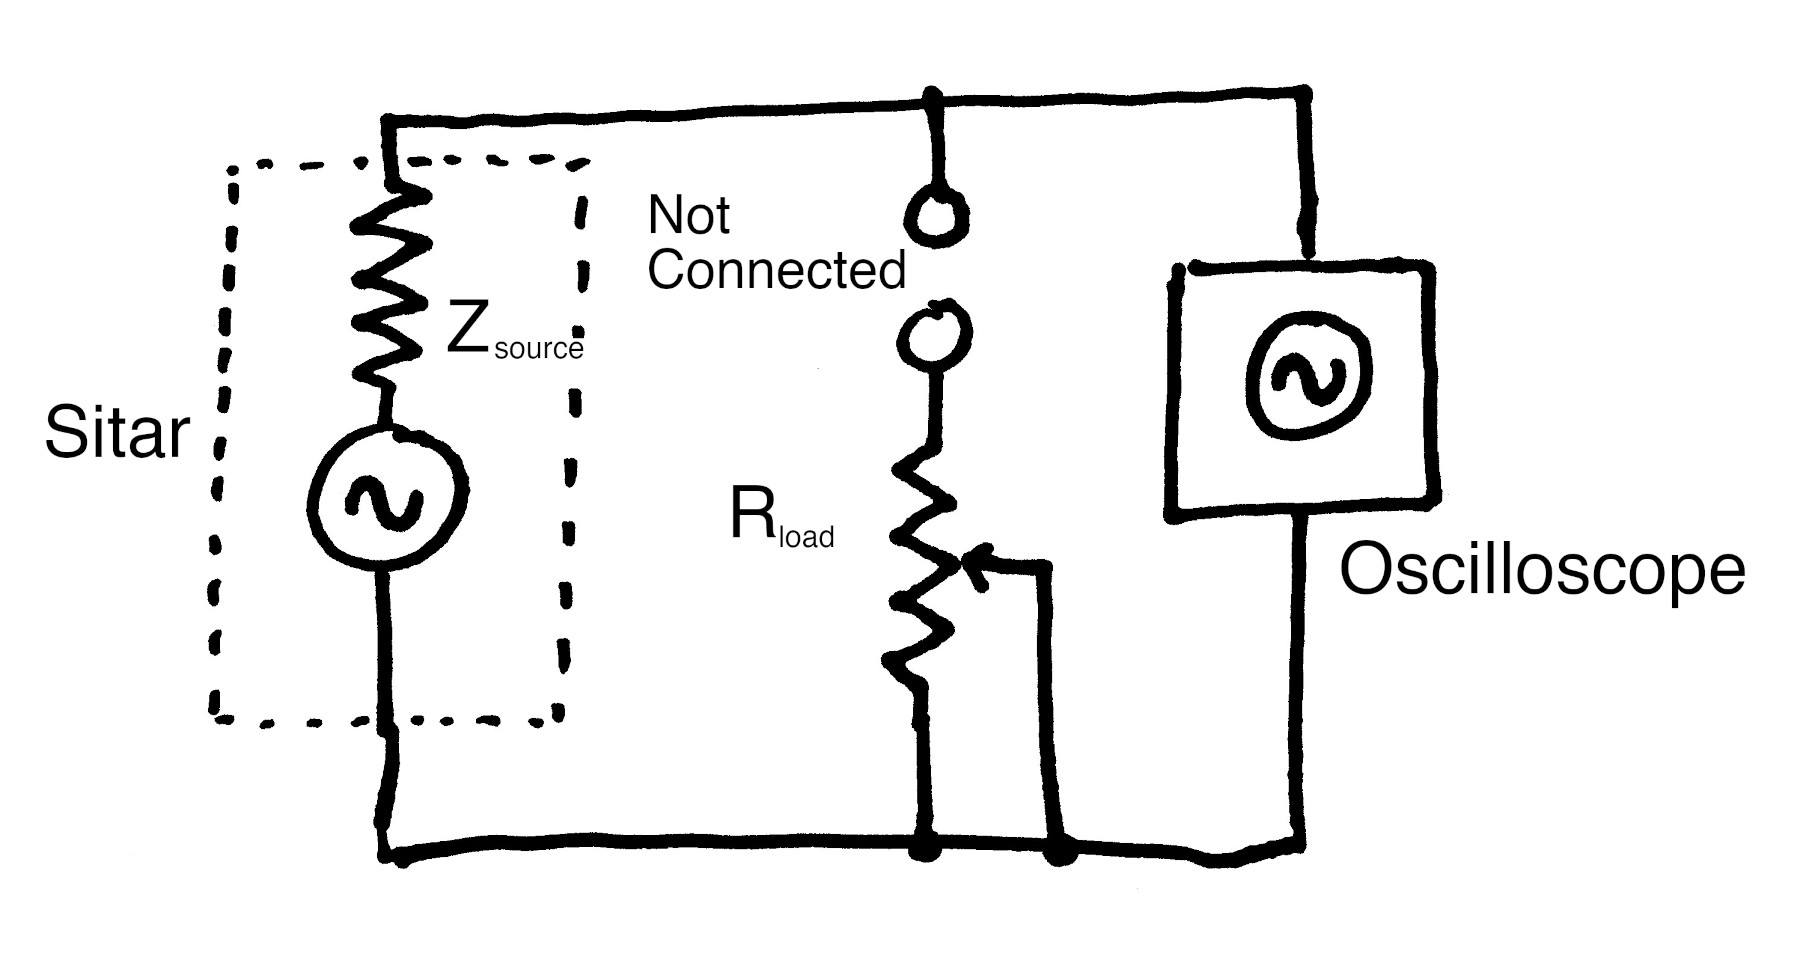
2) Adjust the load until the signal drops to 1/2 its original value – The schematic for this step is shown below:
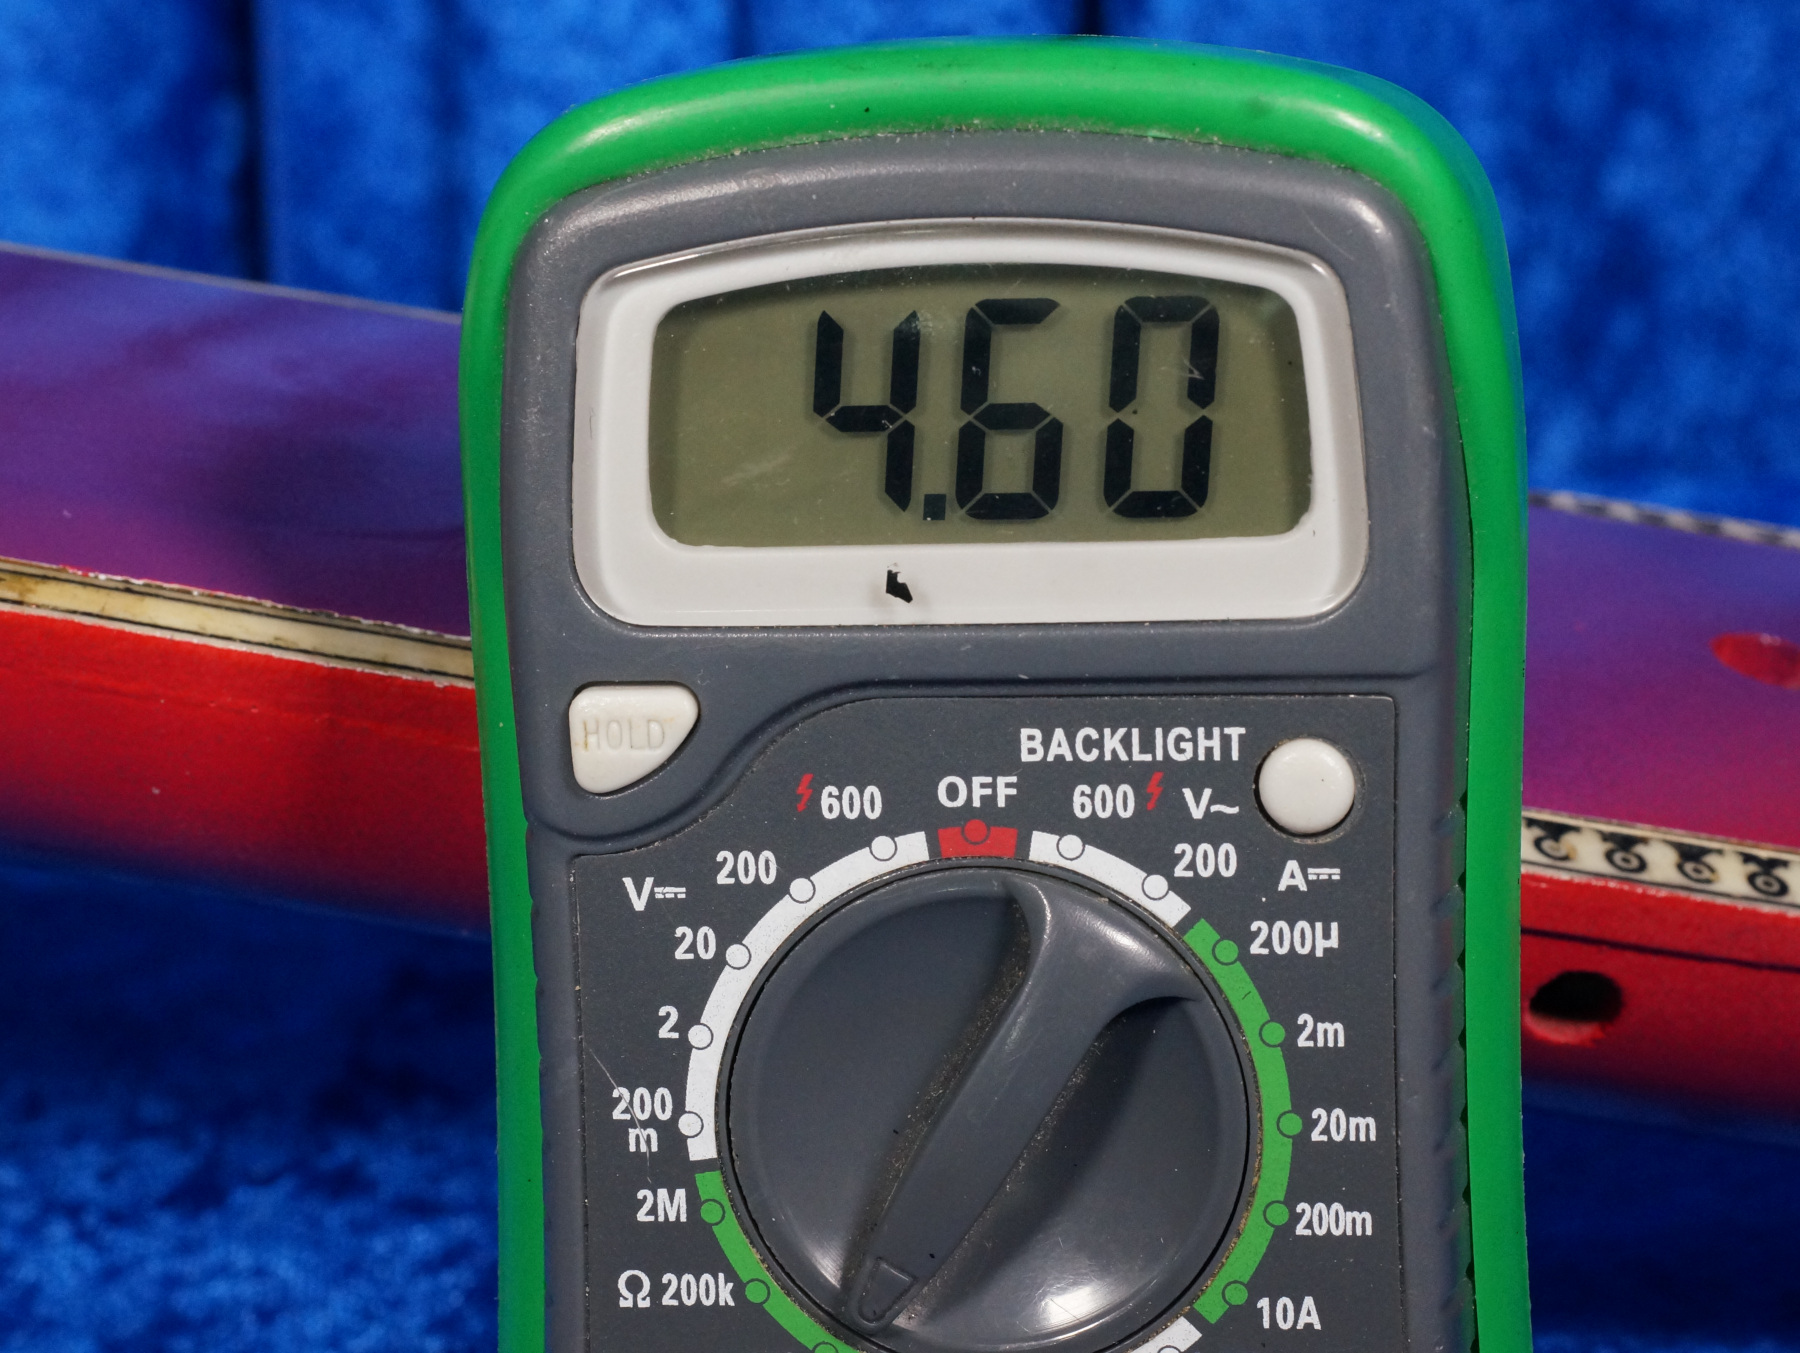
We connect the potentiometer and adjust it so that the signal is half of what the reference signal was. You may need to try several pots until you find one that works comfortably. I found that a 20kΩ worked well for me. (It doesn’t matter whether it is an audio taper or a linear taper, either will work.)
3) Measure the load – Remove the potentiometer and measure it with an ohm-meter. Whatever the resistance of the pot is, that is your source impedance.
Why does this work? – In a sense, we have set up an “L” pad attenuator. (see below)
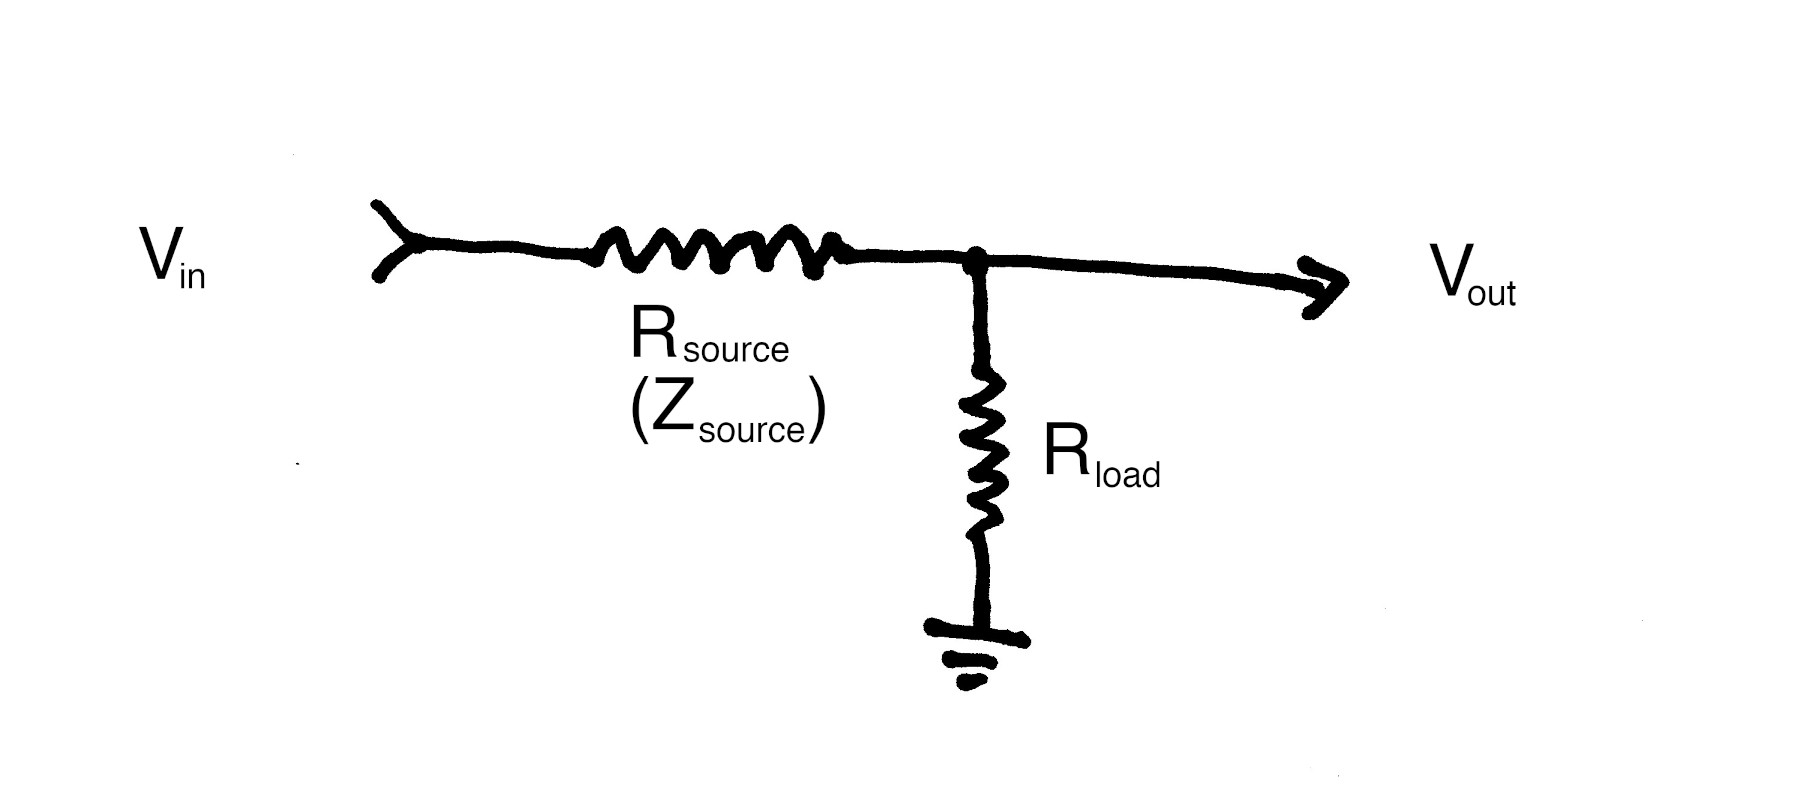
When the two resistances of an “L” pad are equal, then Vout will be exactly 1/2 of Vin. We could have used other resistance values for our load to find the Zsource of our sitar, but this would have forced us to invoke Ohm’s law, and do a bunch of calculations. (I am lazy and did not want to do this.)
OK, so when I measured it, I found the Zsource to be roughly 5kΩ. So now we can positively say that the Zsource of the sitar is 5kΩ – Right?
Not necessarily – just like a squirrel can become fascinated by small shiny things, it is very easy to become hypnotised by numbers we get in this fashion. We must not forget that impedance is frequency dependent. The spectral components of a sitar’s sound cover a large portion of the audio spectrum. It would be foolish to expect the transducers to behave consistently across this range.
Therefore, it is better so say that 5kΩ is the “nominal” value.
March 25, 2023 – The First Two Strings
It is now time to mount the first two strings. String #1 and string #2 are the most important strings on a sitar. We will need these for both further testing, as well as the proper crafting and placement of the frets.
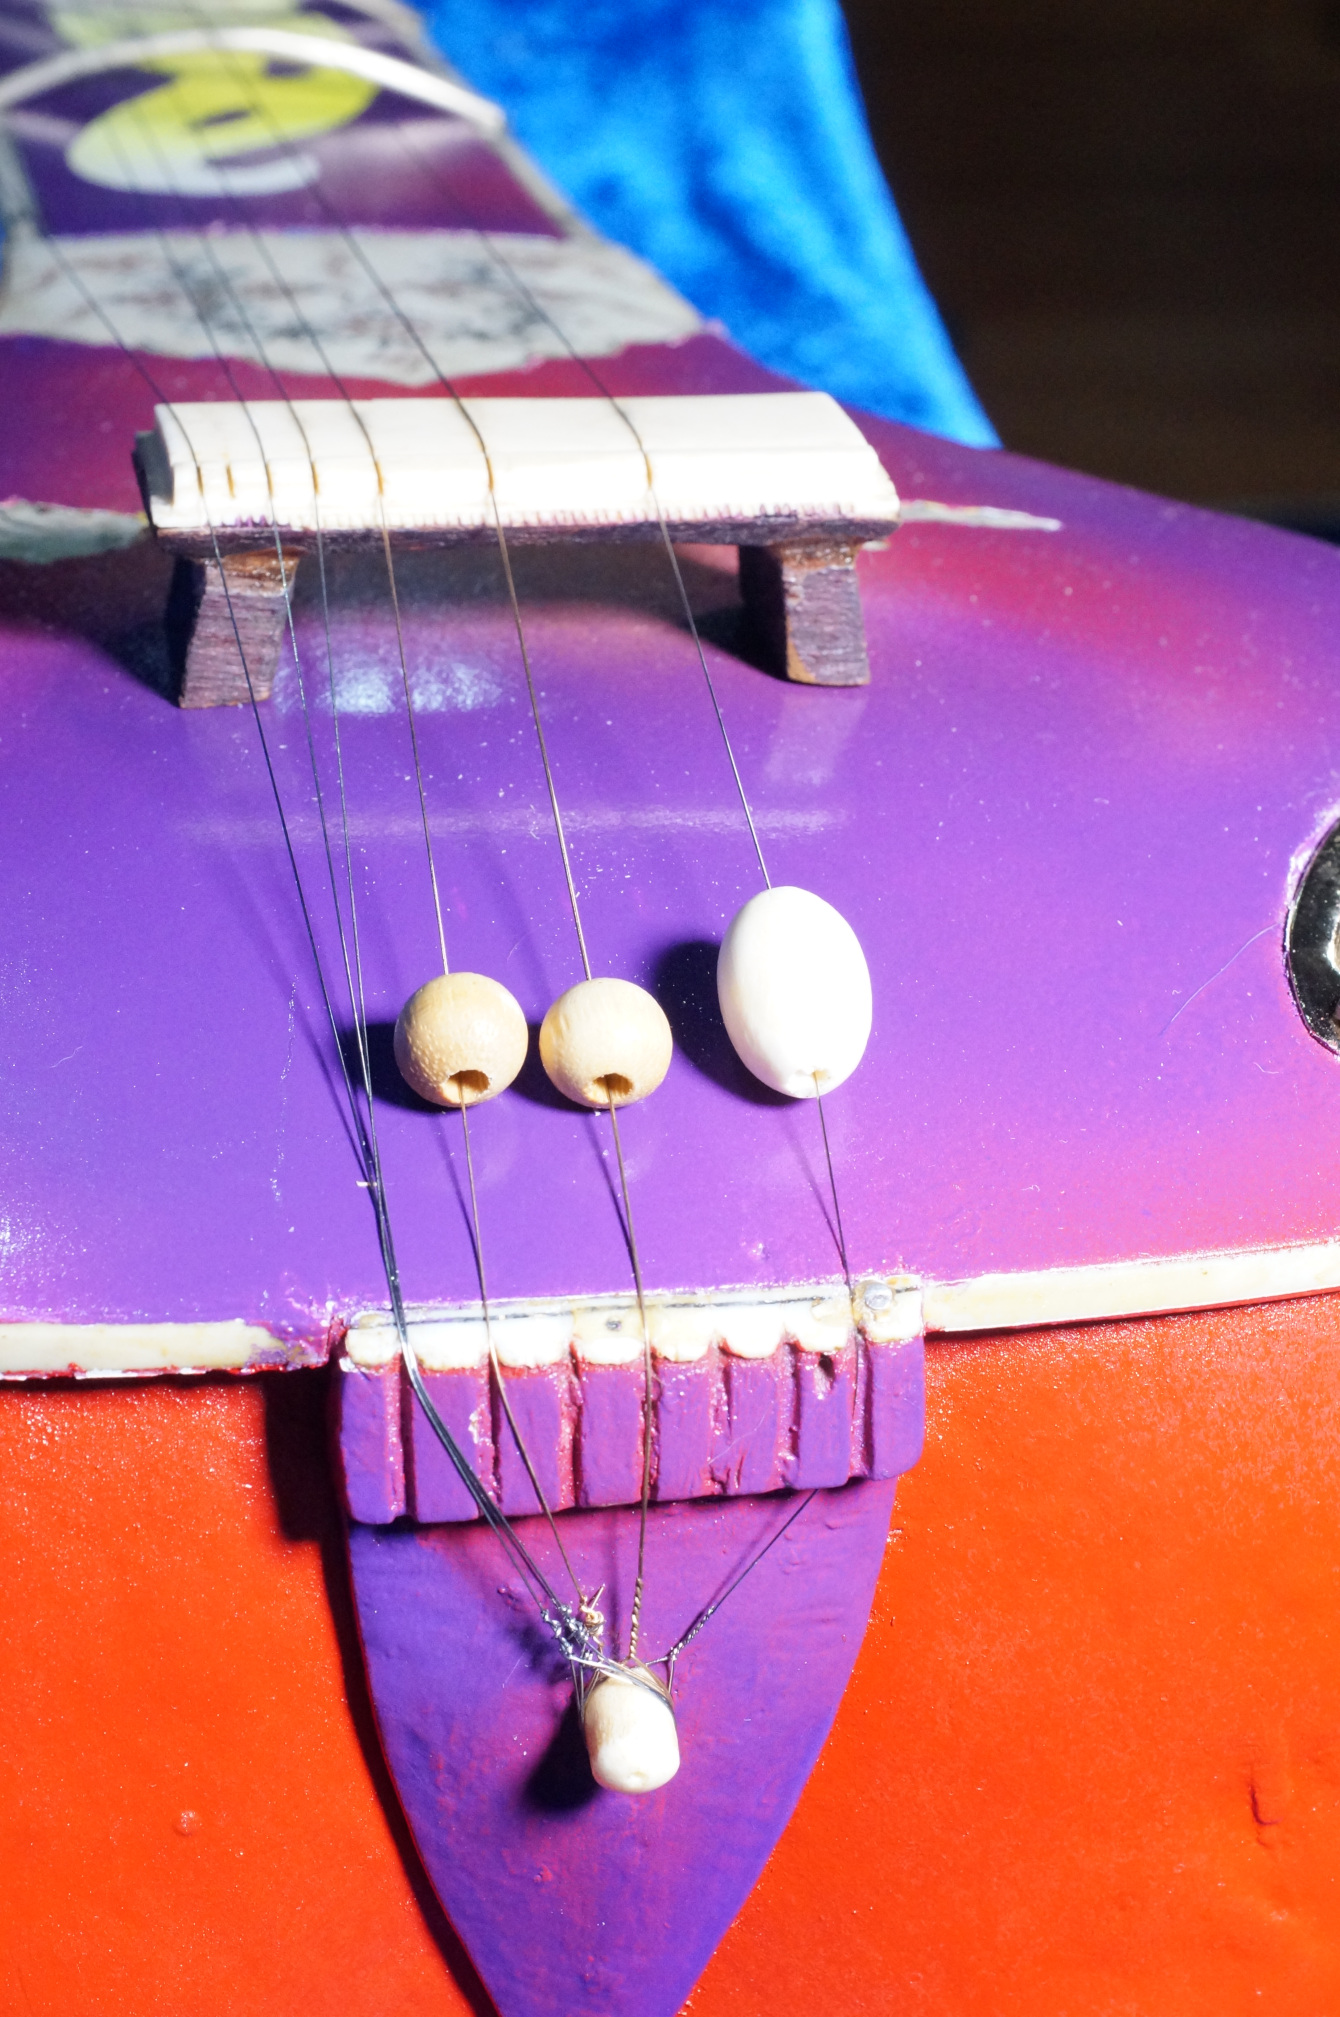
However, before we attach theses strings, we have to restore some parts that we previously removed. We replace the moghara.
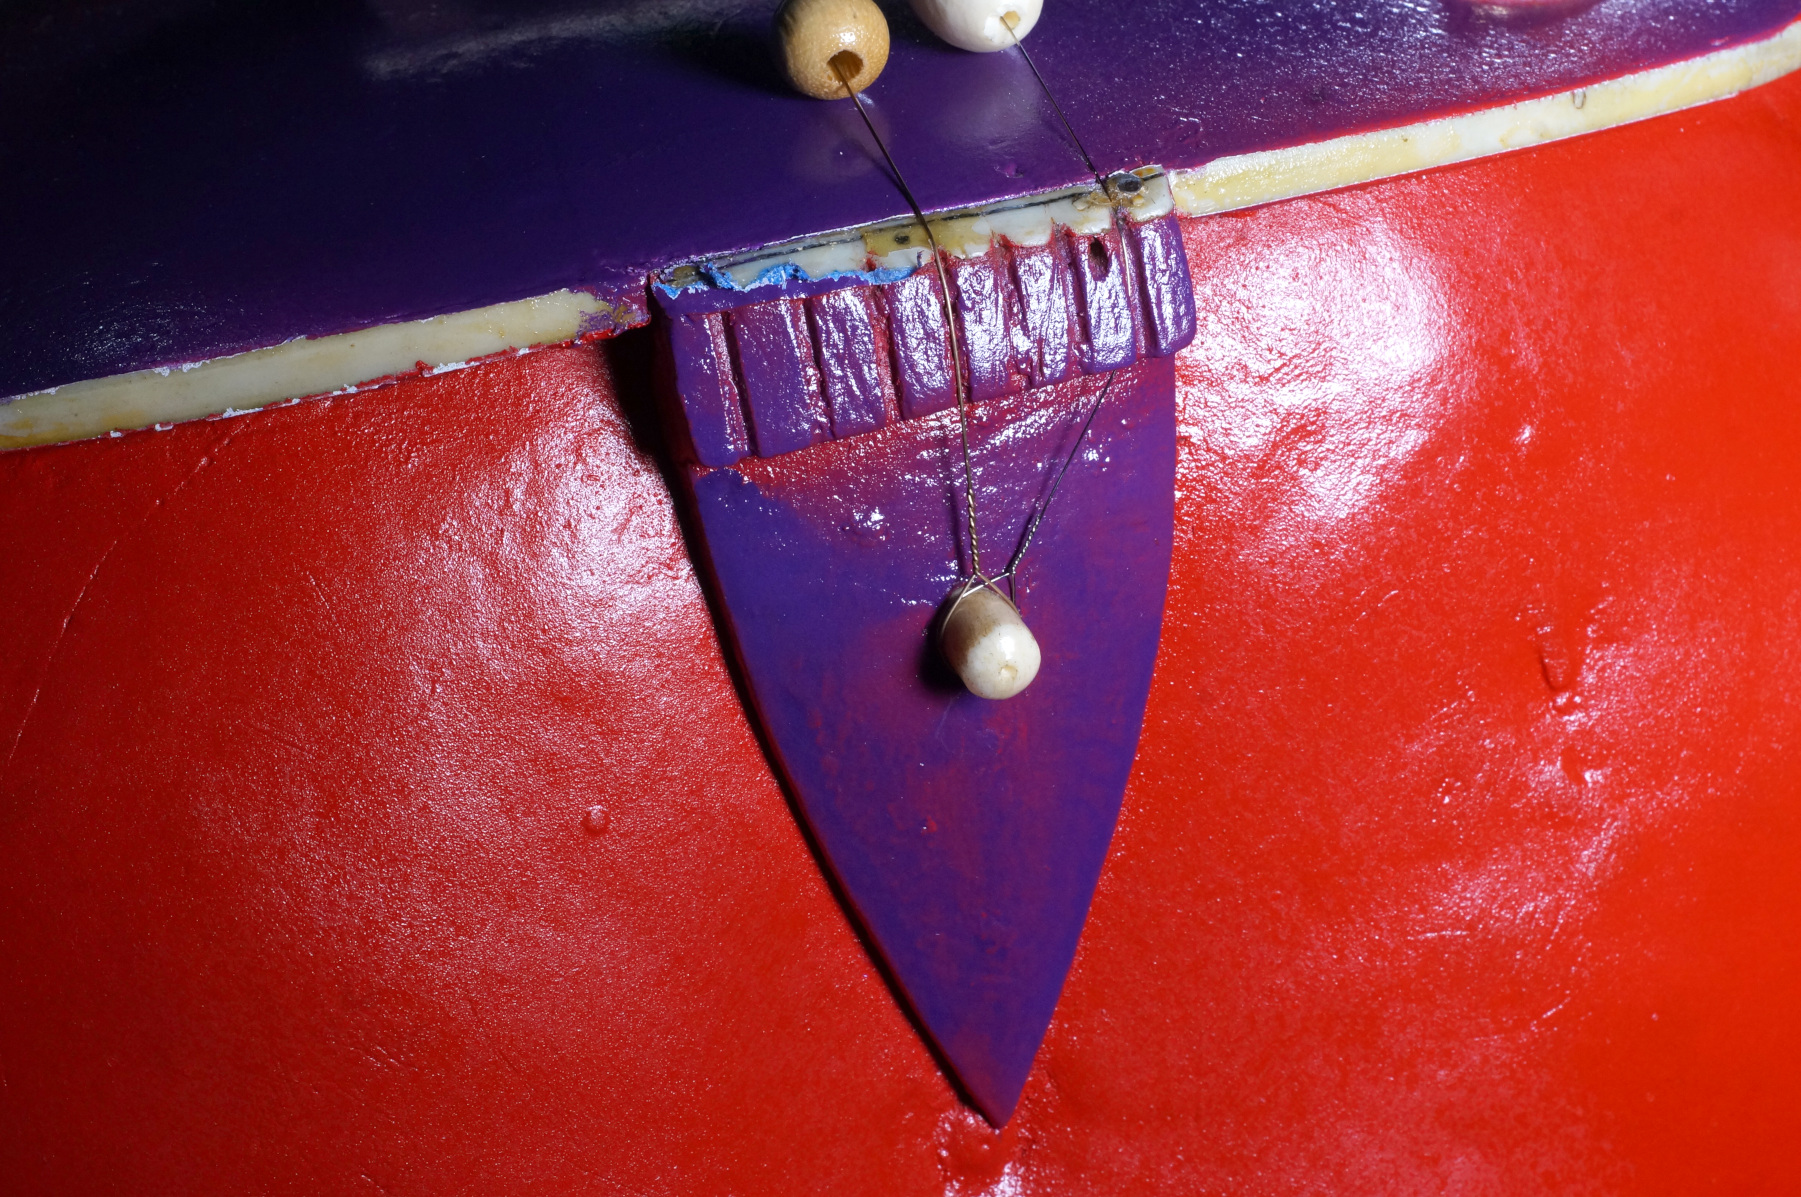
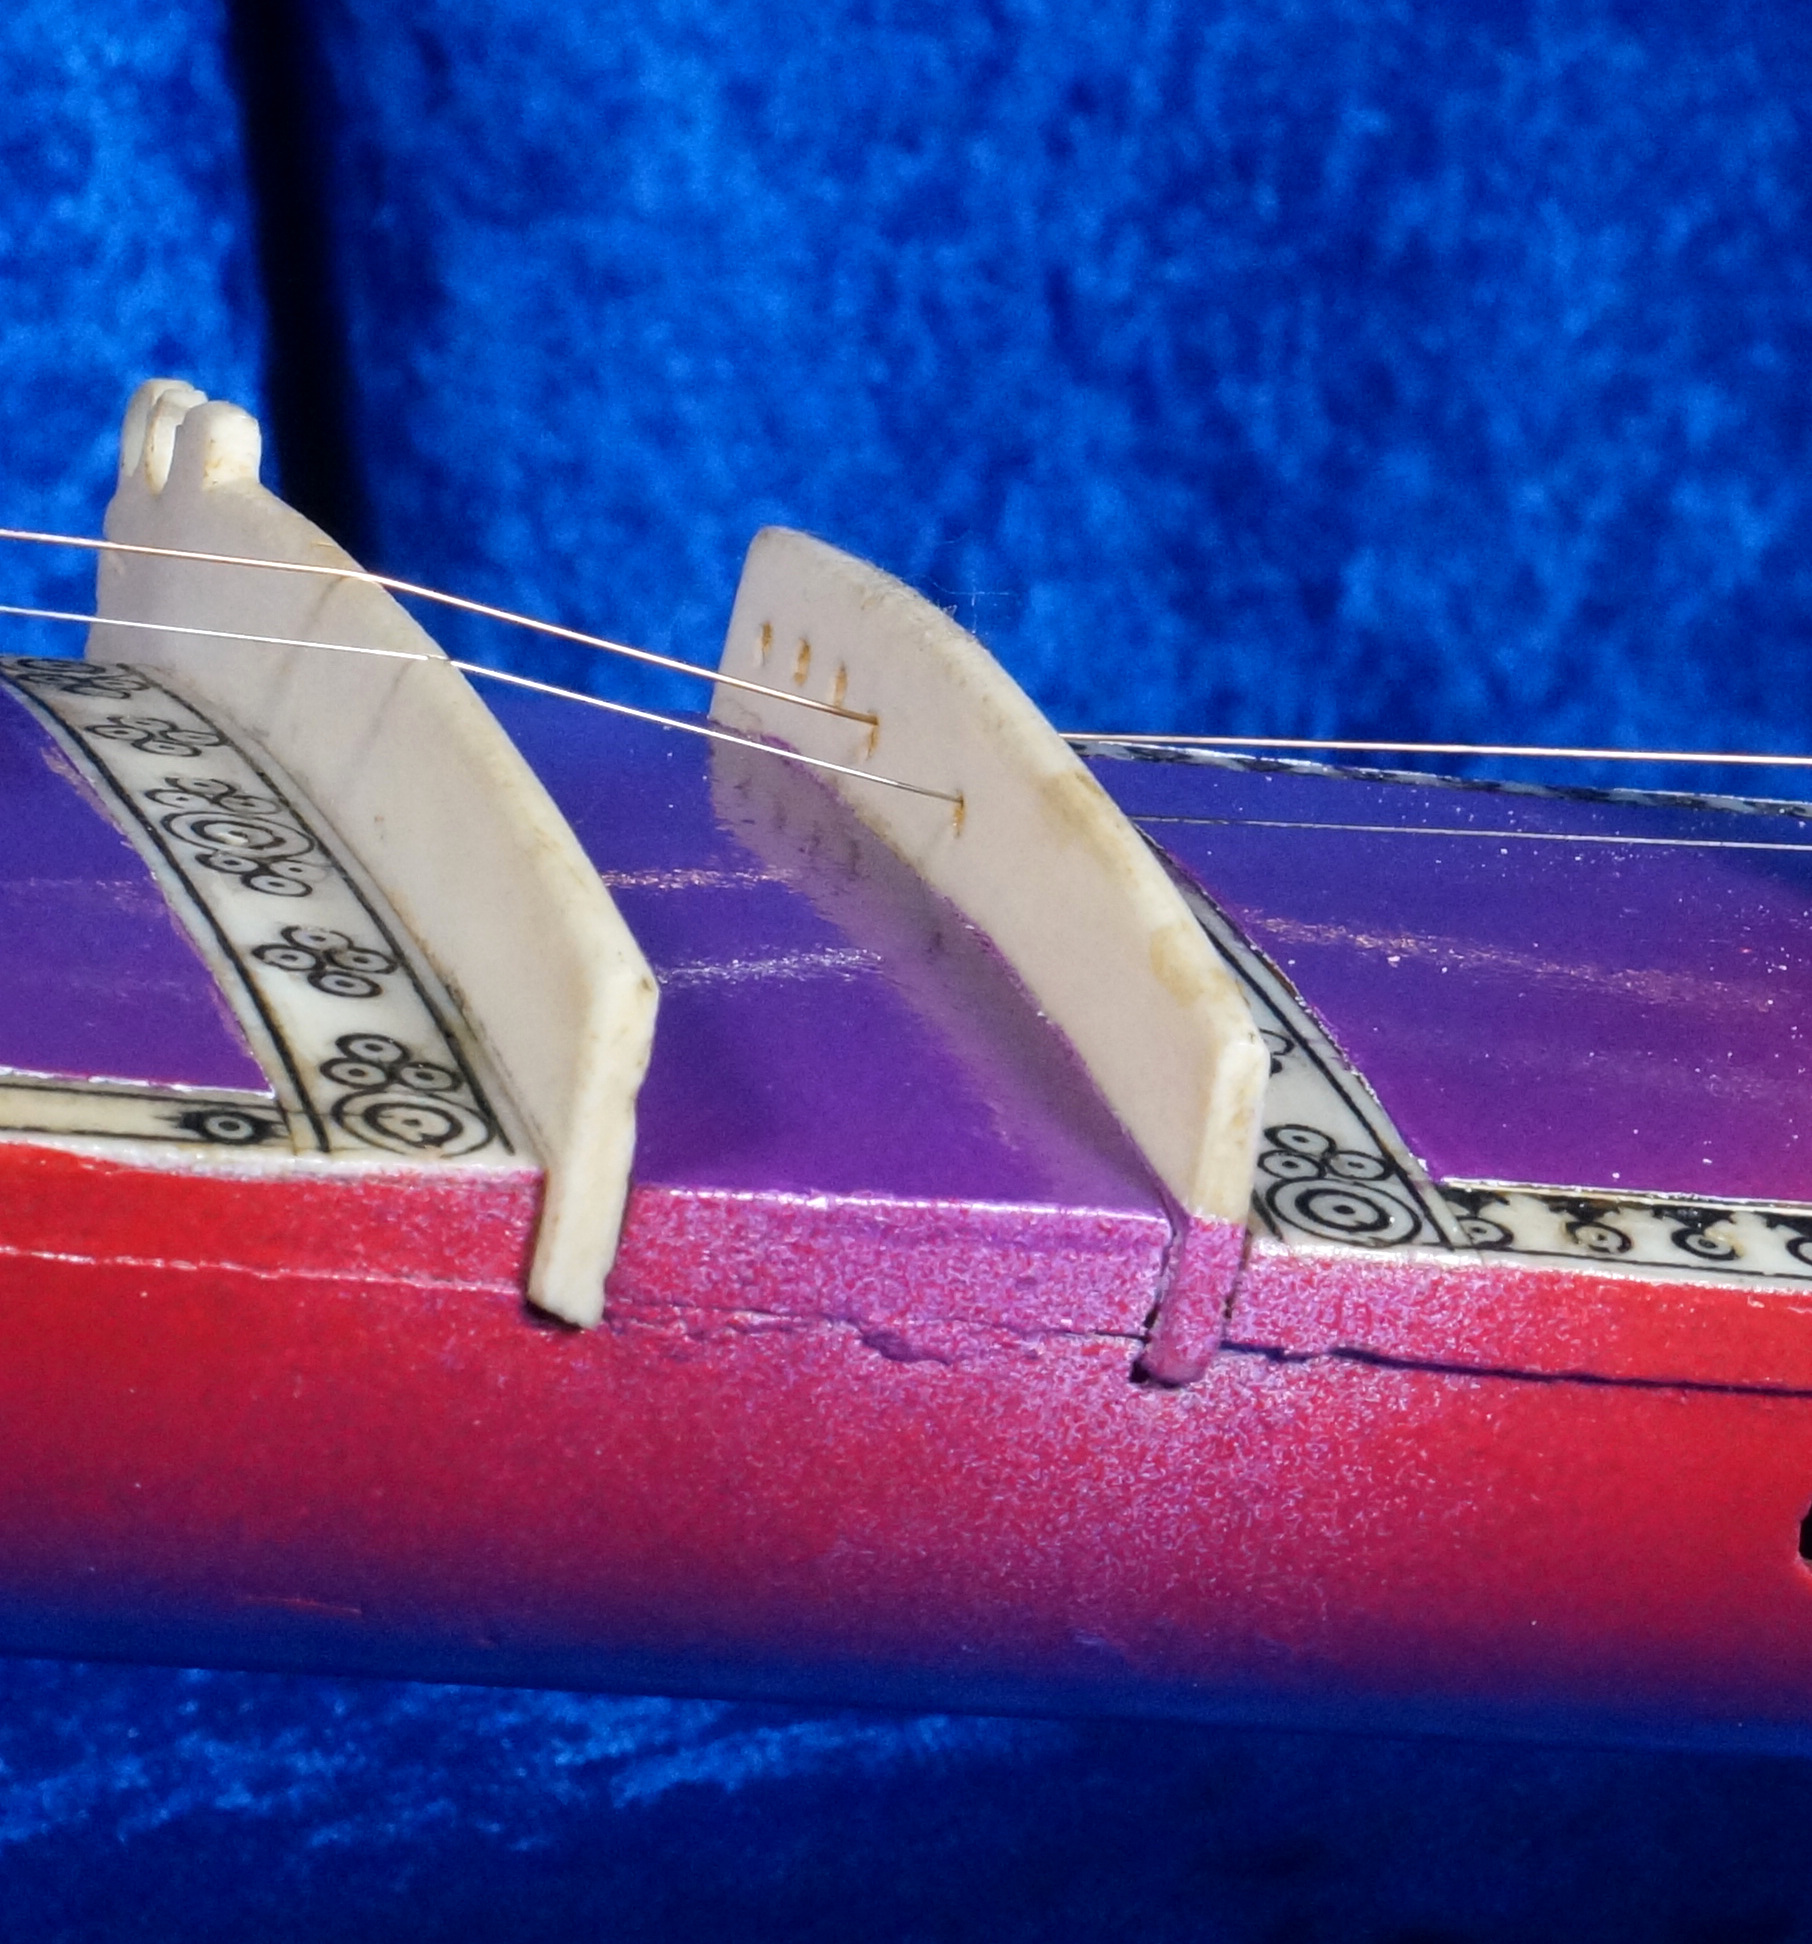
We also replace the bridge on the upper part of the neck.
We now go back to our pegs that we removed at the beginning of this project. We covered the ends with chalk and affixed the strings in the traditional manner.
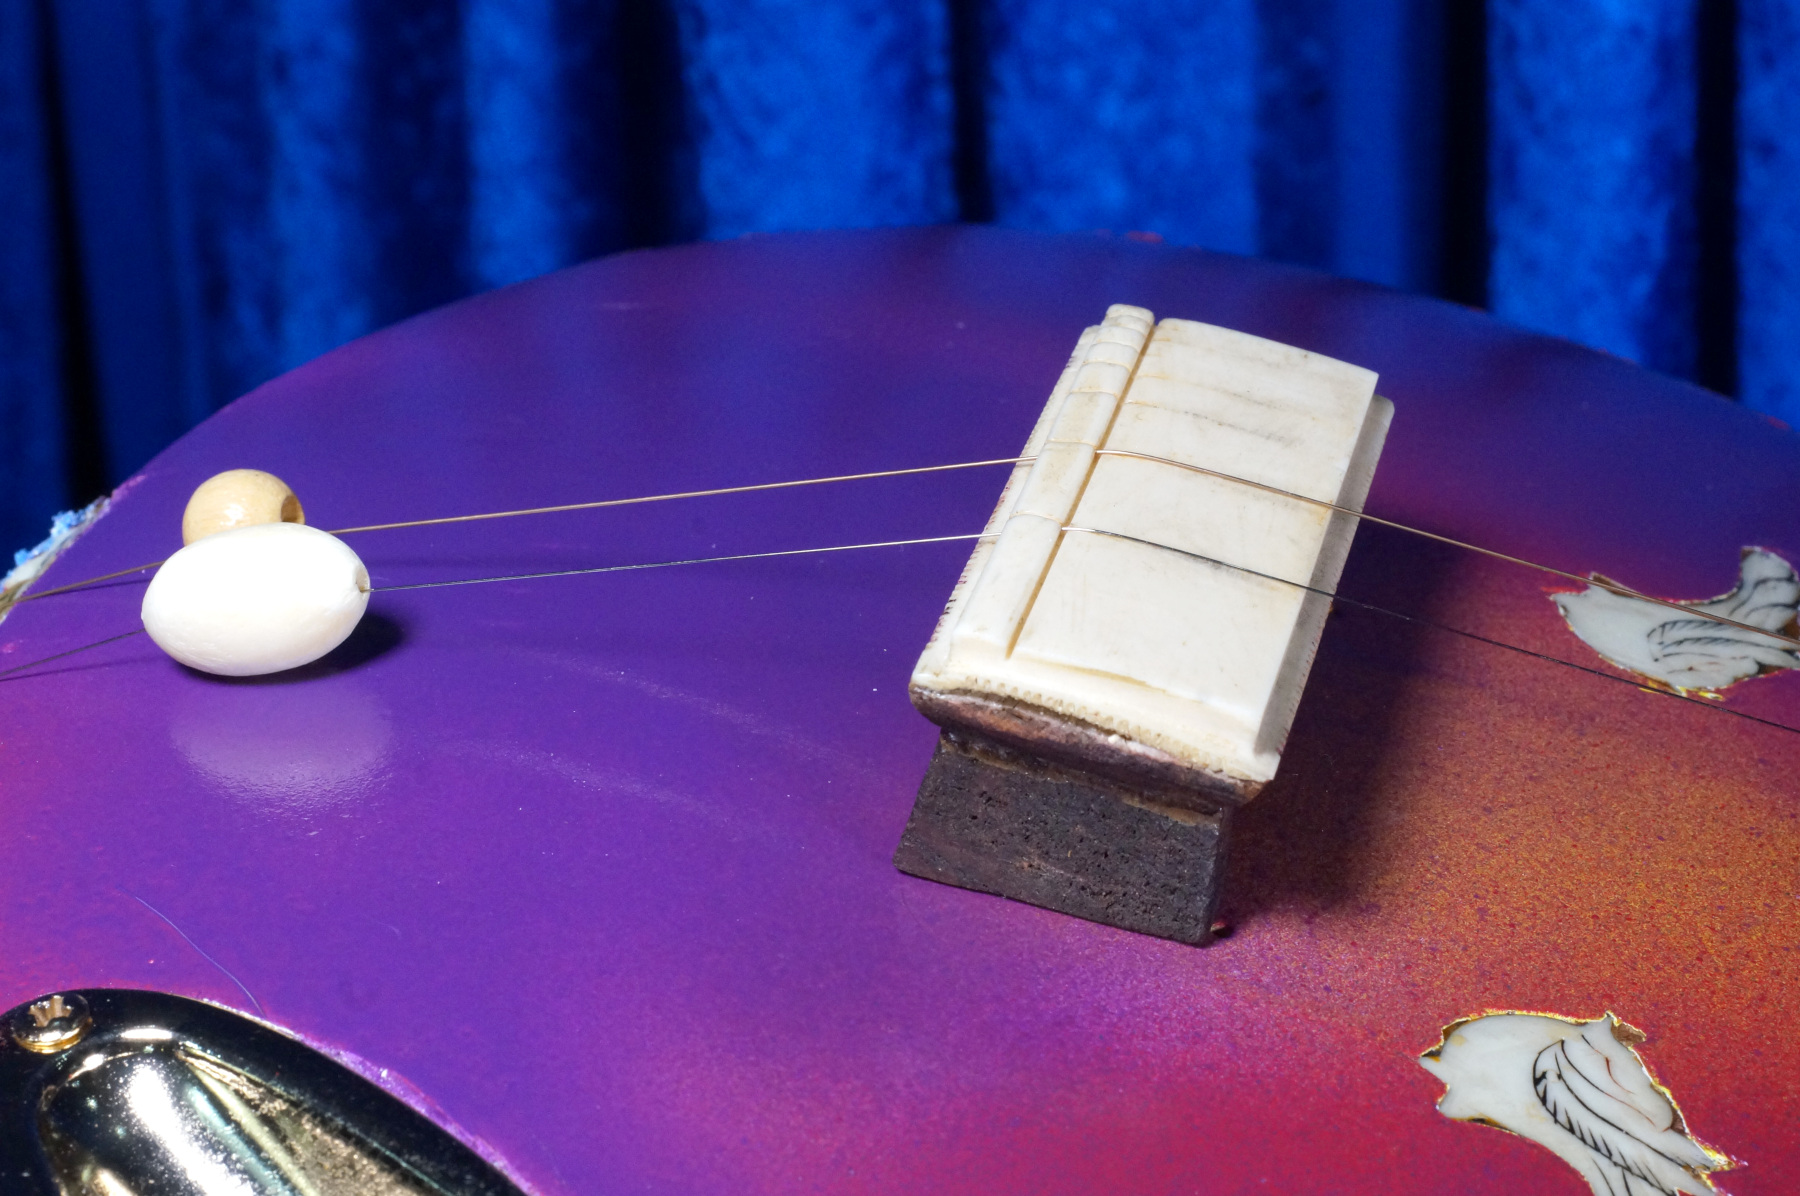
And we replace the main bridge.
At this point we can tune the strings to their respective pitches (i.e., F# – Ma for the first string and C# – Sa, for the second string.)
| IF YOU ARE INTERESTED IN TABLA, THIS BOOK IS FOR YOU |
|---|
This is the first volume of the most complete series on the tabla. Fundamentals of Tabla It is available around the world. Check your local Amazon for pricing. |
March 26, 2023 – Last Round of Tests
Now that the sitar has some strings on it, it is time for some more tests.
The first test was to see how “hot” the signal was. For this I connected the output of the sitar to the oscilloscope and plucked the main playing string.

I was pleasantly surprised at the results of this test. There was a whopping 600mV peak-to-peak signal. This is indeed a very hot instrument.
The next step was a totally subjective test. I plugged the instrument into the High Z input of an ART PRO MPA II preamp. This input is specifically designed for electrified instruments. The output of which went into my mixing board. This test is a “real world” test because it is the way that the sitar will be used in real situations.

I found that the electric sitar behaved beautifully. It had excellent signal to noise characteristics due to its very strong output. This is an area where it could have suffered, because the 5 kΩ source impedance really isn’t particularly low.
I was also pleased to find that from an entirely acoustical standpoint, it wasn’t really that bad. This was in spite of the broken tabali, worn bridge, and heavy layers of paint on the acoustically active surfaces.
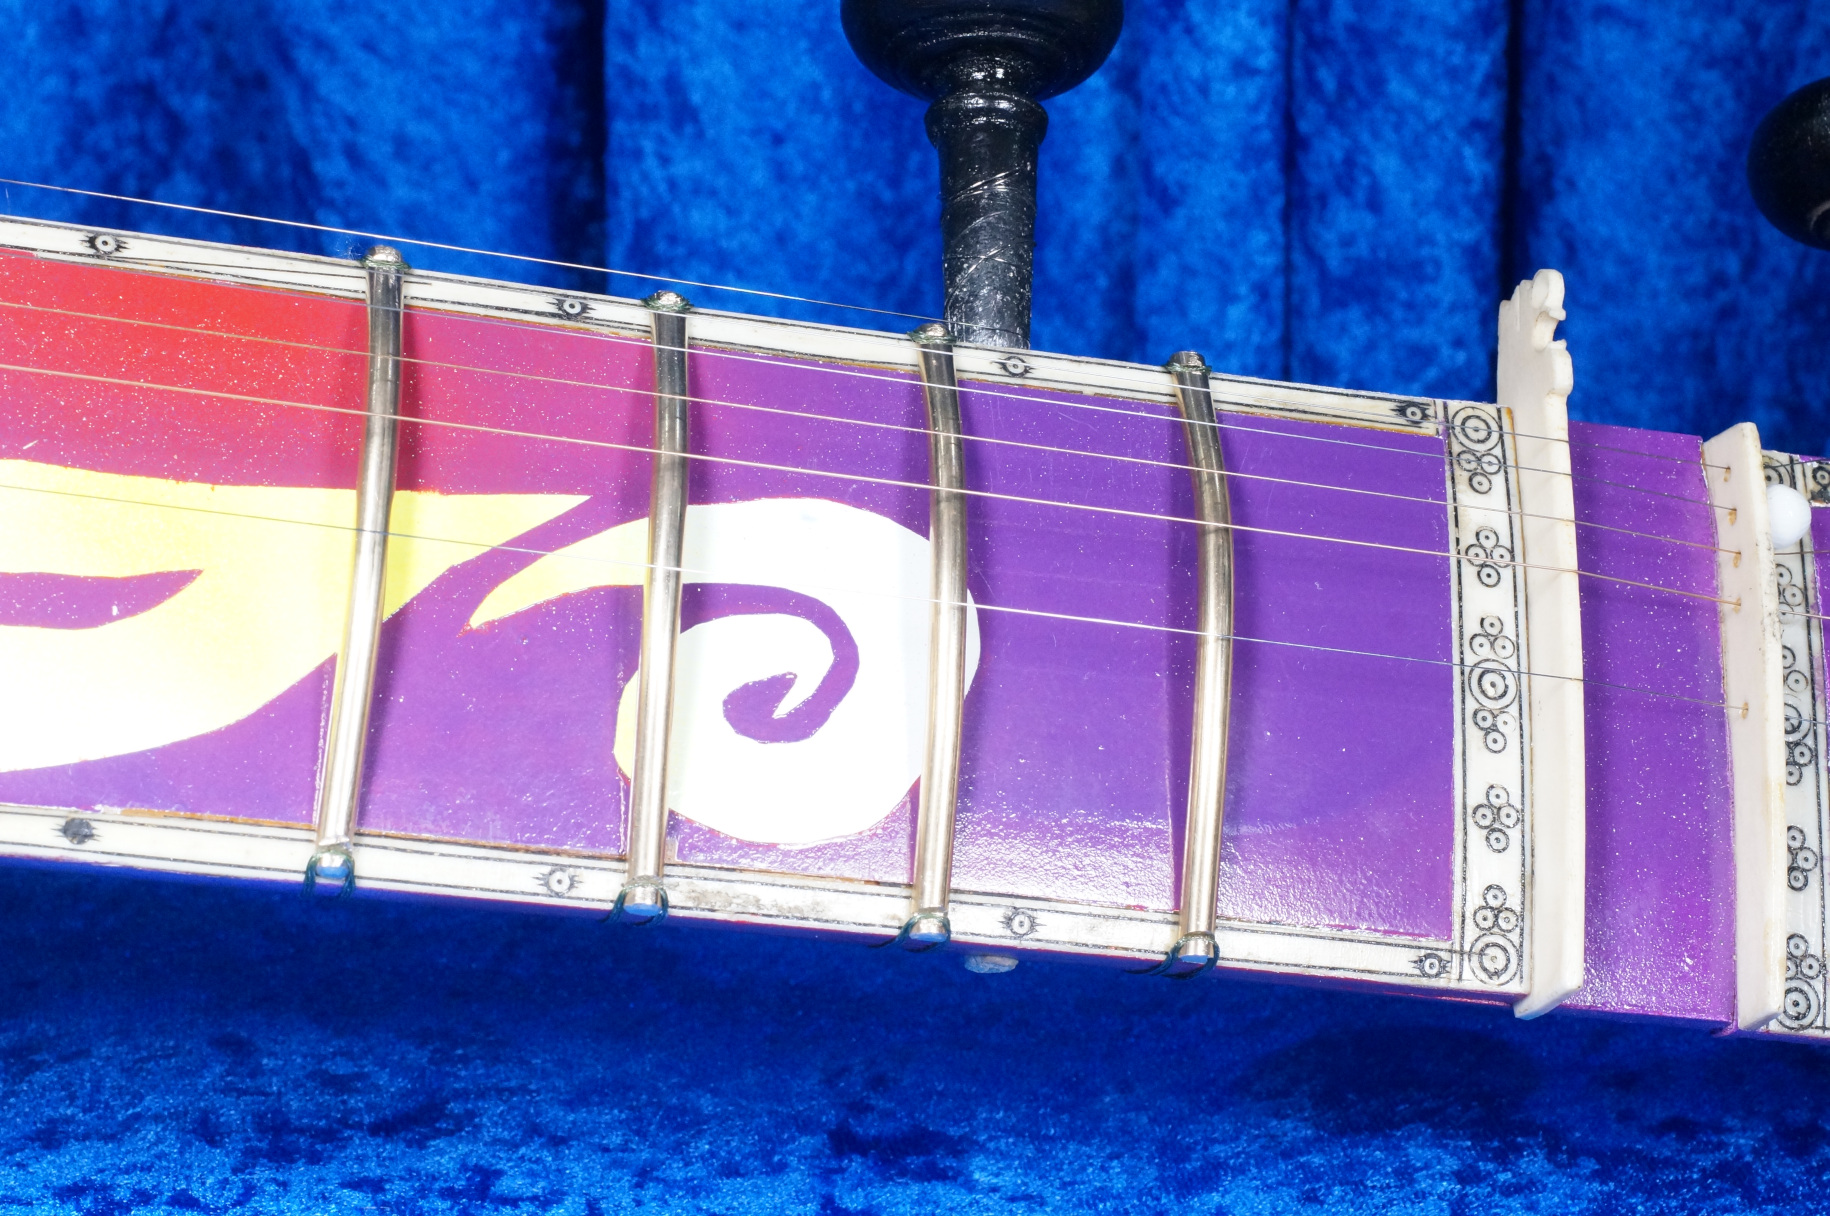
March 27, 2023 – Frets
Only a six of the original frets were left on the instrument. I needed another 14.
Therefore, I was rummaging through my miscellaneous sitar parts. I was pretty sure I had 14 frets. I found a slew of them, but they were too big. I rummaged around some more. This time I found a lot of veena frets; these were of no use. I searched some more, and this time I found about 30 frets, these too were the wrong size. I kept looking and finding more frets, some as large as 20cm. I have no idea what an instrument with 20cm frets would look like. Still the parts came – frets – frets – and more frets, 75, 100, 150 frets! They were all mixing together in a jumble of improper sizes. I was getting more and more frustrated at this confusing mess of useless parts.
Then I woke up.
It was all just a dream brought on by my fruitless searches the night before. Searching my own stock of frets turned up nothing, and my internet searches were likewise fruitless.
I need 14 frets, but this sitar is a little bit smaller than a normal one. Therefore, the frets that I have are too big. I searched the internet, but found no frets of the size that I needed. I could buy larger frets. But these were frightfully expensive, and they would still require cutting, notching, and polishing. Therefore, I would be spending a lot of money on something that still would not fit.
I decided to make my own.
I went on a search for brass rods in local stores. I tried several places here in Houston, but found nothing suitable. So I got on the internet and purchased a couple of brass rods that I can machine to the proper dimensions.
This will take a few days to deliver.
No problem. I certainly have other jobs to do.
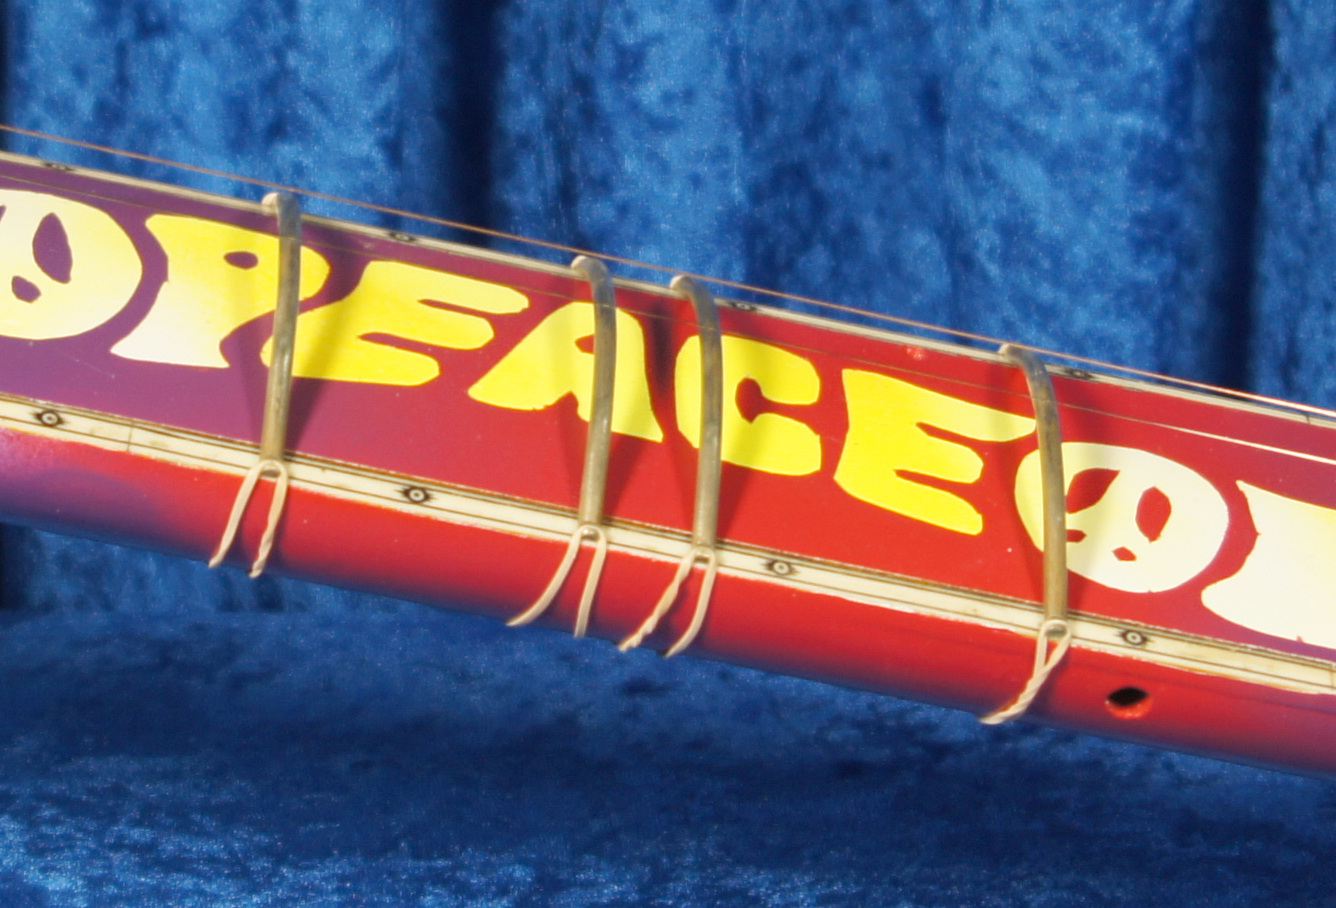
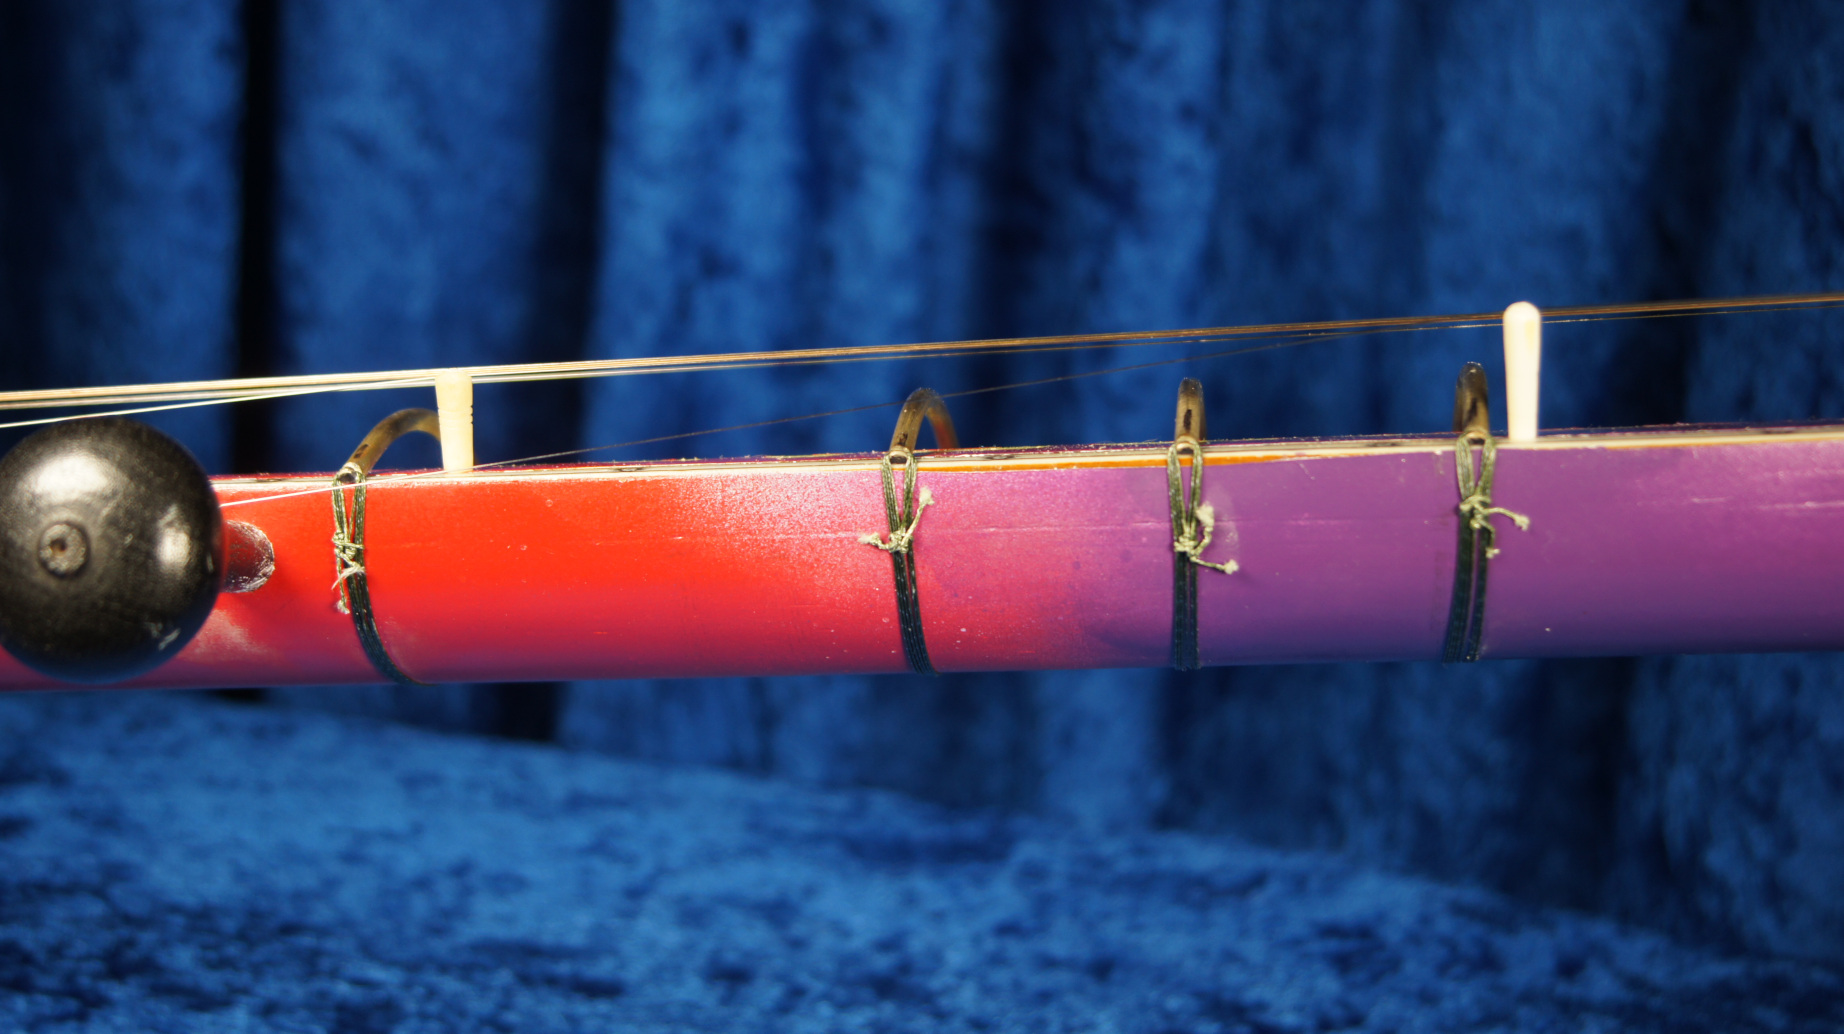
I temporarily affixed the frets that I do have with rubber bands. This allows me to find the proper positions. Later I will tie them in place.
March 28, 2023 – Tied Frets
I tied the six original frets that had previously been held in place by rubber bands.
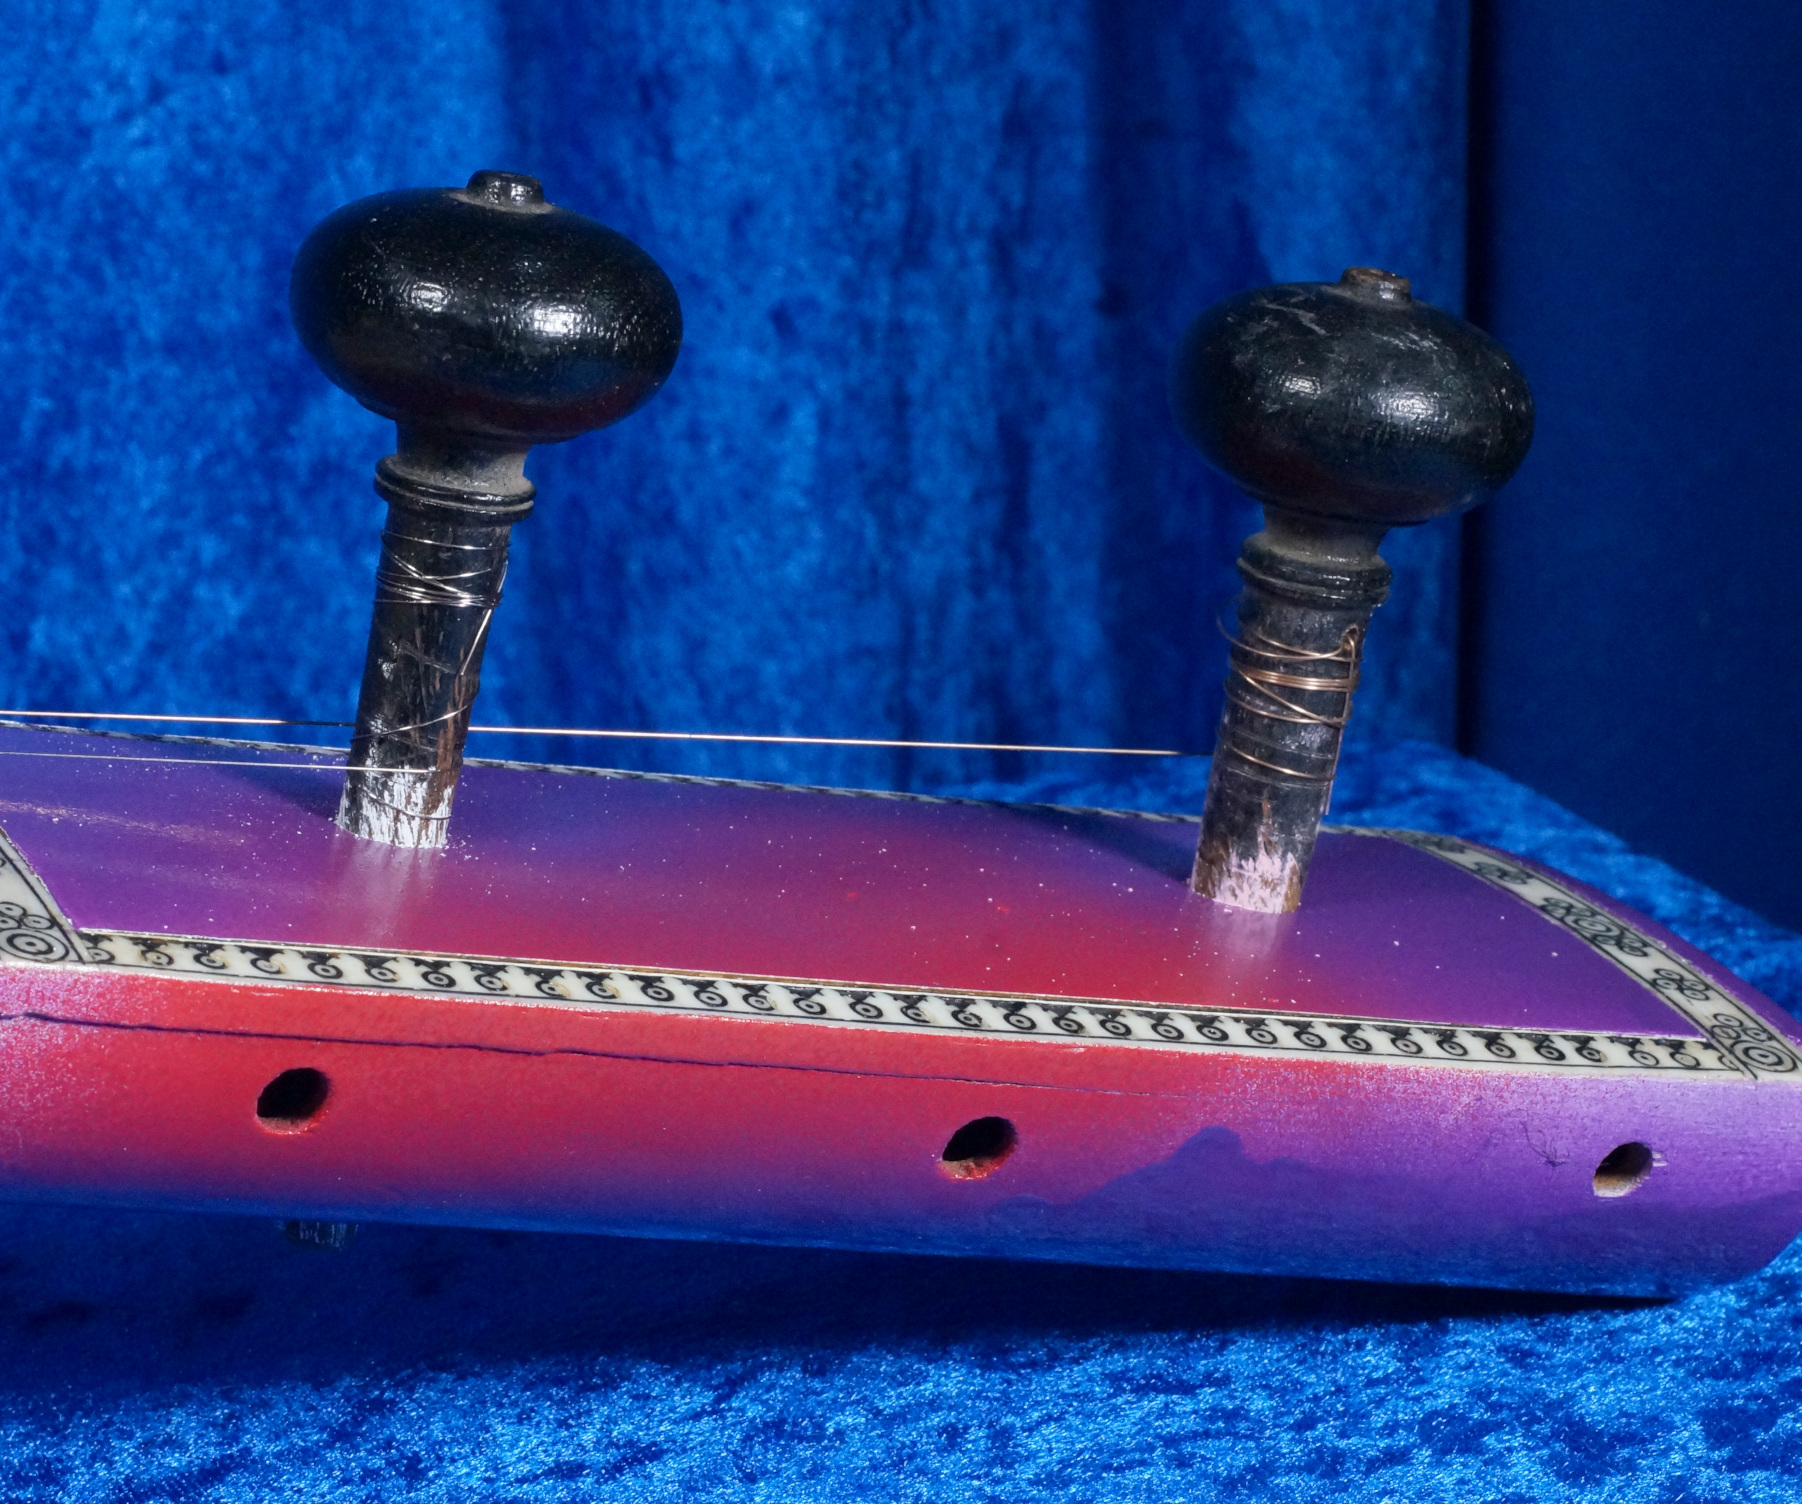
March 29, 2023 – Tuning Knob
I have a few days before the brass rods arrive, therefore I am turning my attention to other things.
One of the kuntis (tuning knob) is missing, so I have to make a new one.
I need a wooden stock to put in my lathe. I started with a wooden finial. A finial is a decorative bob that goes on the top of fence-posts, banisters, or other things. I chose a finial for several reasons. First of all, it was a convenient size. Secondly, it was (presumably) already seasoned and cured, and more importantly it was cheap.
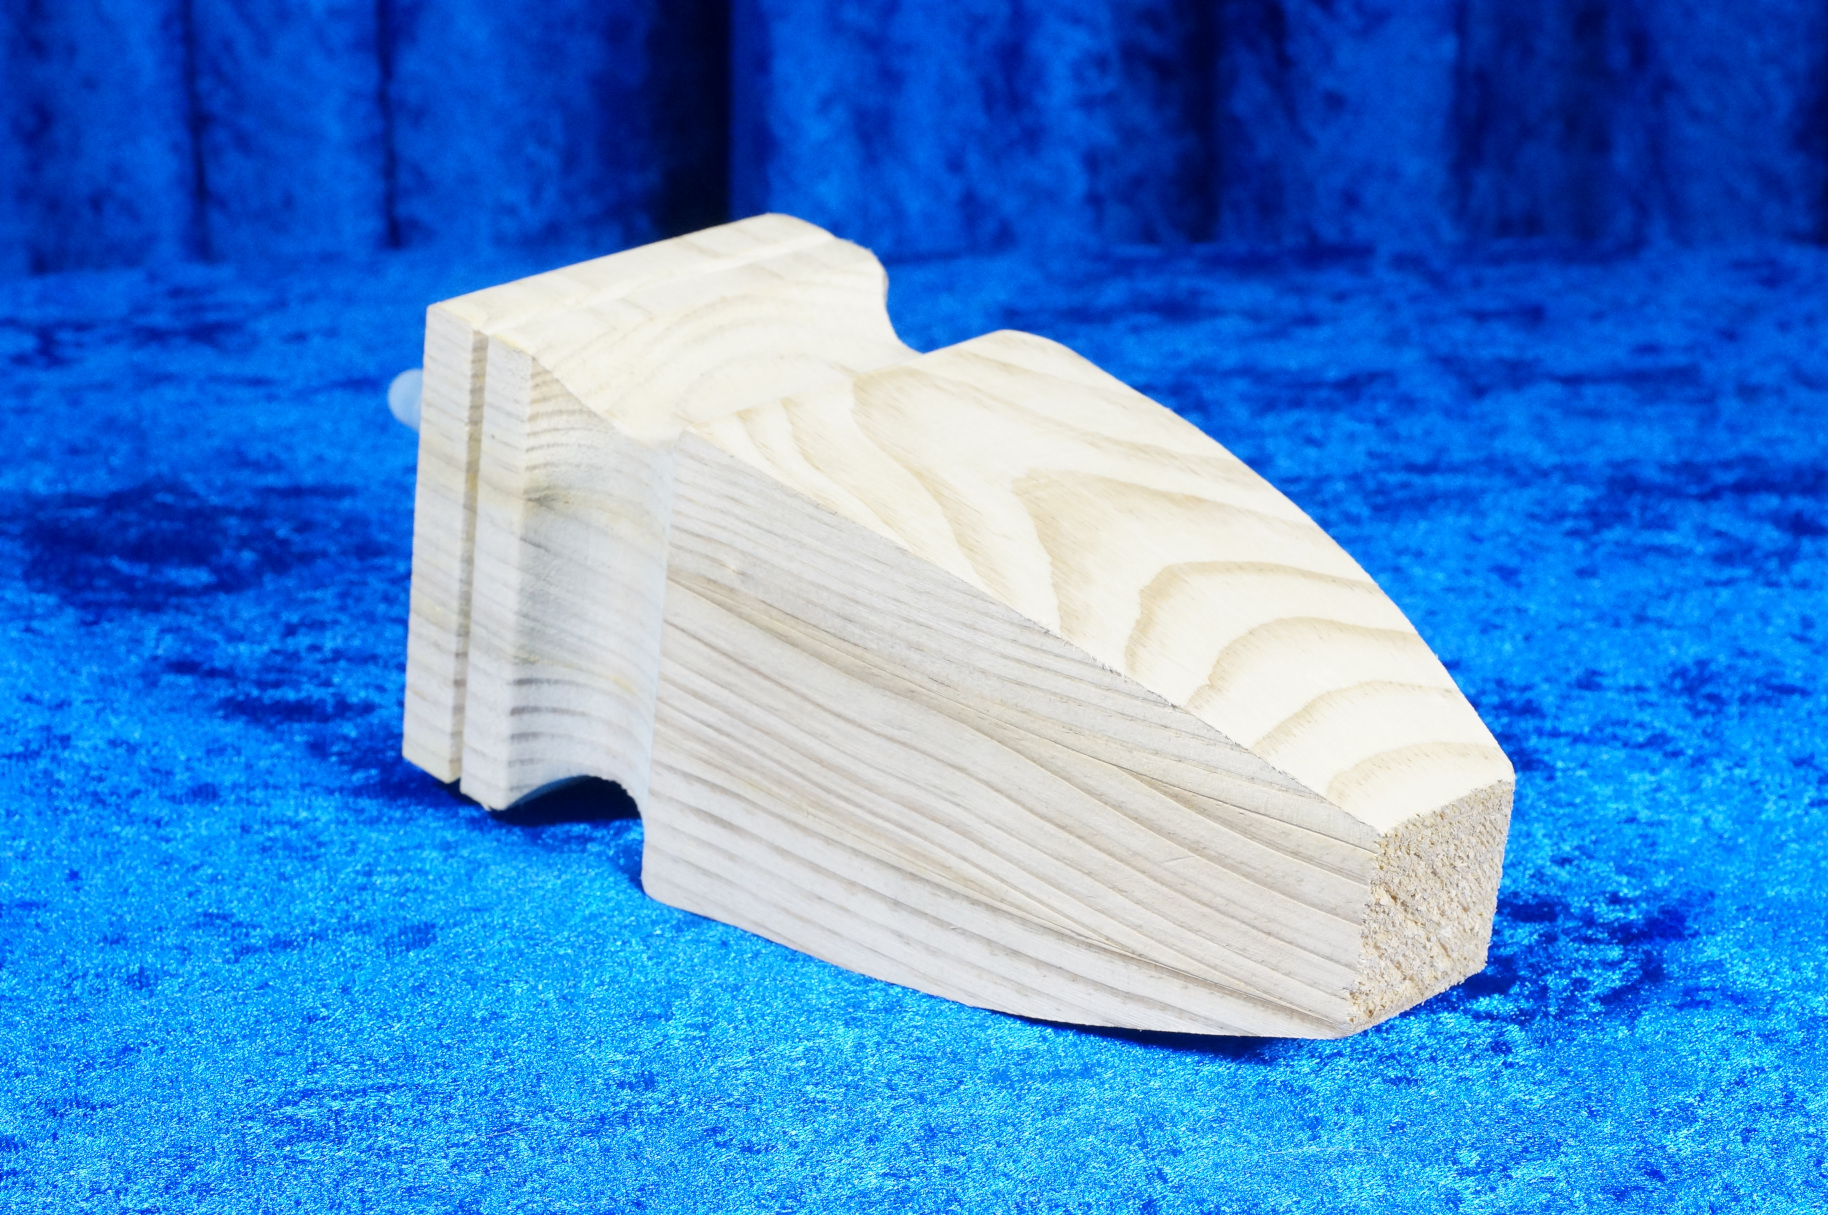
My lathe is very small, so I had to cut it down to make a usable size. For this I first removed the screw that was in the end. Then I rasped it down, and cut off some excess. I then replaced the screw, but cut off the excess.
When it was small enough, I put it in the lathe and started to turn it.
All of these matters took the better part of the afternoon. It took so long because my lathe is really not very good. After working a long time, it still wasn’t finished. I had to get ready for a meeting, so I left it unfinished.
This is as far as I got.
March 30, 2023 – Tuning Knob (#2)
I finished turning the knob. There is still a considerable amount of work required before it is ready to use, but I no longer require the lathe.
March 31, 2023 – Tuning Knob (#3)
I attended to some small finishing touches on the tuning knob. This involved filling the two holes on either end (left from the lathe). I filled them with a mixture of sawdust and wood glue. After drying, I rasped and sanded the knob to make it adhere much more closely to the original knobs. Next, I drilled a hole in the stem to mount the string. Finally, there were several more rounds of sealing, painting, and sanding.
The kunti (tuning knob) is almost finished. The only job left is to fit it to the hole. In this regard, I have intentionally left the stem larger than I want it.
April 1, 2023 – Stringing
Today, I strung the instrument with all of the previously existing tuning knobs. I have not yet used the one chikari kunti (tuning knob) that I have been working on for the last few days, because I have not yet fitted the knob to the hole.
I found that at some point in this sitar’s history, the chikari mogaras got mixed up. The mogara that I found in the tar saptak position (upper octave) actually was supposed to be in the madhya saptak hole.
I also found that the chikari mogara had an insufficient groove in it, so I deepened the slot. This should hold the string better.
I have decided on a tuning that has some of the characteristics of a Vilayat Khan style, but also some of the characteristics of a Ravi Shankar style. I decided on this tuning, partly because of the size of the kaddu, but also the sitar’s intended use on stage.
Below is the tuning. (Sa = C#)
- String 1 – (playing string) Mandra Ma
- String 2 – Mandra Sa
- String 3 – Mandra Sa
- String 4 – Mandra Ga
- String 5 – Mandra Pa
- String 6 – (Chikari) Madhya Sa
- String 7 – (Chikari) Tar Sa
| HAVE YOU THOUGHT ABOUT LEARNING THE TABLA? |
|---|
This is a book/streaming audio set that can get you started. More Info.
|
April 2, 2023 – Misc. Matters
I attended to several different things today.
I fitted the final kunti (tuning knob). This is the one that I have been working on for the last few days. It is a tedious process that involves chalking the stem of the peg, inserting it into the hole, twisting a few times, then removing the peg, and looking for disruptions in the chalk. Wherever there is a disruption in the chalk, that indicates a place where the peg is touching the sides of the hole. I then rasped it down with a wood rasp to make the tuning knob conform to what I want it to be.
There were a few other things that I noticed and attended to.
One thing that came to my attention was in the existing tuning knobs. Sometime in the history of this instrument, two pegs became transposed. In a sitar, all the holes are a little bit different; therefore, two pegs were not really fitting well. I put them back in their intended positions. Now they fit fine.
I also noticed that the existing chikari mogara was still insufficiently grooved. The chikari string kept slipping off. I removed it, deepened the notch, now everything seems fine.
April 3, 2023 – Cremation-Ground
“It smells like a smarshanam!” said Chandra in a somewhat disturbed tone.
She says the same thing every time that I am working with camel bone. When one is working with it, the friction of cutting and turning with a lathe causes the bone to char and emit a strong smell which is reminiscent shmarshan (cremation ground).
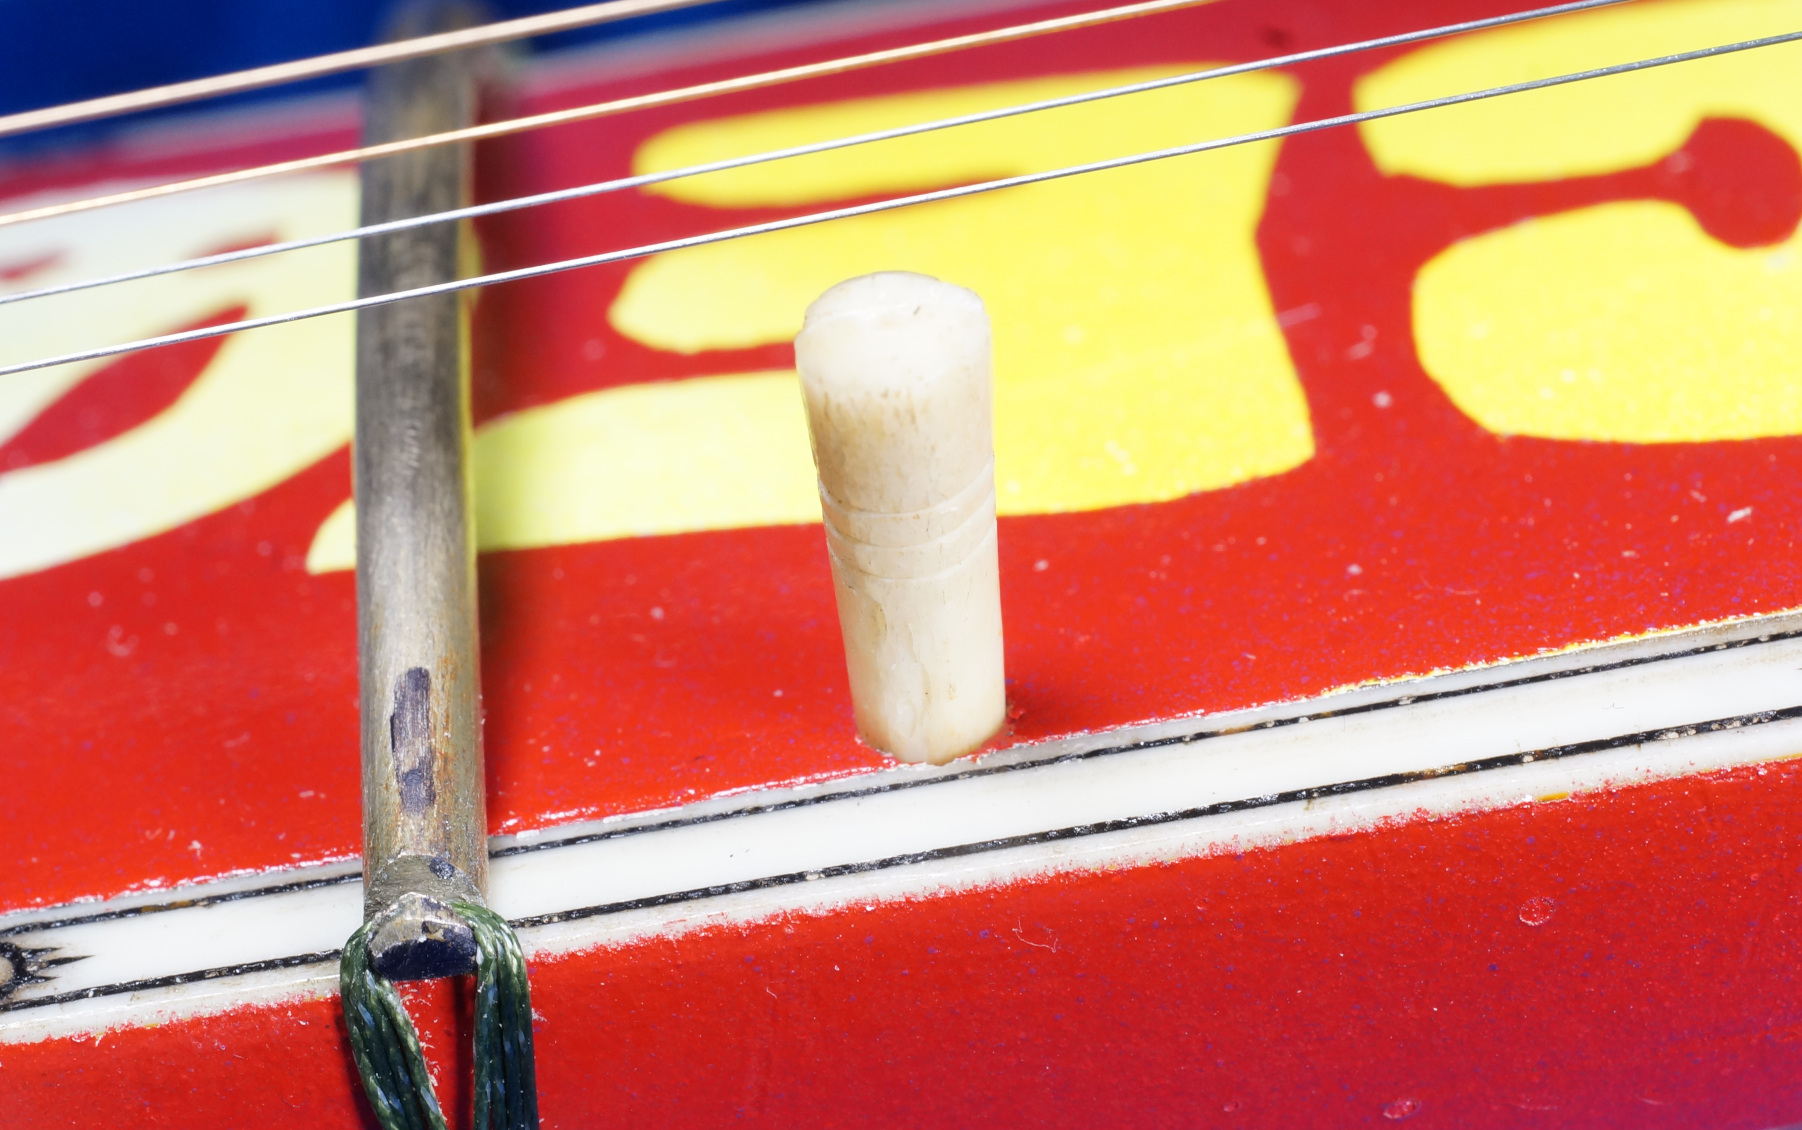
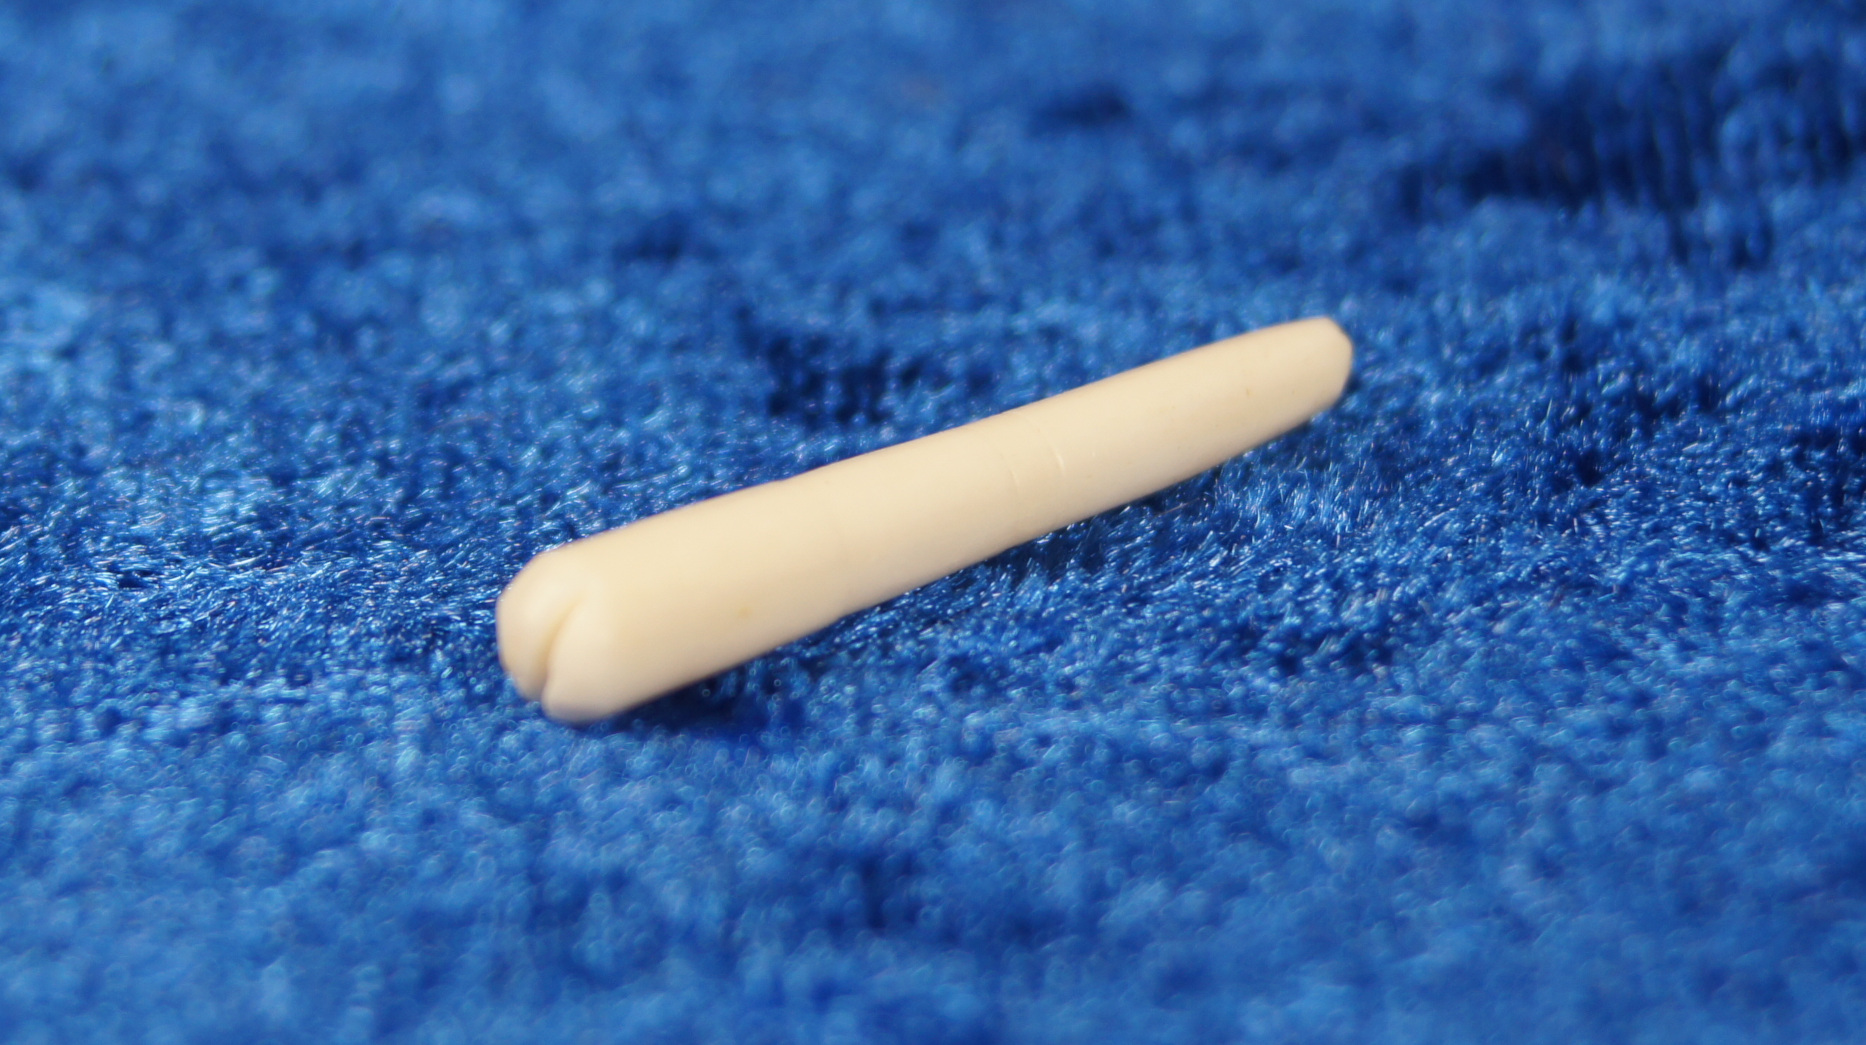
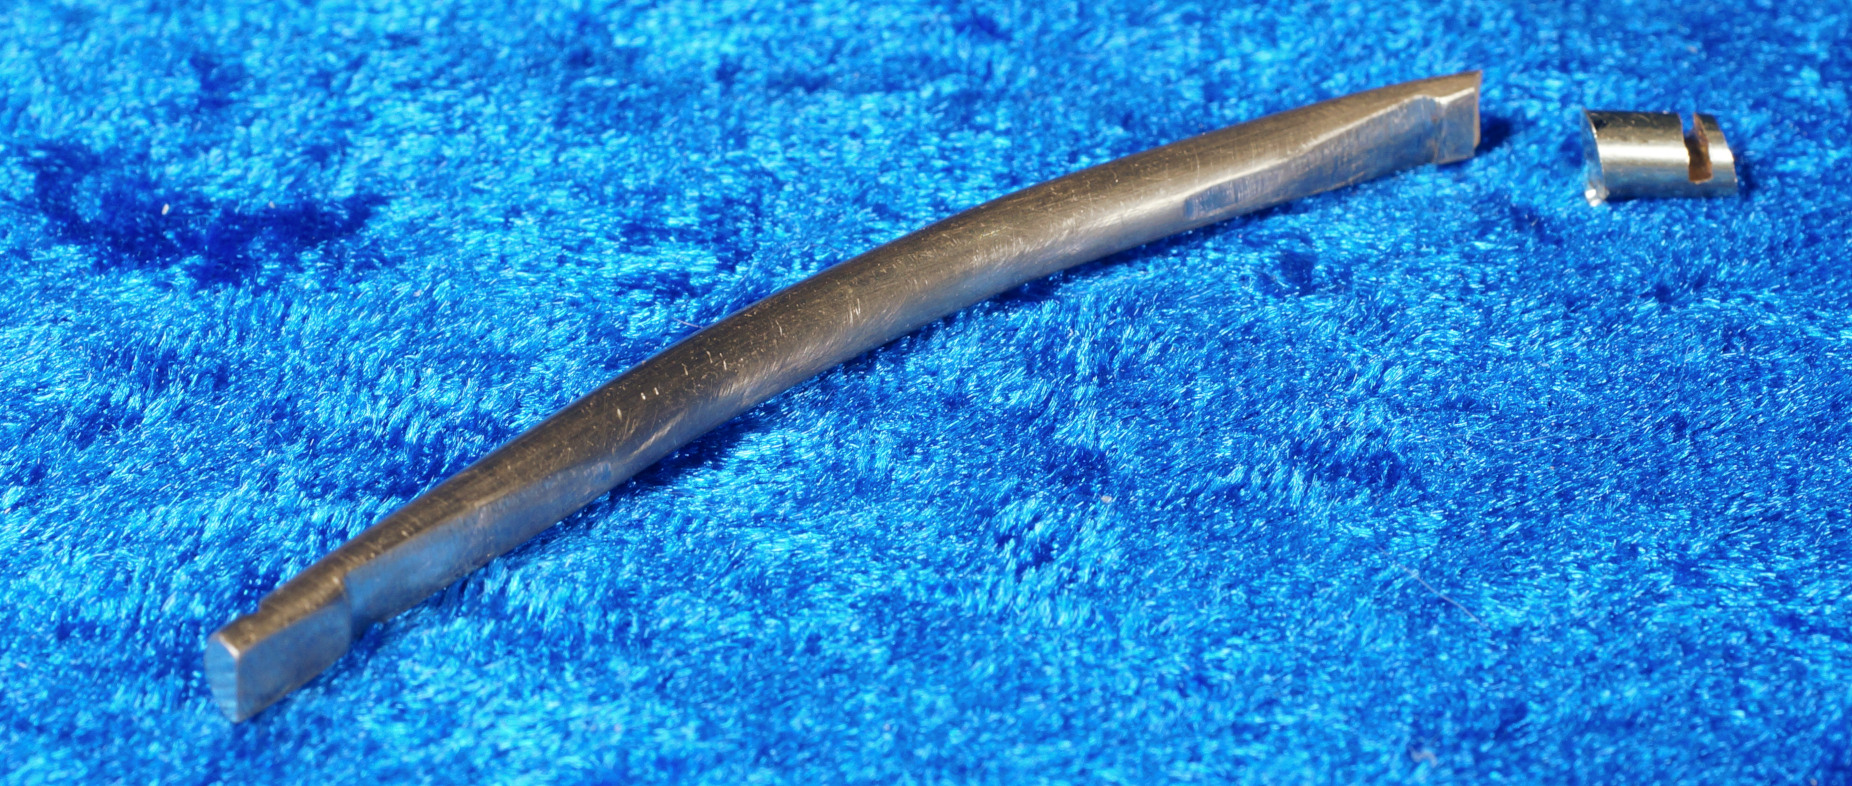
I was busy turning a small piece of camel bone on the lathe to make a new chikari mogara. This is a job which is much more demanding than it would appear. Camel bone is extrodinarilly hard, and therefore difficult to work. Furthermore, the small size of the mogara means that one’s tolerances are measured in millimetres.
The job of fashioning the chikari mogara begins with a small piece of bone. This is placed in the lathe.
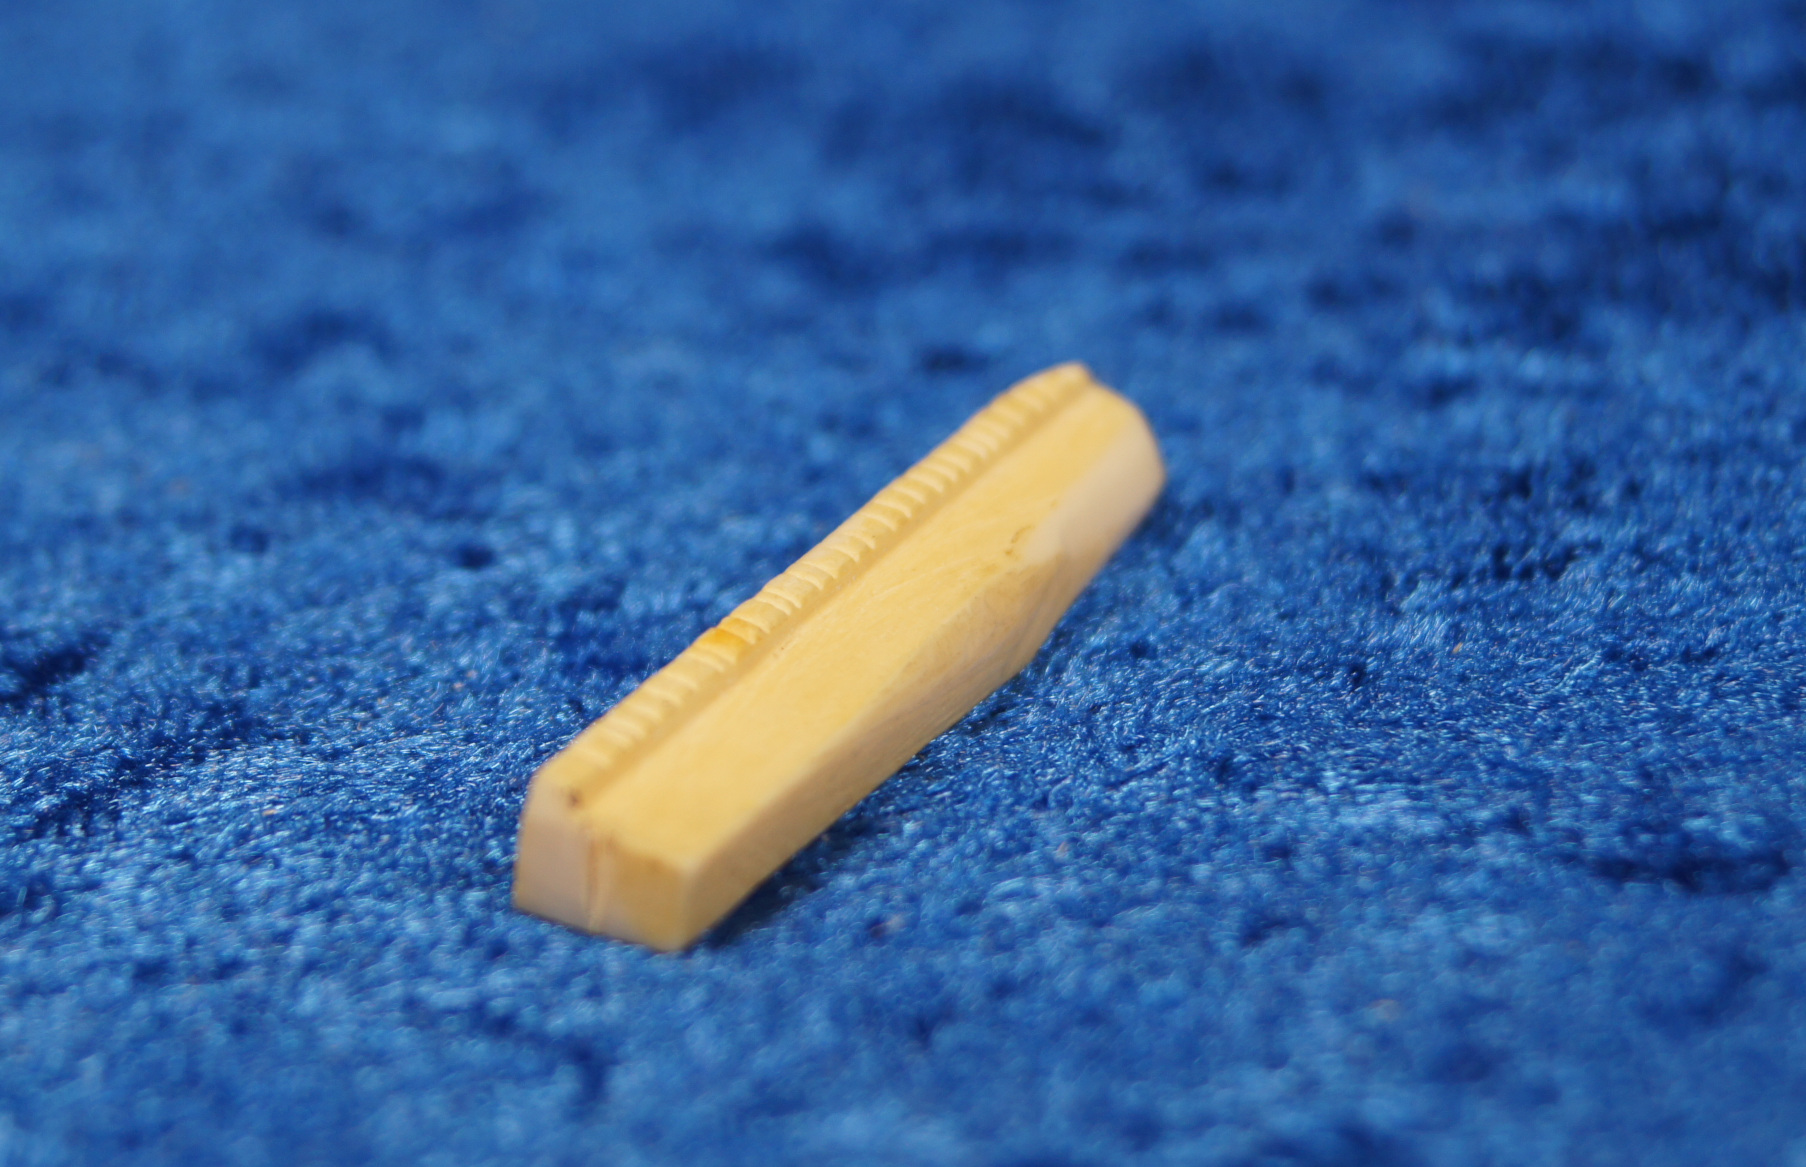
It is turned until it is the approximate size that one wishes. Notice that there is a bob on one end. This is the place where the bone piece was held by the chuck on the lathe.
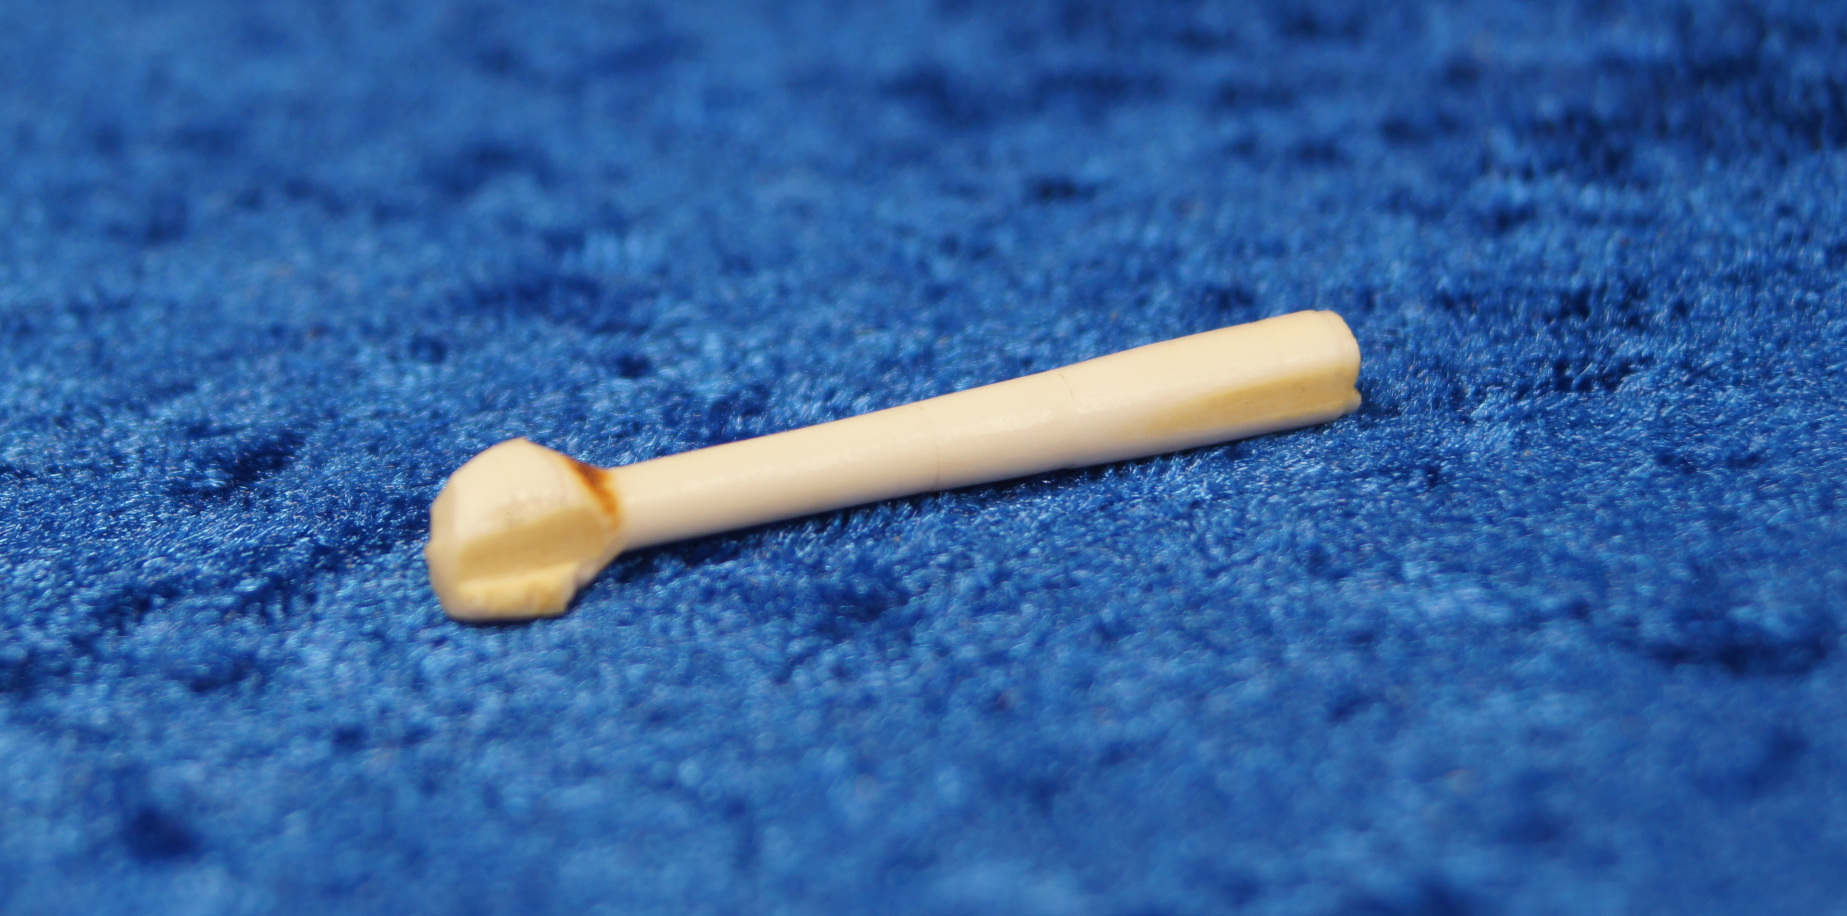
It must undergo a little bit of finishing. This begins by cutting off the bob. One now takes a file and works on the end to make sure that it fits correctly in the hole.
When the mogara is fitted in the hole, one must adjust he height. It is important that the new mogara be considerably taller than one needs. The requirements for it being a correct height are so demanding, that it is almost impossible to figure it out ahead of time. Therefore, you should start with a longer one than you need, then cut it down to the correct size. If you place the mogara in the hole and look from the side of the instrument, it should stand up considerably higher than the level of the strings.
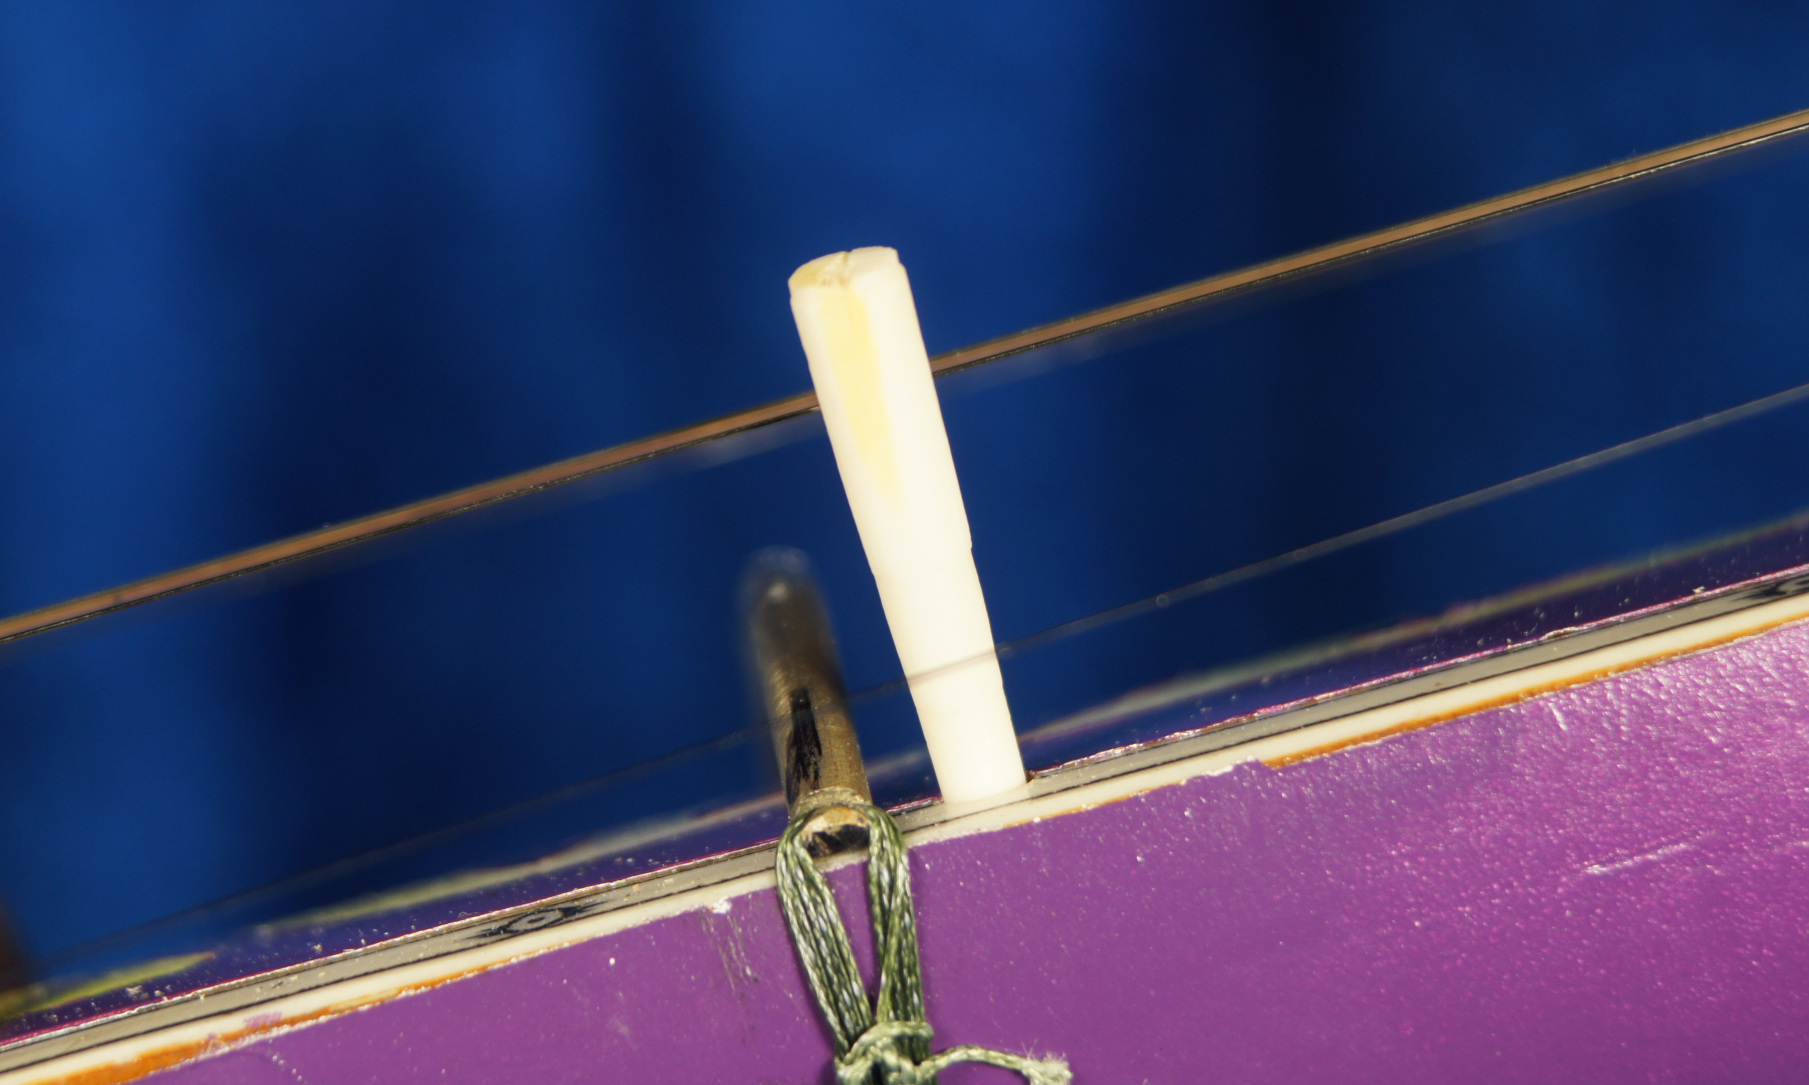
Mark the mogara at a place which is just slightly higher than the string. You will want the finished mogara to raise the chikari string to be level with the other strings; but you will need some room to work, hence the higher position.
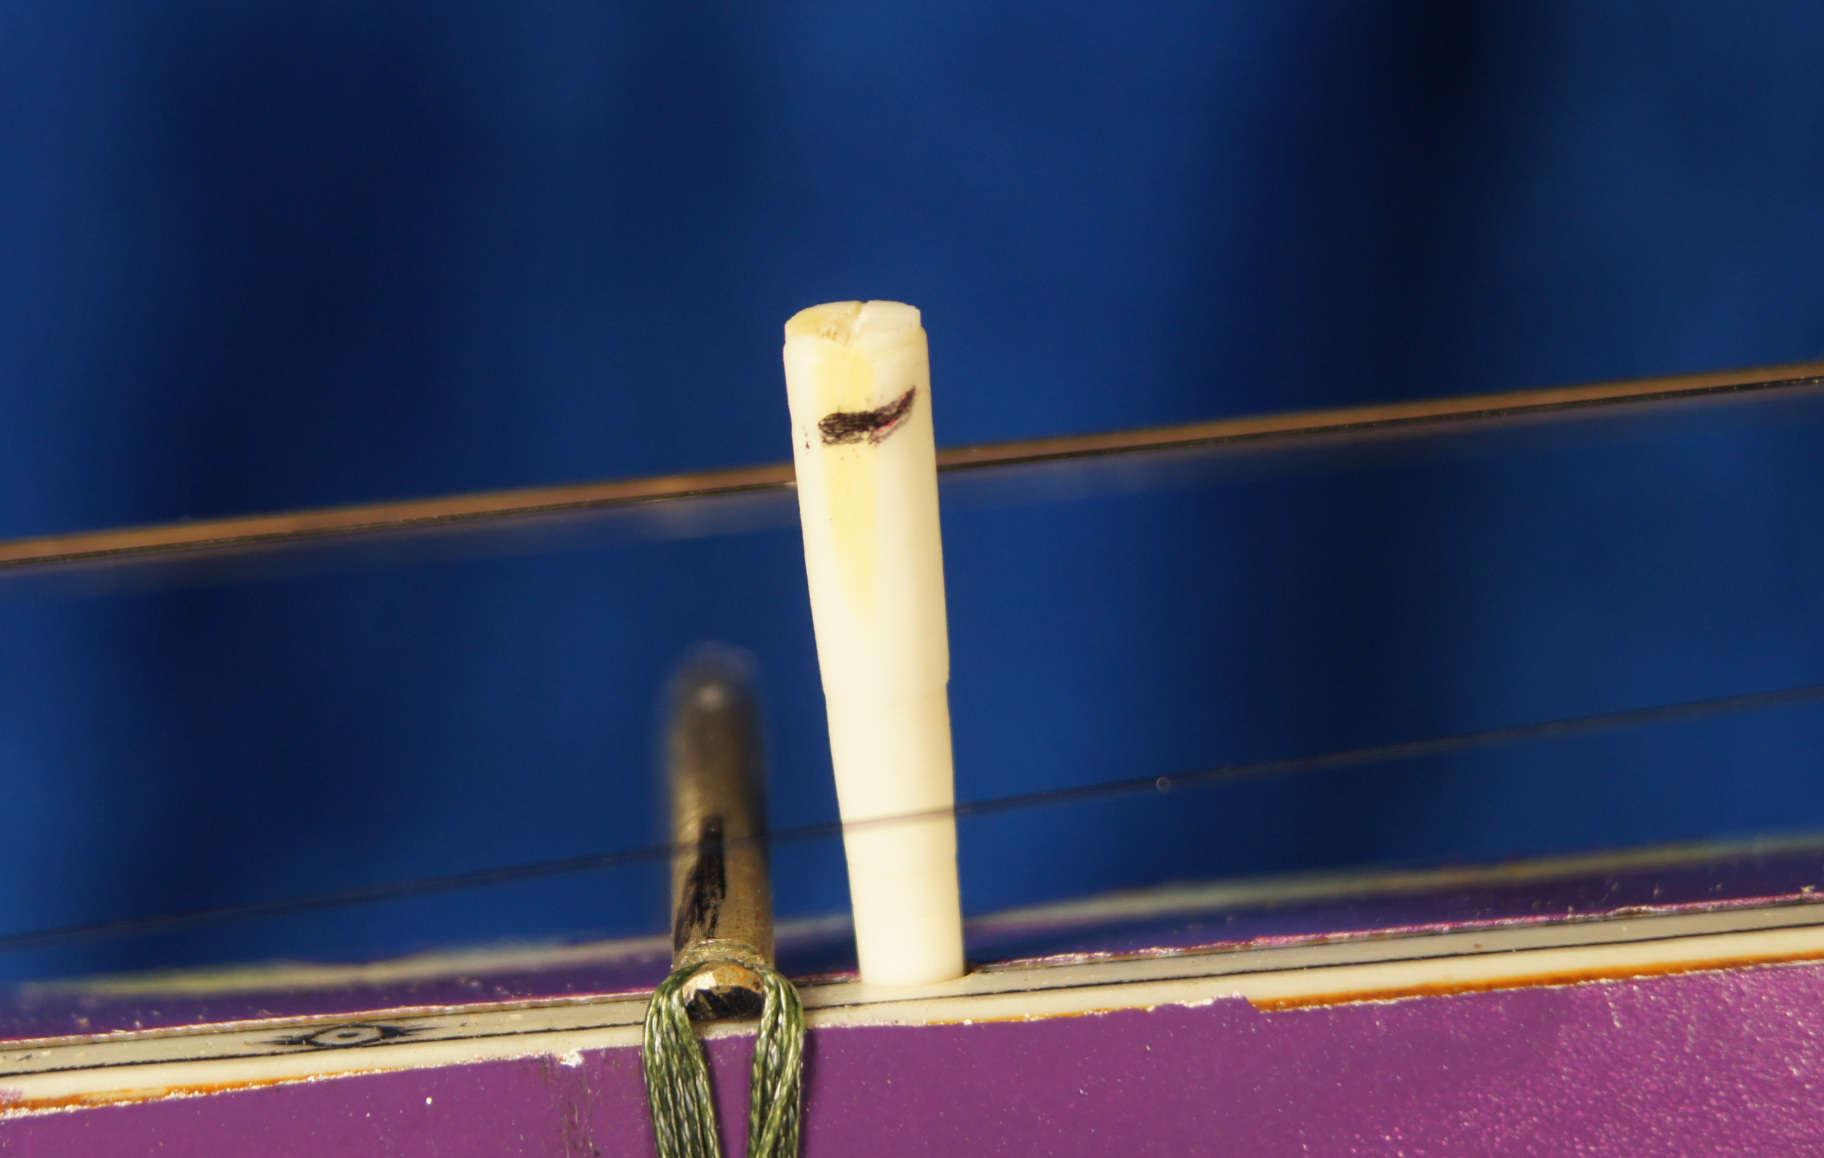
Remove the mogara and cut it at the place where you marked. With a file, round off the edges.
Now cut a groove into the mogara.
Put it back in the hole and gently tap it firmly into place.
If you have done everything correctly, the chikari mogara will raise the string to the level of the other strings.
| LEARNING THE TABLA-1? YOU MAY BE READY FOR LEARNING THE TABLA-2 |
|---|
This is a book/streaming audio set that continues where the first book left off. More Info.
|
April 4, 2023 – “Standard” Tuning (Pt. 1)
“Tum Hindu ya Mussalman?” (Are you Hindu or Muslim?) enquired the miscreant.
My wife and myself were on a motorcycle on a road in an undeveloped area near Chikkadpalli. It was about 1979.
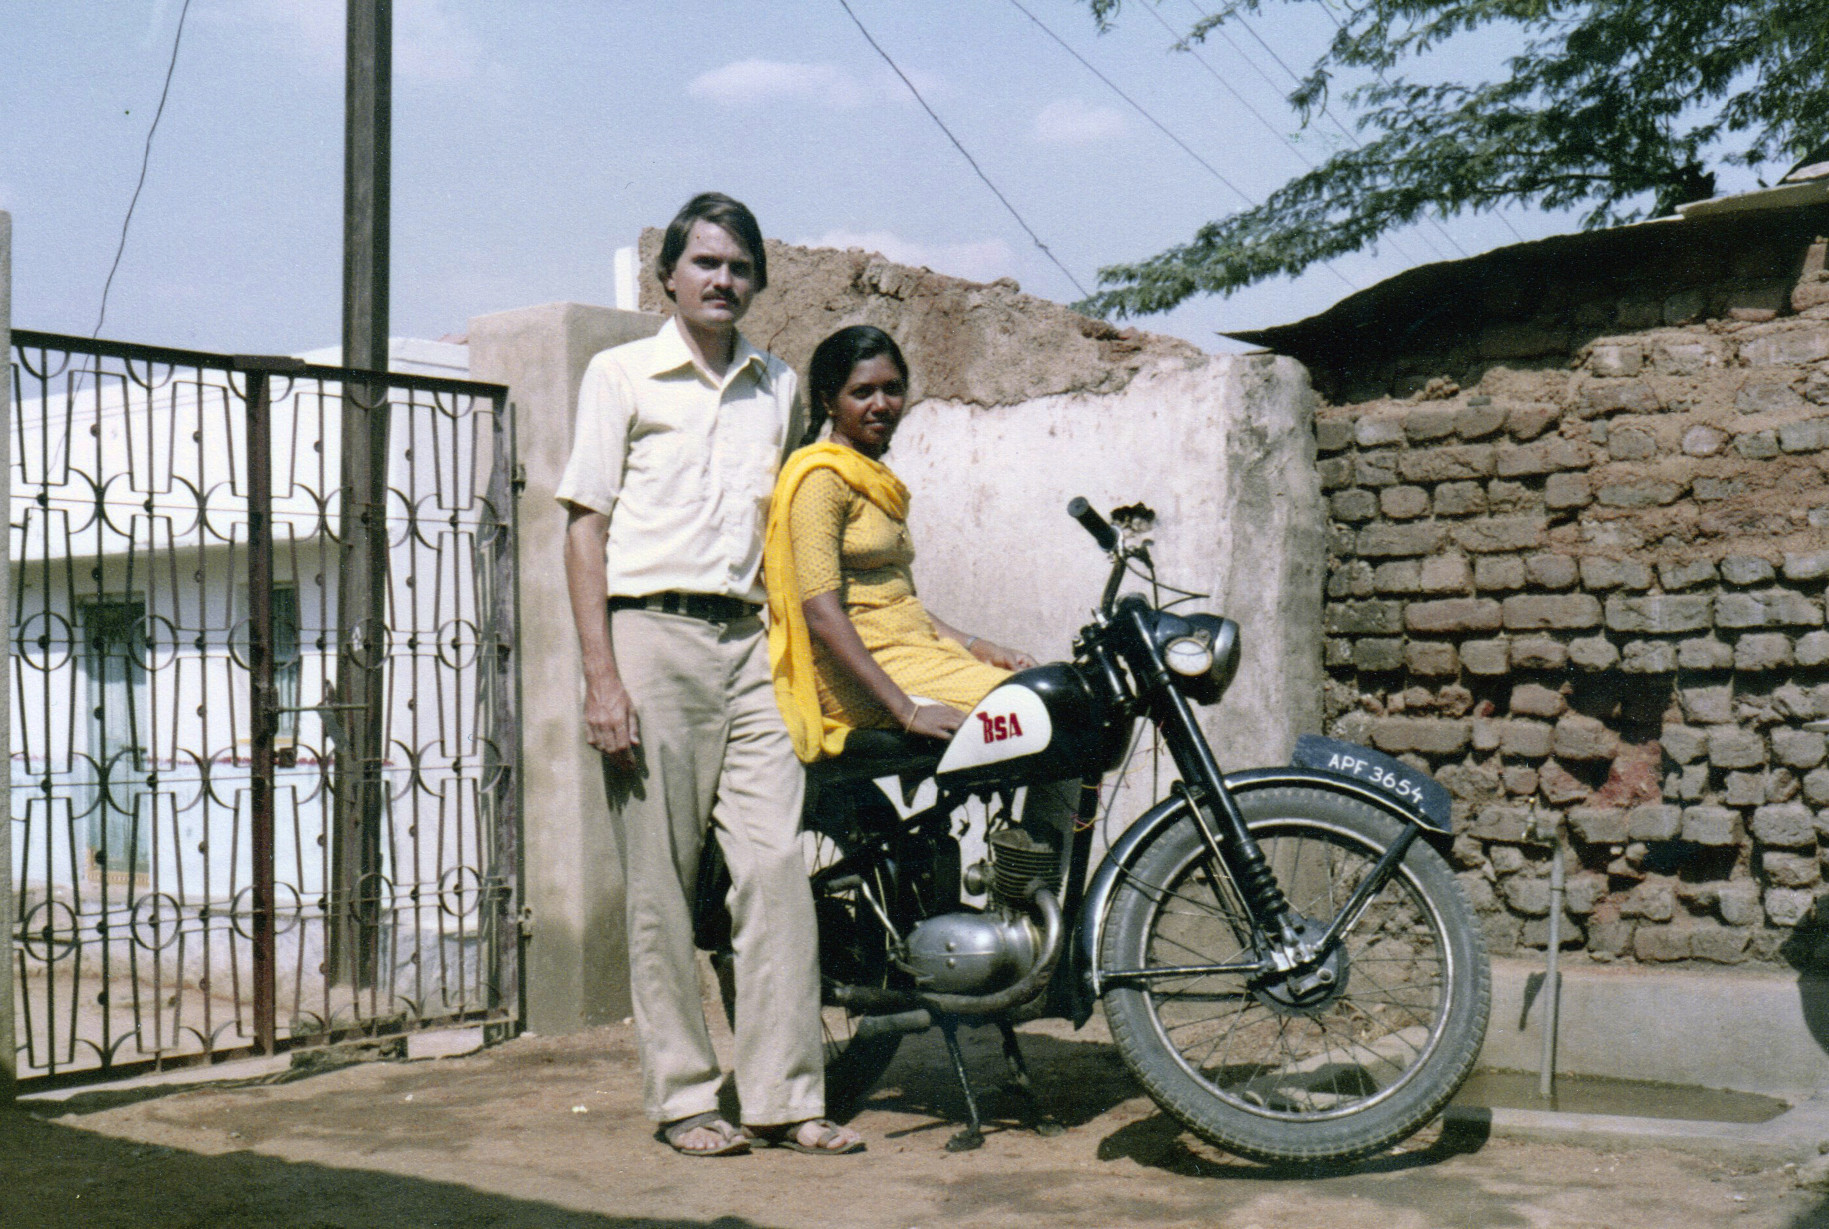
“Hindu ya Mussalman?” repeated the miscreant.
I was not sure what answer the band of miscreants were looking for; but I knew that a wrong answer could conceivably cost me my life.
“Christian,” I replied. I knew that this was a safe answer, and fully believable given the colour of my skin. Whereupon, we were allowed to go.
Never-the-less, this incident convinced Chandra and myself that we should leave Hyderabad as soon as possible. This was only a few months after the infamous “Rameeza Bee” incident, in which the state government was suspended, and the military was called in to restore order. During that time there had been 20 hour a day curfews. We were allowed out on the streets for only four hours a day to find food and water. I was in no mood for a repeat of the situation.
We had a very short time to escape Hyderabad. Chandra and myself quickly made our way to our small flat in Moosarambagh, packed some things, and managed to get to the APSRTC bus depot. We were fortunate enough to get one of the last buses out of the city.
We suffered an uncomfortable night’s journey in antiquated buses. The rickety vehicles appeared to have been held together with baling wire and glue. After what seemed like an eternity, we pulled into Akividu.
Akividu was an extremely small town in 1979. It was just barely larger than a village. It had a few small shops, but a plethora of rice godowns (store houses). The only notable entity was the “Star of Hope” missionary hospital, in which my sadu-bhai (wife’s-sister’s-husband) worked.
There was absolutely nothing to do, so I was bored. But at least there were no curfews, no bands of miscreants roaming the streets, and no riots.
Still I was BORED. I needed something to occupy my time.
I was able to come across an old tribal musician, who was affectionately known as Tata (grandfather). He was a performer as well as a purveyor of a folk instrument that he referred to as kamakshi veena. I spent a considerable amount of time with him documenting every aspect of it that I could. But when it came to the subject of tuning, he looked at me like I was a complete fool. He could not even attempt to answer the question.
This was a problem that I kept coming up against. I would ask musicians how they tuned their instruments, but frequently all that I would get were confused looks.
It was beginning to occur to me that they were not the problem; I was the problem. I was suffering from an extremely Eurocentric approach to the subject. I needed to divest myself of it if I was going to understand Indian music. I was pressing them for a standard tuning, when in reality none existed.
When discussing the subject with more knowledgable classical musicians, the overall principles were conveyed to me. In India, tuning the instrument is part of the creative process. Chandra was studying sitar, so I had material dealing with sitar tunings. Furthermore, I was also getting information on other instruments as well. But trying to pin their tunings down to a standard tuning was analogous to getting hold of a pianist and demanding to know what keys they hit.
April 5, 2023 – “Standard” Tuning (Pt. 2)
There is no such thing as a standard tuning for sitar, but there are common tunings. The Ravi Shankar style and Vilayat Khan style are two common approaches, but nothing which is standard. The simple fact that strings must be retuned every time you switch from one rag to another precludes this.
With this warning, let us return to the tuning that I am using for this sitar. This was described in the April 1st entry.
One can immediately see that I am looking for a very general approach for this instrument. This generalism is the main advantage of not having sympathetic strings. The specificity of instruments with sympathetic strings is probably an important reason why such instruments were largely abandoned in European music. Today, instruments such as the viola d’amour are almost never to be found in Western performances.
A certain degree of generalism is present in my tuning. With the exception of the main playing string (string #1), almost all the other strings are tuned to either Sa (tonic) or Pa (natural 5th).
But string #4 stands out. It is tuned to Ga (natural 3rd). This means that when performing, the entire sitar will be droning a C# major chord. Obviously there are not too many Western musical situations where this will be acceptable. One could either drop the string down to Sa or raise it to Pa to make the instrument more general; but that would further compromise the character of the sitar.
Generalism is NOT a character of the sitar. Its tuning must be modified according the specifics of each piece. Even without the sympathetic strings, the tuning shown April 1st, would probably be used less the 50% of the time.
So let us discuss more situations and tunings.
String #4 can simply move between the natural 3rd (shuddha Ga) and the minor third (komal Ga) according to the scale. This doesn’t require any complex understanding of the music, and is easy to affect.
However, string #5 introduces some twists. If the natural 5th (Pa) is not present, then we will usually wish to go for the natural 4th (shuddha Ma). There are however complexities involved when there is no Pa, but only an augmented 4th (tivra Ma). In such situations, we probably would not wish to tune to tivra Ma, but instead would probably wish to tune to whatever Ga (3rd) or Dha (6th) is used.
We have discussed some options as far as the modality of the instrument, but what about the key. One will frequently be called upon to play the sitar in a variety of keys. Changing the key between C, C#, or D is no problem. One simply increases or decreases the tension of all the strings. One may even drop it to B or lower, but the quality of the sound suffers tremendously.
But what do you do if you are called upon to play in F, F#, G, or something similar? You can always give some excuses as to why it cannot be done. But the only thing that will happen is that the person contacting you will go away and approach someone who says they can do it. You will have lost the gig and gained nothing.
So by what magic is that other person doing it? We will see tomorrow.
April 6, 2023 – “Standard” Tuning (Pt. 3)
Playing a sitar in a key anywhere near F# has its challenges. Tuning down from a C# is out of the question; the strings will be too loose. Tuning up is also out of the question; this will certainly break the strings.
There is good news and bad news concerning the way that we accomplish this. The good news is that it can be done without any compromise in the quality of the sound. The bad new is that it requires a considerable amount of flexibility and skill; because the position of the notes on the frets will change.
The key to playing in F# or anywhere near that, is to be found in the first and second strings. In normal situations, these are tuned to Ma and Sa respectively. What we have to do is invert the tuning.
Inversion is a musical process whereby a chord changes its definition due to a change in its root.
(Dazed and confused looks go here.)
Don’t worry, it isn’t really complicated.
Let us go back and look at the tuning that we proposed April 1st. If we look at the pitches indicated we get:
| String #1 | F# | Mandra Ma |
| String #2 | C# | Mandra Sa |
| String #3 | C# | Mandra Sa |
| String #4 | F | Mandra Ga |
| String #5 | G# | Mandra Pa |
| String #6 | C# | Madhya Sa |
| String #7 | C# | Tar Sa |
Now, let is keep the same tuning of the strings, but simply declare that string #1 is Sa, and not Ma. Even though we have not altered any of the tension of the strings, the new values are:
| String #1 | F# | Madhya Sa |
| String #2 | C# | Mandra Pa |
| String #3 | C# | Mandra Pa |
| String #4 | F | Mandra Ni |
| String #5 | G# | Madhya Re |
| String #6 | C# | Madhya Pa |
| String #7 | C# | Tar Pa |
Remember these new values are from the key of F#, yet they did not require any significant retuning of the instrument. (You may need to slightly tweak the fret positions and tuning due to the fact that the sitar is in a just intonation and not tempered. If this is hard to understand, don’t worry about. Just tweak it until it sounds right.)
From the previous chart we see that all of the strings are a reasonable pitch except strings #4 and #5. We would probably like to bring string #5 down to the Sa position; to do otherwise would make the tonic absent in the playing of jhalla. But string #4 is open to one’s artistic vision. If one simply wishes to “play it safe”, then one can raise the pitch of string #4 to Sa.
The sitar is now tuned to F#, but the frets are all in different positions. Sa now is at the open first string, instead of the 7th fret. Therefore, you have to be flexible and skilled so that you do not get confused.
And that is all there is to it.
| IF YOU ARE INTERESTED IN TABLA, THIS BOOK IS FOR YOU |
|---|
| This is the first volume of the most complete series on the tabla. Fundamentals of Tabla It is available around the world. Check your local Amazon for pricing. |
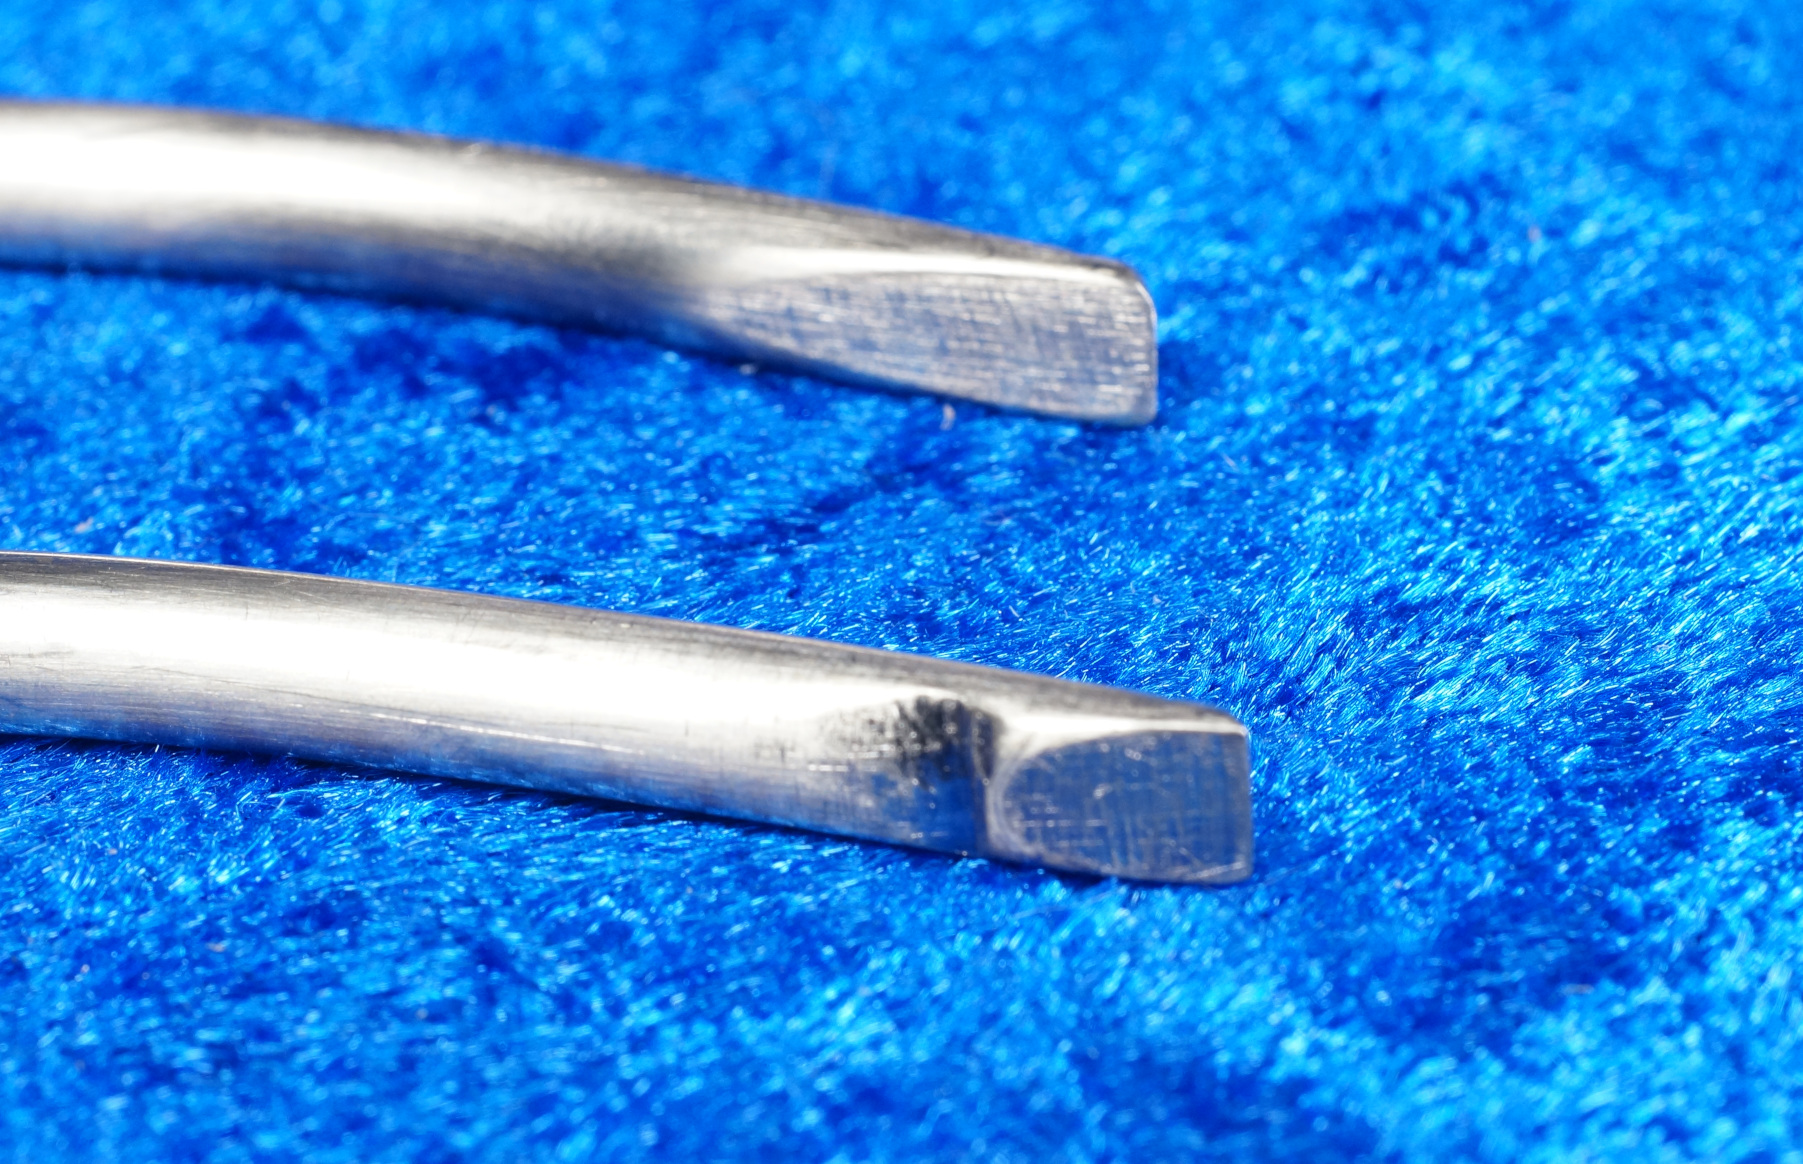
April 7, 2023 – Frets
It has rained all day today. The daytime high did not go above 60F (16C) today. This is unthinkably cold in Houston for this time of year. Chandra is happily ensconced in her chair in the living room watching an endless stream of Korean and Chinese dramas.
It is a perfect day to sit in my studio and make frets.
The work is slow. The work is tedious. But I have music playing, and it is a very relaxing way to spend the day.
I wasted a lot of time just gathering the tools and developing a workflow. Therefore, I only got four frets made. I had actually made a fifth one, but I accidentally spoiled it while I was setting the action.
April 8, 2023 – More Frets, but a Problem
Very slow progress today.
I only got three frets made. I found that some of the frets would damage the paint when they were adjusted. Unlike a normal sitar whose front of the neck is concave, this style of sitar has one that is convex. Therefore a larger portion of the neck comes in contact with the two legs of the frets. I will make slight changes in the subsequent frets in order to accommodate this.
I had to touch up the places where the paint was damaged. Tomorrow after the paint has dried, I will continue work.
April 9, 2023 – More Frets
Very slow progress, but progress non-the-less.
I spent the entire afternoon, tying frets, removing them, reworking them, retying them, only to repeat the process an indefinite number of times
The net progress in all of this was only two frets added.
I did work out a way to deal with the convex face of the neck without scratching the paint. If I reduce the footprint of the fret to just cover the bakelite trim, then this seems to work nicely. However, it does increase the amount of work I have to do for each fret.
| IF YOU ARE INTERESTED IN TABLA, THIS BOOK IS FOR YOU |
|---|
This is the second volume of the most complete series on the tabla. Advanced Theory of Tabla It is available around the world. Check your local Amazon for pricing. |
April 10, 2023 – Two More Frets
Yep, that’s it.
April 11, 2023 – Eighteen Down – Two to Go
I completed two frets today, for a total of 18 completed. I just have two more to do.
April 12, 2023 – One More to Go
I was very busy with other things, so I only had a couple of hours to work. Therefore I only got one fret done.
Tomorrow, Inshallah I will be finished.
April 13, 2023 – An Uneasy Finish
I am reminded of that saying, “The best laid plans of mice and men often go awry.”
But, Mousie, thou art no thy lane
Robert Burns 1759-1796
In proving foresight may be vain:
The best laid schemes o’ mice an’ men
Gang aft agley,
An’ lea’e us nought but grief an’ pain
For promis’d joy.
I thought that I would have a very easy time today. After all, I only had one fret to do. Sadly, this was not to be the case.
I spent about an hour-and-a-half making a fret. Unfortunately, in the very last step of fitting it, I broke it.
It was now time to move on to “Plan B”, I started work on another one. Sadly, very early on, I broke this one as well.
Oh well – “Plan C” was a no-brainer. I would just make another one; but there was a problem. I had no more brass rods upon which to work. I had some on-order, but a quick referral to the internet showed that it was not expected to come until Monday. This was only Friday.
I was tired and frustrated, and decided to take a break and go for a bicycle ride. During the ride, it occurred to me that I should do something. It is an undertaking that since the dawn of mankind, people have used to clear the mind, and impart a power of insight worthy of a deity.
I am of course referring to tacos and beer.
After partaking of the “Food of the Gods”, the answer to my problem was clear. I would go back to my personal storage of frets, grab one of the larger ones, cut it down to size, and fashion a fret from it. Therefore, I would not have to wait until Monday to finish the sitar.
I did, and this last fret almost finished the instrument; but not quite.
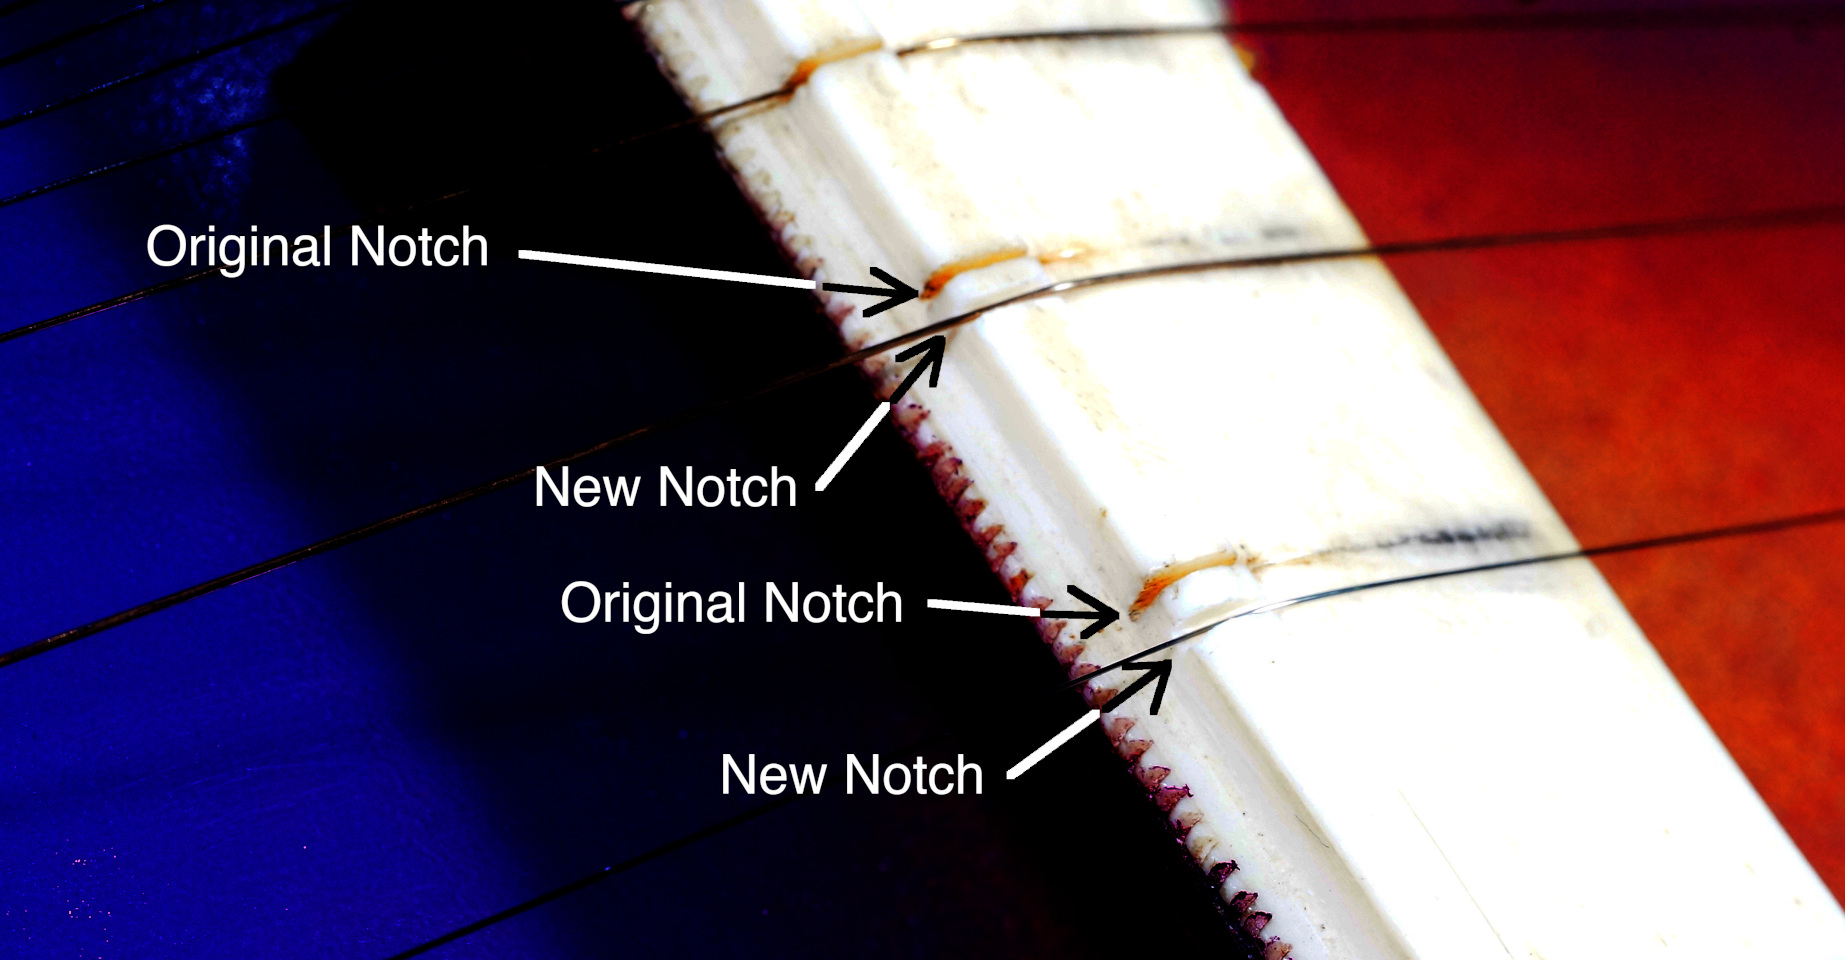
I had to deal with the worn bridge. The proper course of action would be a complete jawari work. But I was tired; I have been working on this for six weeks. Therefore, I took a shortcut. I put two new notches on the bridge, a mere 3 mm from the existing ones. This moved the strings out of their excessively worn grooves, and into a fresh area of the bridge. (I think that every sitarist is familiar with this trick.) It may not have been an elegant way to deal with the problem; but it worked like a charm. The sound is now bright and open.
I made one last round of checking the tuning pegs to see that their action was good. Whenever I felt something wasn’t quite right, a little attention with the wood rasp fixed it.
That is it. The Psychedelic Electric Sitar is finished.
(p.s. The brass rods came in the mail after the sitar was finished.)
| ARE YOU INTERESTED IN HOW THE TABLA IS MADE? |
|---|
This is the third volume of the most complete series on the tabla. Manufacture and Repair of Tabla |